

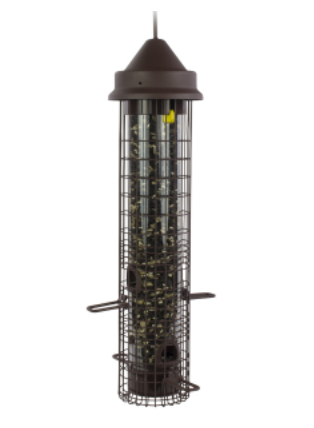
External viewfinders compared: TTArtisan vs Lichifit
External optional viewfinders compared. From the exquisite TTArtisan finder to the inexpensive version from Lichifit. Both have their place.
You get what you pay for with tiny Lichifit external viewfinders
When it comes to the tiny Lichifit external optical viewfinders, you definitely get what you pay for.
For the cost of a couple of fancy coffees from your favourite barista, you can have the tiny, all-plastic optical viewfinder on your favourite digicam setup.
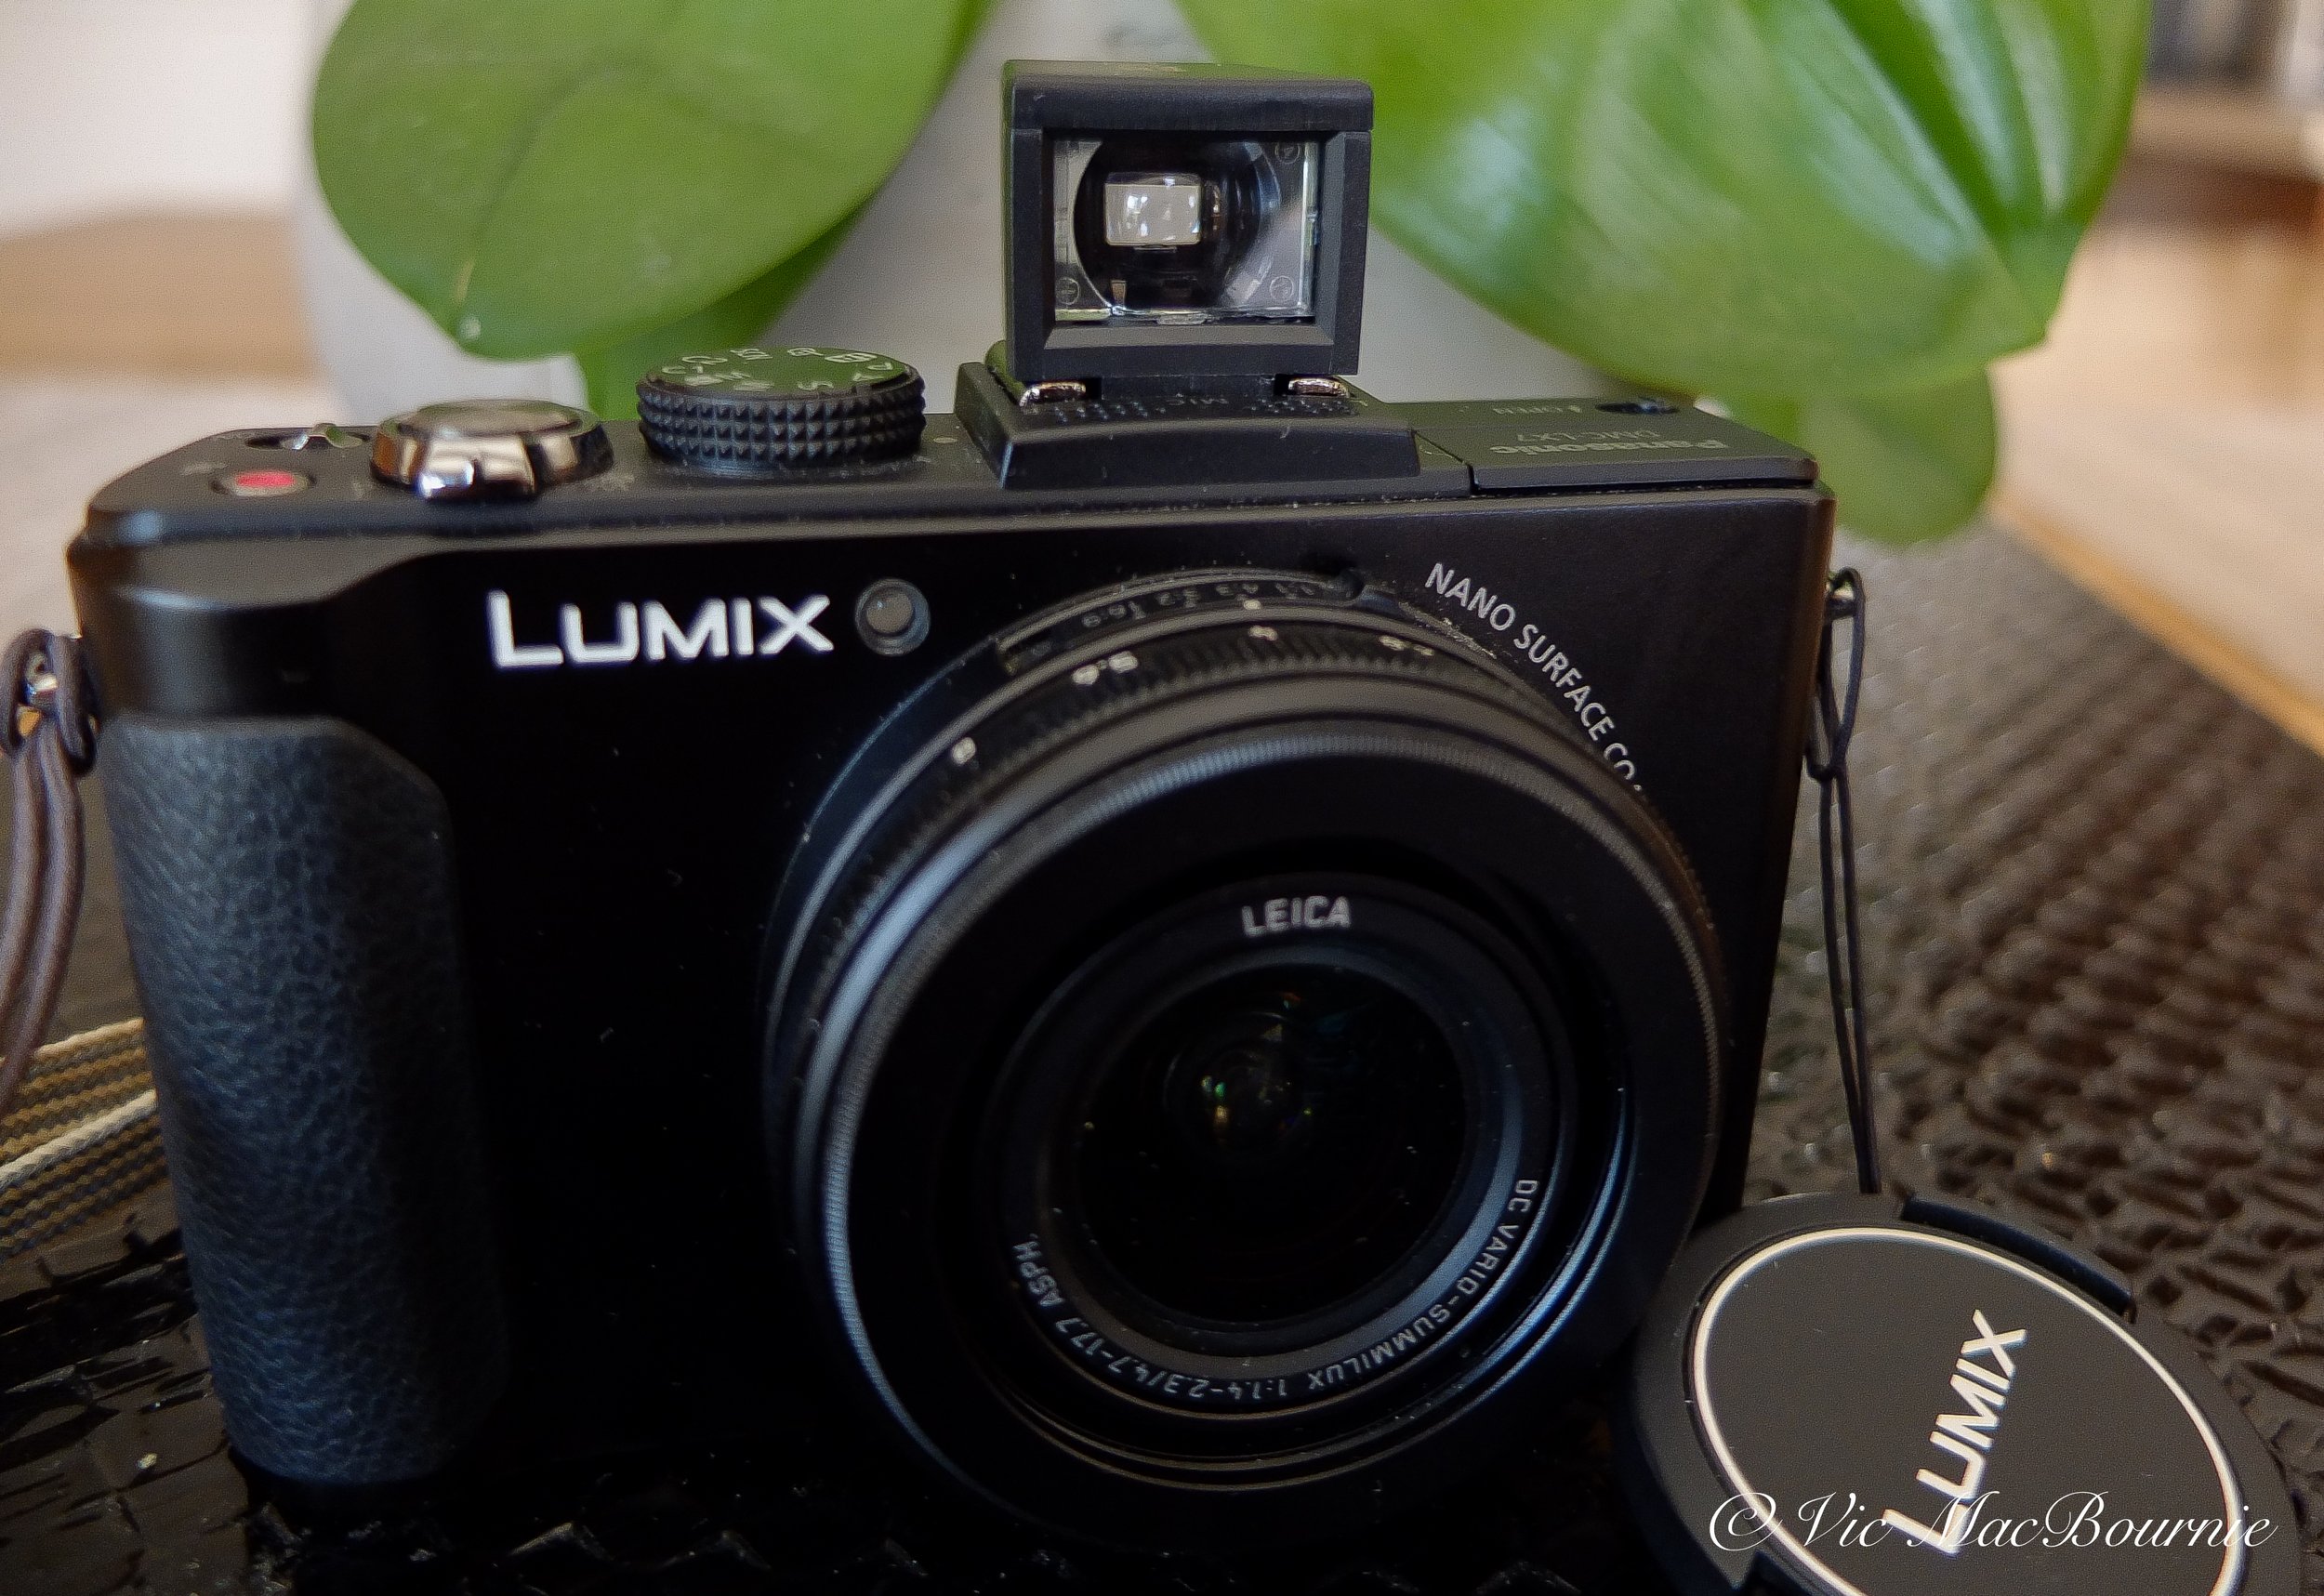
The tiny Lichifit external optical viewfinder looks at home on the compact Lumix LX7.
Some photographers will definitely prefer to save their money to buy the fancy coffees rather than fork out the money for this viewfinder, but there will be plenty of photographers who are satisfied with this inexpensive accessory that fits into the hotshoe of their favourite camera.
Judging from the number of street photographers using these inexpensive finders on YouTube, the viewfinders’ quality levels are not a limiting factor to their usage.
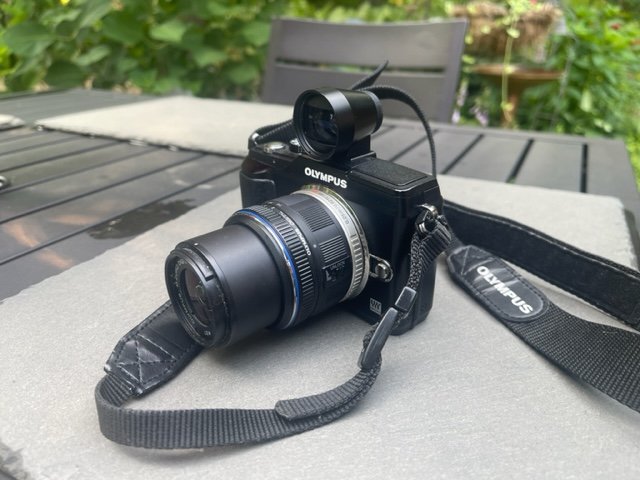
The Olympus Pen E-PL2 with the TT Artisan viewfinder.
For more on using external viewfinders, check out my post on the Olympus PEN series of cameras. Go to the Olympus camera website for more information.
Their popularity may be the result of street photographers not needing the highest resolution in a viewfinder. Let’s face it, many of the images they create are shot from the hip and are not even seen until the photographers review their images at the end of the day.
It’s all about speed and getting the shot rather than taking the time to examine the details in the image.
These viewfinders are perfect, stealth accessories that work well if you are just grabbing a shot and need a quick framing of the scene.
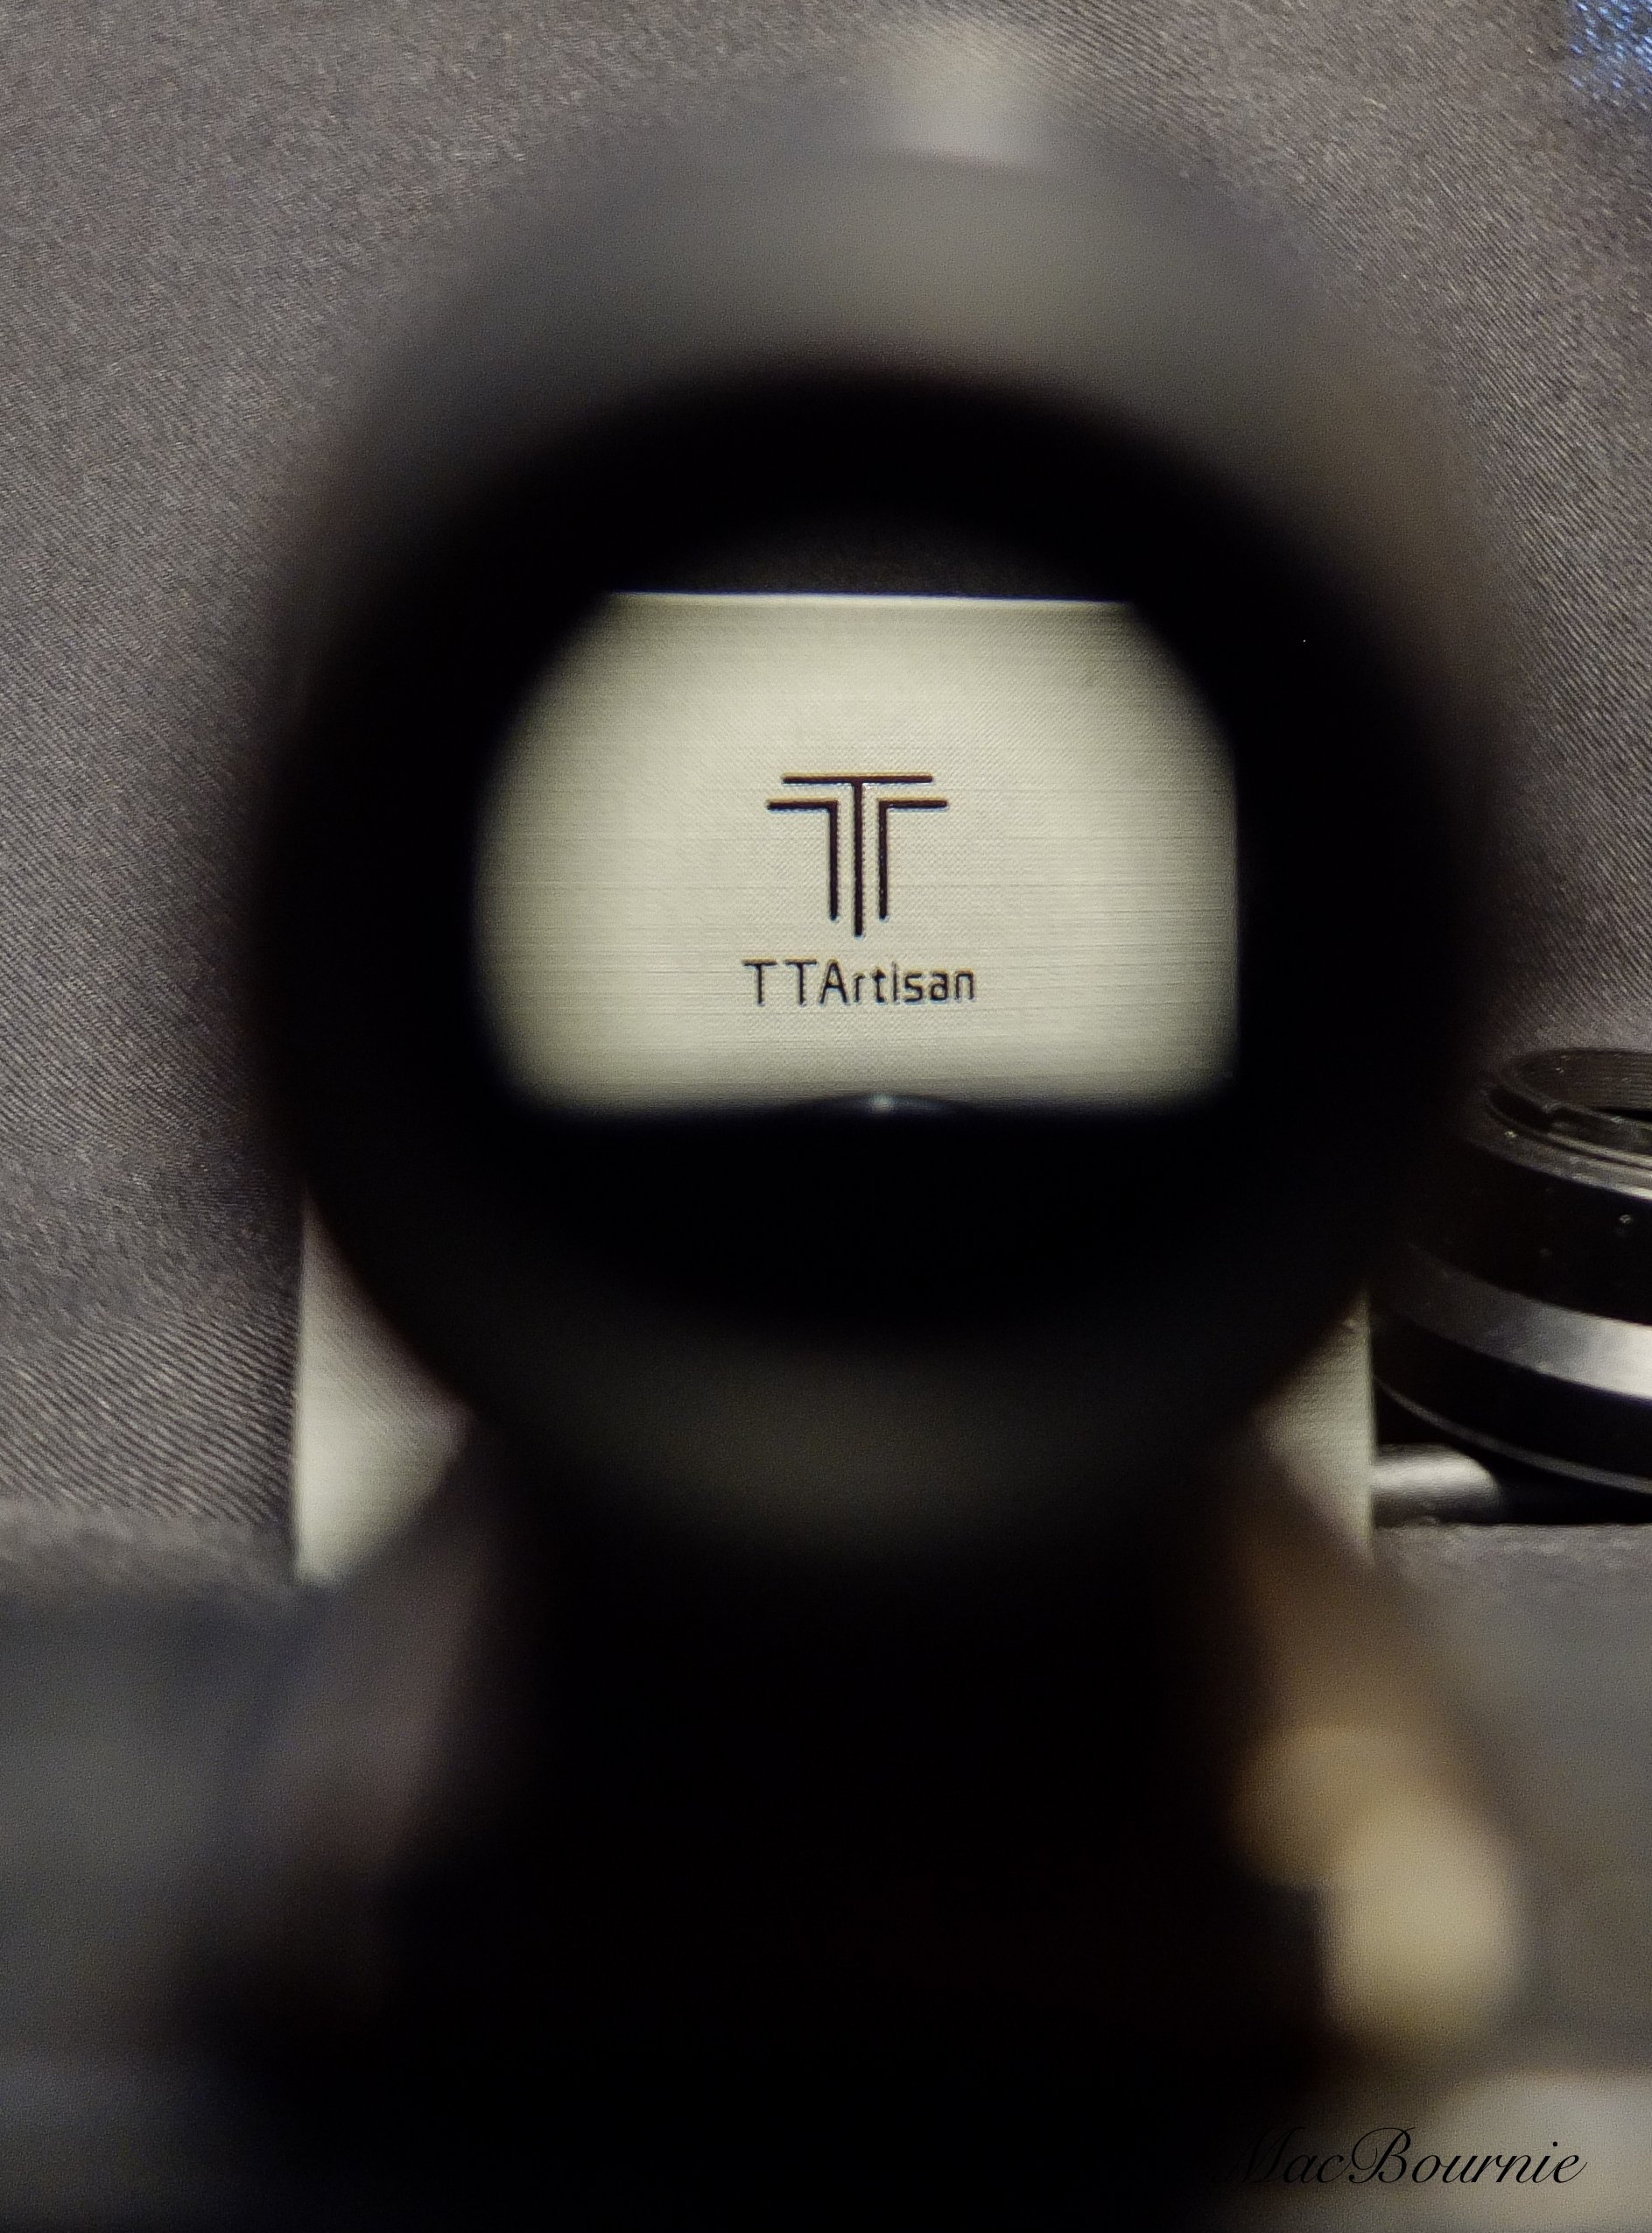
Click on the link for my comprehensive post on the high-quality, TTArtisan 28mm viewfinder pictured below on the left.

The external optional viewfinders on these Pentax Q cameras show the significant difference between the TTArtisan 28mm viewfinder and the tiny Lichifit 28mm viewfinder.
How small are they?
These things are extremely small and super light.
The good news is that they are so small that you can easily slip a digicam with one of these viewfinders attached into a camera bag or the pocket of a jacket. The viewfinder itself (or several viewfinders for other prime lenses) could also be tucked into a pocket of your camera bag or pocket and pulled out when you need one.

The tiny Lichifit 28mm external viewfinder fits nicely on the miniature Pentax Q line of cameras.
It’s hard to imagine how small these viewfinders actually are.
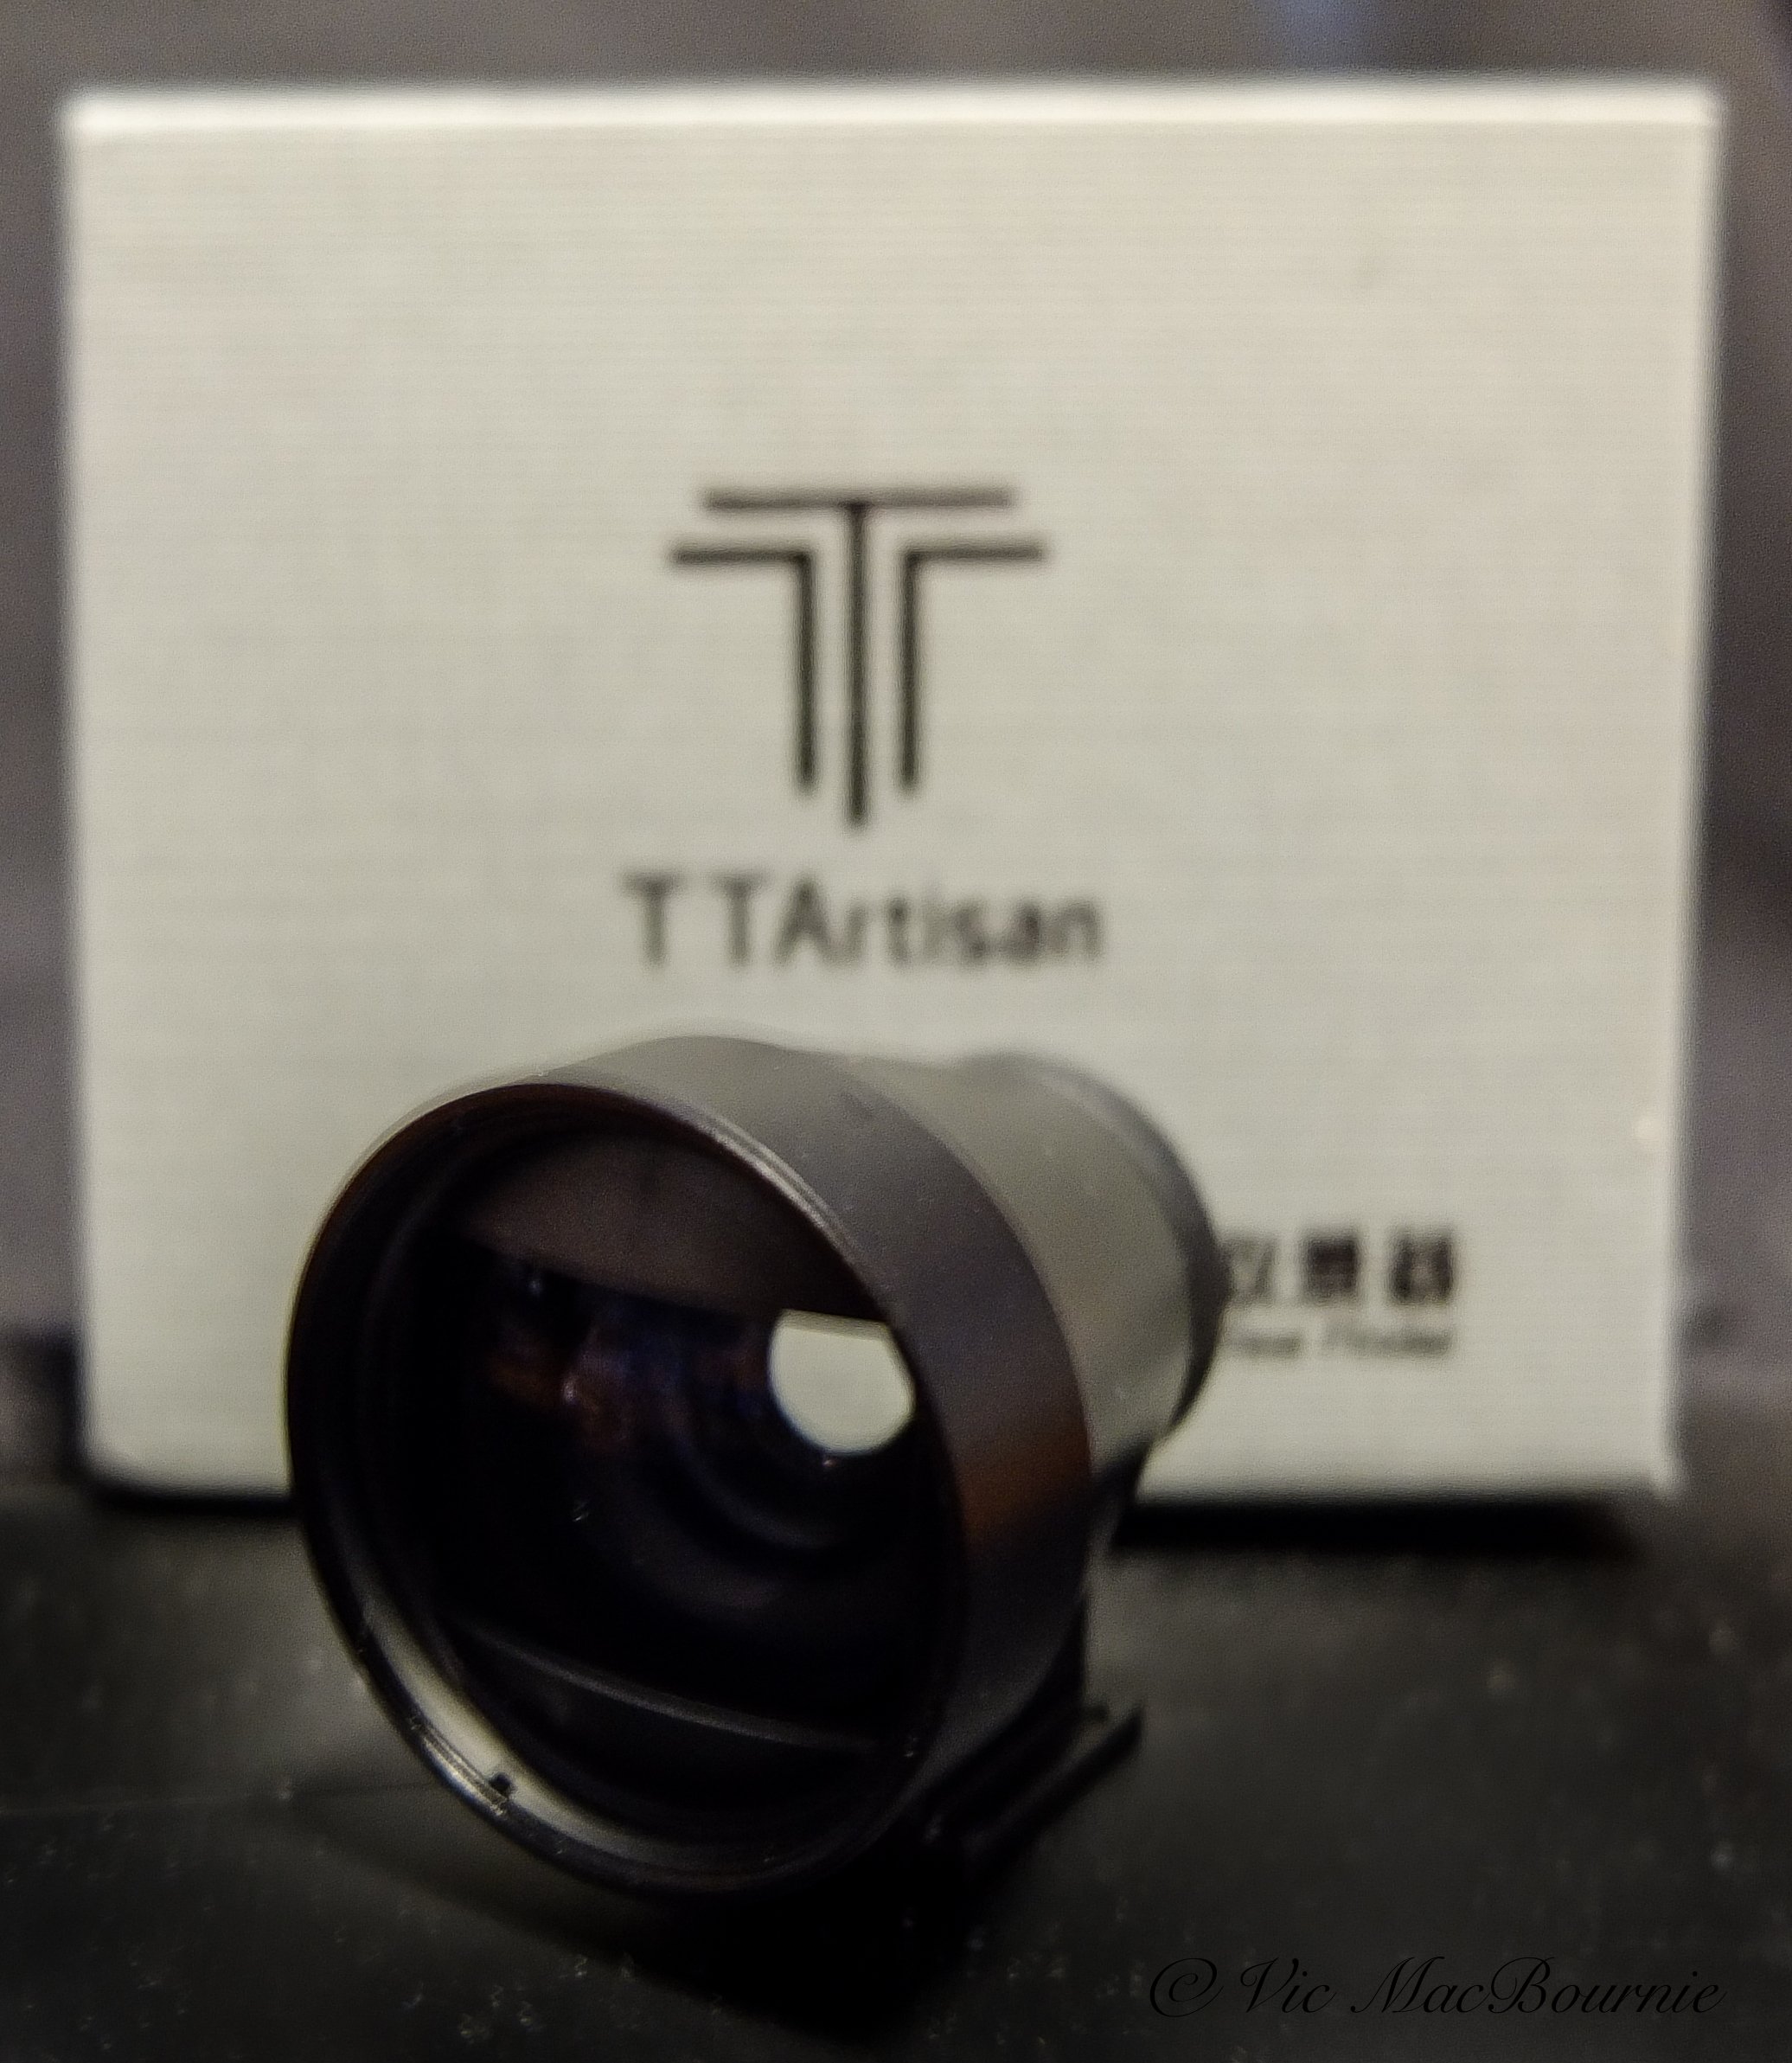
In fact, I ordered the 28mm TTArtisan finder at the same time as I ordered the 28mm Lichifit finder. When the package came, I didn’t even know that the lightweight Lichifit finder was even included in a separate padded bag.
It wasn’t until I went to throw out the packaging that I noticed the tiny viewfinder tucked away in an envelope in bubble wrap.
Small and lightweight is an understatement.

A rear view looking through the viewfinder of the tiny Lichifit 28mm external viewfinder fitted atop the Pentax Q.
Are they good for landscape and garden photography?
I’m not sure these viewfinders work as well with landscape or garden photographers as they do for street photographers. Landscape photographers need to see a higher level of detail through the viewfinder than, say, a street photographer.
The slightly blurry image and distortion that these finders deliver would be, I believe, frustrating for some landscape, garden and travel photographers.
If given the choice, I would rather save my money and purchase the TTArtisan viewfinder even if it is probably triple the cost of these cheap, mini, plastic viewfinders.
For these photographers, investing in a higher quality viewfinder like the TTArtisan is something you may want to consider.
The good news is that the Lichifit finders are so inexpensive to purchase, that it might be worth it to try one out and decide for yourself if you can live with the slight blur and distortion caused by the plastic in the viewfinders.
If you are looking to add a camera or lens to your arsenal, be sure to check out KEH Camera Exchange. You can replace your older equipment and trade in some of your equipment to help fund your new gear.

This image shows the Olympus Pen system with the viewfinder attached.
Why you might want a Lichifit viewfinder
• If having an inexpensive, quick look is more important than seeing a crystal clear image through the finder, then one of these may work for you.
• If you are looking for a tiny, extremely lightweight viewfinder, then you might like this accessory.
• Or, if you need a large selection of viewfinders to match up with your many prime lenses, a set of these inexpensive finders may just work well for you.
• They are available in a range of funky colours that might work with your camera, especially if you are the owner of one of the Pentax Q custom coloured cameras.
It’s important to note that, like the TTArtisan viewfinders, no information is transmitted from the camera to the viewfinder. There is no f-stop, shutter speed or focus confirmation in these viewfinders. They are used to get a view of the image at times where you either don’t want to use the camera’s LCD or are unable to use it because of excessive glare on it from the sun.

Two Pentax Qs show the size and style differences of the optional external viewfinders.
If the TTArtisan line of optical viewfinders are exquisitely made, stylish accessories with high-quality optical glass, these Lichifit finders can almost be described as the exact opposite.
In other words, the Lichifit finders are tiny, cheap and not very sharp.
They also lack the highly-desirable vintage look that the TTArtisan finders exude with confidence.
Add to that, there is much less of a coolness factor using one of these whether you are out in the field or at the coffee shop reviewing your images.
I do like the tiny footprint, especially when I use it on my miniature Pentax Qs and the equally small Lumix LX7. They look good on these cameras and I can live with any parallax problems that might occur.
The company says the viewfinders are “small transparent and bright, and are very coordinated to install on various side axis cameras.”
They advertise the finders, which come in 28mm, 35mm and 40mm options, are good to “replace an old, broken or non-working optical side axis viewfinder, easy to use and stable performance.”
The company does not recommend they be used with high SLR cameras because of the potential for parallax problems.
Unfortunately, where these quick-and-dirty viewfinders fall far too short are the optical qualities. Looking through the viewfinder’s results in a slightly blurry image that is probably just a little too soft for my liking, even considering the price.
Does that mean I can’t or won’t use the little 28mm? No, not by a long shot. It’s usable, but it won’t be anywhere near as enjoyable to use as the TTArtisan viewfinders.
If given the choice, I would rather save my money and purchase the TTArtisan viewfinder even if it is probably triple the cost of these cheap, mini, plastic viewfinders.

Why you need the TTArtisan optical viewfinder(s)
The 21mm and 28mm TTArtisan viewfinders combine fine craftmanship with a sophisticated look to enhance any viewfinderless digicam or traditional film camera.
Exquisitely made, exceptionally beautiful: And they work great

The TTArtisan optical viewfinder makes the perfect addition to any digital or film camera that lacks an optical viewfinder. The viewfinders, available in both 21mm and 28mm are exquisitely made, elegant to look at and an ideal companion to anything from a Leica to a Pentax Q.
If a viewfinder on your camera is important to you, but you are stuck with one of the many modern non-viewfinder digicams, you owe it to yourself to check out one of the TTArtisan optical viewfinders.
And, if looking sophisticated while you’re out photographing in the field or checking out your images at the local coffee shop ranks right up there with your photographic results, then you need to run out immediately and pick up one of these little gems as fast as physically possible.
For more on the TT Artisan, check out my story on the Olympus PEN camera system.
Are there parallax correction problems? Of course. Without the highlight lines in the finder, it’s difficult to get exact framing. And, if you look into and to the right or left in the viewfinder you are able to see much more of the view. My response: by using the viewfinder regularly, you’ll get a good feel of how the it performs and, unless you are a real stickler for details, you’ll be happy with its performance.
“Like the sound of a Leica shutter in action, there is something simply elegant about a beautiful camera with an exquisitely designed viewfinder that makes you want to bring it up to your eye and use it at every opportunity possible. ”
The TTArtisan optical viewfinders are an elegant photography accessory to any camera but especially those that lack their own viewfinders forcing the photographer to use the LCD screen on the back of the camera.
Whether it’s the 28 or the larger 21mm optical viewfinder, these exquisitely made glass and black anodized aluminum viewfinders made in China are an absolutely gorgeous addition to even the most expensive digital or 35mm film cameras. Leica comes to mind, but I’ll be pairing my 28mm TTArtisan viewfinder with my Pentax Q and Lumix LX7 cameras. Panasonic does sell it’s own very similar optical viewfinder for a considerably higher price.
It’s important to note that none – not a bit – of the information like F-stop, shutter speed or focus indicator is passed through to the finder. There are no electrical contacts on these viewfinders.

The TTArtisan optical viewfinder pairs beautifully with the Pentax Q system of miniature cameras.
The company’s information points out that: “The TTArtisan viewfinder can be used on cameras with cold shoe mounts, such as the Ricoh GR, the Leica rangefinder cameras, old-fashioned film cameras, etc. For cameras with the original viewfinder, the TTArtisan viewfinder can be used as a great decoration.”
My recommendation is: Just get one. You won’t be disappointed. Heck, pick up both the 28mm and 21mm while they are still reasonably priced.
I got mine on sale from AliExpress for a good price, but you can also purchase them from Amazon and some of the better photographic outlets.

The TTArtisan 28mm optical viewfinder pairs beautifully with my Lumix LX7. While lacking all of the communication available with the Panasonic electronic viewfinder, the TTArtisan is still useful at the wide end and adds a touch of class to the camera.

This image from the TTArtisan website shows the viewfinder being used on the very popular Ricoh GR digital camera.
Trust me, you’ll love using it and, as a bonus, look incredibly cool in the process.
I have to admit that, while I need a viewfinder for those bright sunny days when trying to read the back of the LCD screen on my cameras is next to impossible, it was actually the cool factor that really got me to pull out the credit card.
Not that I need to look cool. Thankfully, I’m well past that time in my life. What’s cool, however, is the camera – any camera – with one of these mounted on the flash hotshoe.

Image shows both the 28 and 21mm TTArtisan viewfinders. The 21mm is significantly larger than the 28mm.
Why does adding a viewfinder even matter?
It matters for two reasons.
First is that using a viewfinder rather than the LCD on the back of the camera will almost always give you a sharper image. The viewfinder acts as a point of contact with your face and can be an important factor in getting a sharper image.
The second reason a viewfinder matters is because a camera that you fall in love with is a camera that’s going to get a lot more use. Holding the camera, bringing the viewfinder up to your eye, and looking through the optical glass can be truly inspirational if not a little nostalgic.
There is no denying the joy I get from using the finder. It just makes you want to take the camera out on the streets and into the garden to put it to use.
The 28mm TTArtisan veiwfinder is an elegant addition to everything from a Leica film camera to a modern digital camera that lacks a viewfinder.
Like the sound of a Leica shutter in action, there is something simply elegant about a beautiful camera with an exquisitely designed viewfinder that makes you want to bring it up to your eye and use it at every opportunity possible.
And, let’s face it, photography for most of us is about enjoying the process, being inspired and making works of art that satisfy our creative needs.
We all know, however, that looks aren’t everything. In the end, the product needs to provide some semblance of utility to make it worth purchasing, carrying around in your camera bag and taking the trouble to attach it to the hotshoe.
How do the TTArtisan viewfinders perform?
Do the TTArtisan viewfinders perform as expected. Absolutely.
Are they perfect? Absolutely not.
To be a little critical, the viewfinder’s biggest problem is the lack of lines on the glass that allow the user to compose the image accurately. Higher-end viewfinders will include engraved lines that show the user what they can expect to capture with say a 21mm, 28mm or even 35mm … lens.

The 28mm TTArtisan viewfinder adds a sophistication to the Lumix LX7 digicam.
My 28mm viewfinder, for example, should have lines showing a 28mm point-of-view and maybe even a 35mm view. That would make it the perfect optical finder, and allow me to use it with greater confidence that I would capture the exact image I was trying to capture at both the 28 and 35mm focal lengths.
As one reviewer wrote: “Good looking, excellent optics and build. BUT... Guys, why no bright frames inside !?!?
You can’t make accurate framing and composing – can’t tell the actual frame border without help of bright frame inside viewfinder!..”
A fair comment. Most of us, however, don’t use a viewfinder like the TTArtisan for precision framing of our images. On the street, we’re using it to get a very quick, general idea of the image we are taking without having to look at the camera’s LCD. In the garden, we just need a general idea of the image and any cropping needed can be done in post processing.

Even the packaging that comes with the TTArtisan viewfinders hints at the quality of the item.
If the sun is bright and the reflective glare off the LCD makes it difficult to view, we just need to get a good idea of what we are photographing. This viewfinder delivers under those circumstances.
I think that a high precision optical viewfinder complete with focal length lines was much more important when photographers were shooting only film. With the evolution of digital photography, where images can be cropped easily in Lightroom, Photoshop or another post processing tool, the ability to see precisely what we are photographing is less critical. And, if we have a situation where it is critical, we can always use the LCD on the back of the camera.
So, unless you can’t live without critical information showing the exact image you are photographing, the TTartisan 21mm and/or 28mm optical viewfinders are a perfect addition to your viewfinderless digital or film cameras at a very reasonable price.

Two external optional viewfinders compared. The TTArtisan viewfinder on the left compared to the tiny, inexpensive Lichifit 28mm finder on the right. For the complete comparison post, go to external viewfinders comparison.
A rubberized surround makes it easy for photographers to use the viewfinder with glasses and a convenient carrying pouch helps protect the viewfinder when it’s tucked away in your camera bag. I have not experienced it but apparently the rubber surround can be easily knocked off the viewfinder. If this becomes a problem, a little supper glue will probably solve the problem.
The company also notes, in its on-line literature, that the “optical glass has good light transmittance and multiple high-quality coatings, which provides a good experience for framing.
• Rubber Eyepiece: The side of the eyepiece is wrapped with a circle of odorless rubber, which protects the eyes well.
• Compact and Portable: The viewfinder weighs only 51/33 grams
• Anodized Aluminum: Elegant design complete with aviation aluminum material
The optical glass in the TTArtisan viewfinders provides excellent clarity.
Lens and optical viewfinder - the perfect combo
I am planning to use my viewfinder with zoom lenses that include the 28mm focal length, but the veiwfinders are ideally meant to be paired with prime 28mm and 21mm lenses including, of course, the very affordable TTartisan lenses sold for various camera manufacturers from Leica to Sony, Fuji and the like.
Pairing the optical viewfinders with their lens counterparts make for exquisite combinations that create the ideal photographic experience while increasing the “cool factor” off the charts.

Mastering photography in the garden, on vacation and at the computer
The KelbyOne photographic on-line program is an excellent way to learn about your new camera and improve your photography right in the comfort of your own home.
Cashing in on KelbyOne’s photographic expertise
Let’s face it, our smartphones are great, but to capture truly memorable images of our gardens, vacations, pets or our kids and grandchildren, we are going to need a decent camera.
And we are going to have to learn at least the basics before we begin using our camera with any real confidence.
That’s where KelbyOne comes into the picture.
This on-line treasure trove of how-to videos has not only made learning to use our cameras extremely simple, it offers the budding photographer the opportunity to grow their skills and knowledge at your own pace in the comfort of your own home. Need to be part of a community for one-on-one interaction and problem solving? They’ve got that too, as well as a regular newsletter to help photographers take their images to higher levels through the use of Photoshop, Lightroom and other valuable photo software.
And it’s fun.
Heck, it’s a lot of fun. Just the idea of sitting at home with a tea or coffee – being able to call up one of the more than 900 videos on the laptop and getting help from expert instructors – is almost unimaginable to this grizzled old photographer who cut his teeth on Kodachrome slide film and grainy B&W film.

How times have changed.
It was a few years ago that I purchased my first 35mm camera right out of university and went to work learning everything I could about it and the art of photography.
I still have many of the original books that I poured over to learn about the master photographers and outstanding photojournalists of their day – Margaret Bourke-White, Robert Capa, Ansel Adams and the like. The impressive, but completely out of date, Time Life series of books still sit on one of our shelves collecting dust.
Yes, times have certainly changed.

KelbyOne offers a terrific close-up course or macro photography course.
What type of photo courses are offered at KelbyOne
I still love my old photography books, but they just can’t compare to the ease and enjoyment of on-line learning from some of the best photographers in the industry. Experts in their field coming straight into the comfort of your home to give you a course on macro photography, capturing backyard birds, travel photography, photographing children, toddlers, pets, portraiture, architecture and, of course, perfecting landscapes, just to name a few.
Speaking from experience: On-line courses are valuable resource
I have been lucky enough to take two of the KelbyOne courses recently.
The first – Fujifilm ambassador Karen Hutton’s informative close-up and macro photography course – proved to be truly inspirational. Although the detailed information she imparted on equipment was useful, it was her approach to using close-up and macro photography as a means to create a photographic story that inspired me to take a new approach to my own close-up and macro photography.
Click on the link for my full story on Karen Hutton’s close-up photography course.
Hutton encourages photographers to take multiple images of a subject, showing it in its natural environment before moving in closer to capture finer and finer details. The resulting photo essay provides a more complete picture than a photographer could hope to create with any single image.
This approach gives both the photographer and the viewer a much greater understanding of the subject.
Hutton’s enthusiasm for her work adds to her inspirational approach and creates a friendly feel to the whole experience. Watching her video is more akin to hanging out in the field with a photo friend, than it is about an hour of photography instruction.
I highly recommend enrolling in her close-up and macro photography course if you have any interest in documenting your garden and its inhabitants up close, or if you have stayed away from close-up photography because you have been uncomfortable with the traditional tools needed to be successful.
Rick Sammon's course on photographing backyard birds is an excellent way to learn about photographing birds.
Photographing backyard birds with Rick Sammon
The second on-line course I was lucky enough to take was from Rick Sammon.
His course, like Karen’s, is not designed for expert bird photographers with the longest, most expensive lenses.
I would recommend this course for anyone looking to use their existing lenses to capture backyard birds as well as birds at sanctuaries and parks where they are accustomed to people. If you are simply looking for tips or to brush up on your skills, this course will set you on the right path.
Rick loves to share his knowledge almost as much as he enjoys sharing his work.
Click on the link for more on Rick Sammon’s course on photographing backyard birds.
That includes, at last count, more than 50 books on photography, regular monthly articles in Outdoor Photography and an envious portfolio of more than 25 instructional courses on KelbyOne, The Ultimate Source for Photography Education. In fact, Photographing Backyard Birds is his 25th course offered on KelbyOne.
The one-hour course features a total of 250 slides to help illustrate his talks and keep viewers focused on capturing great photographs. Many of the images include tips on post processing in both Lightroom and Photoshop, including examples of images that many of us would discard. Rick also shows us how most can be saved through post processing.
Rick starts with the basics and progresses through photographing around garden ponds and lakes. He offers tips on ISO settings, anticipating action, creating controlled backyard sessions, and tips to learn from your mistakes.
He kicks off the video with 11 tips every bird photographer needs to know. The tips provide an ideal starting point for viewers and helps to set the tone for what to expect.
For those of us thinking about getting into backyard bird photography, Rick’s course is an ideal starting point. For those who have some experience shooting backyard birds but want to take it to the next level, Rick’s expertise is worth tapping into for just a few dollars.
Since, we have already spent a lot of money on cameras, lenses and accessories, it makes sense to spend a little more to learn from Rick’s expertise.
What is the KelbyOne photography program?
Before I explain the KelbyOne on-line photography program, let’s take a look at the founder of the program, Scott Kelby.
I was introduced to his work many years ago when I purchased one of his incredibly informative Photoshop books from my local Costco. Since then, he has gone on to write a plethora of books and articles on everything from Lightroom and Photoshop to getting the most out of your iphone camera.
Scott is the brains behind KelbyOne, the extensive on-line photography educational program boasting more than 100 of the world’s best and most entertaining photographers sharing their knowledge and expertise with the photographic community and anyone looking to expand their knowledge about their hobby or their chosen profession.
It’s all online and can be accessed from your computer, tablet or even from your phone. There is no need to leave the comfort of your home to gain a wealth of knowledge.
There are courses on everything from iphone photography to travel photography, portraiture, creative landscapes and Black & White photography to name a few of the more than 900 on-line courses available. There are several courses on using and mastering Lightroom and Photoshop
Students can purchase courses individually for as low as $9.95 or by monthly subscriptions for less than $20.00. There is also a yearly membership for those looking for the ultimate learning experience. The courses offer something for everyone whether your are a beginner, hobby photographer, or a seasoned professional.
“Our goal here is to make learning something that you look forward to. This way you, our community of photographers, can move past the hurdles and bring to life the images that are stuck inside of you. We feel like the content has to be fun, cinematic, and inspiring, and taught by the most personable and experienced photographers in the industry,” states the KelbyOne site.

From a tiny acorn, a mighty Oak grows
From the tiny acorn grows the mighty oak is one of nature’s great miracles. The real miracle, however, is how a single oak tree can transform our landscapes in so many ways.
Our mighty oaks have humble roots
“Large streams from little fountains flow, Tall oaks from little acorns grow”
– D. Everett in The Columbian Orator, 1797
Our neighbour’s giant oak tree crashed to the ground several years ago. I guess it had lived its life to the fullest and was now offering itself up to the earth.
But, its work was not finished.
All around it, in our yard and, I imagine, many yards in the neighbourhood, this giant oak’s offspring had already begun their own lifelong journeys.
All from a little acorn that had fallen from the old oak tree and likely forgotten by a resident squirrel after it buried the acorn in the ground with the hope of using it for a meal in the cold of winter.
Just in case you were not aware, the seed of an oak tree, the “nut,” is called an acorn.

There is no tree more important in our yards than the oak tree. While some can grow massive, there are others that can work in today’s smaller yards.
It is believed that the average 100-year-old oak tree will produce as many as 2,200 acorns per year. That number will go up significantly during high production years that can occur every four to ten years.
I often find small oak saplings growing on our property. In spring, I move them to safer areas to grow in the back of the garden where they are safe and have a much better chance of growing to maturity. Often, during the move, remnants of the woody acorn shell remains on the small roots, a stark reminder of the the saplings’ origins.
If you are trying to decide whether or not to plant an Oak tree in your yard, The Nature of Oaks will certainly help you make that decision. This valuable book highlights the incredible benefits of these important trees.
For more on the importance of oak trees in our garden and natural landscapes take a few moments to check out my other posts on Oak trees:
It should not be forgotten that of the more than 2,000 acorns per year that fall from a mature oak, very few of those seeds grow into oak trees themselves. In fact, it is estimated that only one acorn in 10,000 will grow up to be an oak tree.
Some species of oaks bear acorns yearly, while others bear every two years.
The remainder provide food and even shelter for much of the wildlife in our yards.
It’s hard to believe how hard oaks work for the earth’s creatures.
How important are oaks to our wildlife?
In his highly acclaimed book Bringing Nature Home, How You Can Sustain Wildlife with Native Plants, Douglas Tallamy spells out clearly the vital role Oaks play in the natural environment and how important they are to include in our gardens.
He writes: In a study in Illinoise, John Nill and Robert Marquis (2003) found that a singe white oak tree can provide food and shelter for as many as 22 species of tiny leaf-tying and leaf-folding caterpillars, insects most people never notice on their walks in the woods.”
And that is just a tiny fraction of the fauna in your garden that depend on a single oak tree. In fact, the mighty oak supports 534 species of fauna, more than any other tree we can plant in our gardens.
It is followed by the willows, cherries and plums, in importance to fauna. All good choices when it comes to deciding what tree to plant in your garden.
If the Oak’s importance to wildlife is not enough, consider that of the 400 species of Oak, North America boasts 90 different species with 75-80 in the United States and 10 in Canada.
How long do Oaks usually live?
Oak trees traditionally live for hundreds of years. There’s a good chance your children will be watching the tree enter middle age long after you’re gone.
In Ontario and northeastern United States, that white oak you plant will grow more than 35 metres (that’s more than 114 feet) tall, can live for several hundred years and produce thousands of acorns every year to feed deer, squirrels (including flying, red and gray), chipmunks, wild turkeys, crows, rabbits, bears, mice, opossums, blue jays, quail, raccoons and even wood ducks just to name a few.
As Tallamy points out: “The value of oaks for supporting both vertebrate and invertebrate wildlife cannot be overstated.”
He explains that oaks along with hickories, walnuts and American beech, have stepped up to the plate following the demise of the American chestnut in supplying nut forage for various forms of fauna.
In addition, oaks – both living and dead – provide nesting cavities for our backyard birds ranging from chickadees, wrens, woodpeckers, owls and even bluebirds.
The tree species real genius, however, is what we alluded to earlier, and that is the astounding number of insect herbivores that oaks support in the forest ecosystem.
“From this perspective, oaks are the quintessential wildlife plants: no other plant genus supports more species of Lepidoptera, thus providing more types of bird food, than the mighty oak,” Tallamy writes.
(If you are wondering what a Lepidoptera is: They represent an order of about 180,000 species in 126 families and 46 superfamilies of insects that includes butterflies and moths. It is one of the most widespread and widely recognizable insect order in the world, and your average oak is full of them.)
And all from the tiny acorn.

Squirrel proof bird feeder strategies: Going for gold
Squirrel proof bird feeders are important to maintain a positive bird feeding experience. There are different ways to achieve that with varying degrees of success.
Best squirrel proof bird feeders: How to set up a feeding station and cages to keep them out
Our squirrels train everyday to beat us at our own game. Like the ultimate Olympian, they don’t seem to give up, don’t feel fear, and don’t seem to care about a little pain or even feel sorry for us when they win gold and walk away with a full belly of our finest bird food.
A cage helps, so do weight-sensitive feeders, but it takes more than just throwing them up in the nearest tree to guarantee successs.
So how do we keep squirrels out of our bird feeders?
They know what so many of us fail to accept – there are no squirrel proof bird feeders. There are feeders that work well most of the time and baffles that stop them in their tracks – for a time anyway – but there is nothing that can guarantee that squirrels aren’t getting fed on any given day.
We can try to keep squirrels at bay with a host of elaborate combinations baffles, cages and pressure sensitive feeders, but in the end there is always that one squirrel that accepts any challenge we throw at it with great gusto.
Baffles go a long way to keeping bird feeding station free of squirrels.
I have a name for these squirrels. I call them my Olympic calibre squirrels and right now we have one that comes in the form of a large grey male squirrel that, I swear, has no respect for me, my expensive bird feeders or the baffles meant to keep him on the ground.
My approach to keeping the squirrels off my feeders is a simple one and involves a single, centralized feeding station in an area where the squirrels are unable to access from above or from ground level.
He may not respect me, but I have the utmost respect for him.
I can live with one squirrel occasionally getting up on the feeder. The problem is when the entire neighbourhood has access to my expensive feed.
And, I can say with great certainty that there are very few yards with more squirrels than mine. Winter, spring, summer, fall, it doesn’t matter. There are always a handful of squirrels looking for a handout. Grey, black and red squirrels with a good mix of chipmunks thrown in just for fun.
Our resident red fox has taken care of some of them but the squirrels and chipmunks are always ready to restock with their kin whenever the numbers get manageable.
So it goes without saying that my vigilance is paramount at all times.

Harming squirrels is not the answer
First, let me say that I never harm our squirrels in any way. I don’t use the hot, spicy bird seed and I refuse to use the spinning feeders that just seem cruel to me. Maybe the squirrels like to go for a spinny ride once in a while, but I can’t help but think that the spinning feeders go just a little too far to protect a handful of bird seed.
My approach to keeping the squirrels off my feeders is a simple one and involves a single, centralized feeding station in an area where the squirrels are unable to access from above or from ground level. Although there are a lot of trees around the feeder, any limbs are kept cut back enough that even an Olympic calibre squirrel can’t score a medal with its best jump.
By using a bird feeding station rather than individual feeders, I am able to use a number of different, less expensive feeders and specialty feeders that the squirrels can’t get to. These include everything from simple hopper feeders to suet feeders and compressed seed cylinders.
The key is to keep the feeding station away from areas that allow the squirrels to jump up or down on the feeders.
I could give readers specific distances that the feeder station needs to be away from objects where the squirrels are capable of leaping from, but I think every situation is unique and needs a certain amount of individual experimentation. A good starting point, however is at least four feet off the ground and about ten feet from above for the daring aerial acrobats.
Our biggest weakness is usually an approach from ground level where, like a basketball player, a good vertical jumper can score almost every time.
The most success our squirrels have had is when I have left a feeder dangle too low to the ground.
Our most talented athletes manage to take a running leap off the large baffle flinging themselves into the air – often with an impressive twist or even what appears to be a salkow? – and then grasping the feeder with a toe hold any Olympic wrestler would be proud to have in their arsenal.
Squirrel and raccoon baffles are excellent deterrents
I use a combination of a large steel raccoon baffle as a first defence followed by a cap baffle (see image above) that sits on top of the raccoon baffle and provides the final defence. If they can jump past this combination, the bird seed is toast.
Once defeat is guaranteed, I’ve got one more deterrent that works well. Like any good defence, it involves bending but not breaking and works on the premise that all that work to get up on the feeders probably isn’t worth it.
I like to call it “the pantry is almost empty but go ahead and help yourself.”
It involves simply refraining from the urge to fill up your feeders to the point where it’s not really worthwhile for the squirrels to make the effort to get on the feeders. This won’t stop them for a second, but it will cut your losses if one or two manage to out jump your barriers and go for gold.
What if you can’t or don’t want to use a single pole bird feeding station?
There are lots of reasons to not want to use a centralized feeding station in your yard.
I love the look of beautiful bird feeders hanging in a tree being visited by cardinals, chickadees and a host of finches.
It’s an idyllic look in any woodland garden and one that we should all be able to enjoy without the annoyance of having squirrels swinging like monkeys from every bird feeder in the yard.
There are lots of options available. A quick search on Amazon provides a long list of squirrel proof feeders with some obviously more effective than others.
Squirrel deterrent feeders can be expensive
The answer involves the ability to dig into your pocket, pull out your wallet and hit the cashier at the high-end bird feeding store with your credit card without flinching.
It can get expensive.
Eliminator from WBU
A good feeder is not cheap, but there are reasons feeders designed to keep squirrels at bay without a series of baffles and bobbles can get very expensive.
First there is the feeder itself. If you are buying, pay what it takes to get a good one preferably one that shuts out squirrels and other critters depending on their weight.
Wild Birds Unlimited, for example, sells its “Eliminator” model that closes off access to the seed once the squirrel sits on the base of the feeder.
Wild Birds Unlimited describes how the feeder works: “When a squirrel touches the perches or perch ring, its weight closes the seed ports, foiling its seed-stealing plot. The Eliminator’s unique technology allows you to set the sensitivity level, so you can also exclude large birds such as pigeons or doves.”
Does it work? Absolutely. Can squirrels figure out a way around it? Absolutely. They will try their best to hang from a branch or even the top of the feeder so they do not add weight to the spring loaded seed dispenser.
By positioning the feeder in a location that makes it difficult for the squirrels to access it from a low hanging branch, the chances of keeping the squirrels at bay increases. Consider adding a half dome to make access from the top more difficult.
But even if the squirrels can’t extract seed, the raccoons will take their turn at it once the sun goes down. The result can be an expensive birdfeeder on the ground and susceptible to a hungry, snarling raccoon. I don’t like the feeder’s chances here.
Caged bird feeders are a good choice: Droll Yankee is top choice
Add a solid cage around the feeder and the problem of squirrels and even raccoons is more or less solved.
The best caged feeders work very well. There is a reason Droll Yankee feeders are a little expensive in comparison to other feeders. Their reputation as a company that builds solid feeders that work well is undeniable.

The Droll Yankees Domed Cage Sunflower Seed Bird Feeder is an example of a bird feeder, cage and dome built to keep the critters away while providing excellent access for he birds to high quality seed.
The six feeding ports on the feeder that takes 2.5 pounds of food provides plenty of choice for smaller birds to feed.
The cage allows our smaller songbirds to eat while keeping larger birds like blue jays and starlings away from the feeders. At the same time, squirrels and other undesirables can’t get to the feeders.
The plastic dome provides some shelter for the birds during inclement weather, but more importantly helps to keep the seed dry during rain or snow storms.
Of course the Droll Yankee feeders are not the only recommended caged feeders.
Fundamentals squirrel proof feeder.
The “Fundamentals Squirrel Proof Feeder” from Wild Birds Unlimited is anotheer effective caged feeder. They describe their Fundamentals feeder in the following way: “Our Fundamentals Squirrel Proof feeder is weight-sensitive, so when a squirrel gets on the feeder the feeding ports close, denying access to the seed. Birds can use the four perches or they can cling to the metal shroud to feed.
If it makes sense to add a dome over the entire feeder assembly, it can go a long way in keeping the bird seed dry, while at the same time helping to keep squirrels, chippmunks and raccoons off the feeder.
If raccoons are a problem, just try to remember to take the feeder in for the night or locked away in a safe spot outside away from the racoons but also in an area where mice and rats are not attracted to it. A large galvanized garbage can with a solid lid works for me.

Bird feeder arms: A handy addition to any bird feeding station
Accessory bird feeder arms are excellent additions to any bird feeding station providing a variety of options from adding small specialized feeders, to orange halves for orioles and and dried grasses for nesting birds.
Perfect for holding accessory feeders, orange halves and nesting material
If you have set up your bird feeding station but still feel you need more options, a bird feeder arm might be exactly what you need.
I have two bird feeding arms that prove extremely helpful when it comes to adding small feeder accessories or additional places for feeding our feathered friends, including extra orange halves for the orioles.
Both of my feeder arms are sold as accessories for the Wild Birds Unlimited’s (WBU) Advanced Pole Yystem, but similar items are available with other systems and there is no reason you can’t add a WBU arm to an existing pole bird feeding system providing it fits on your pole.
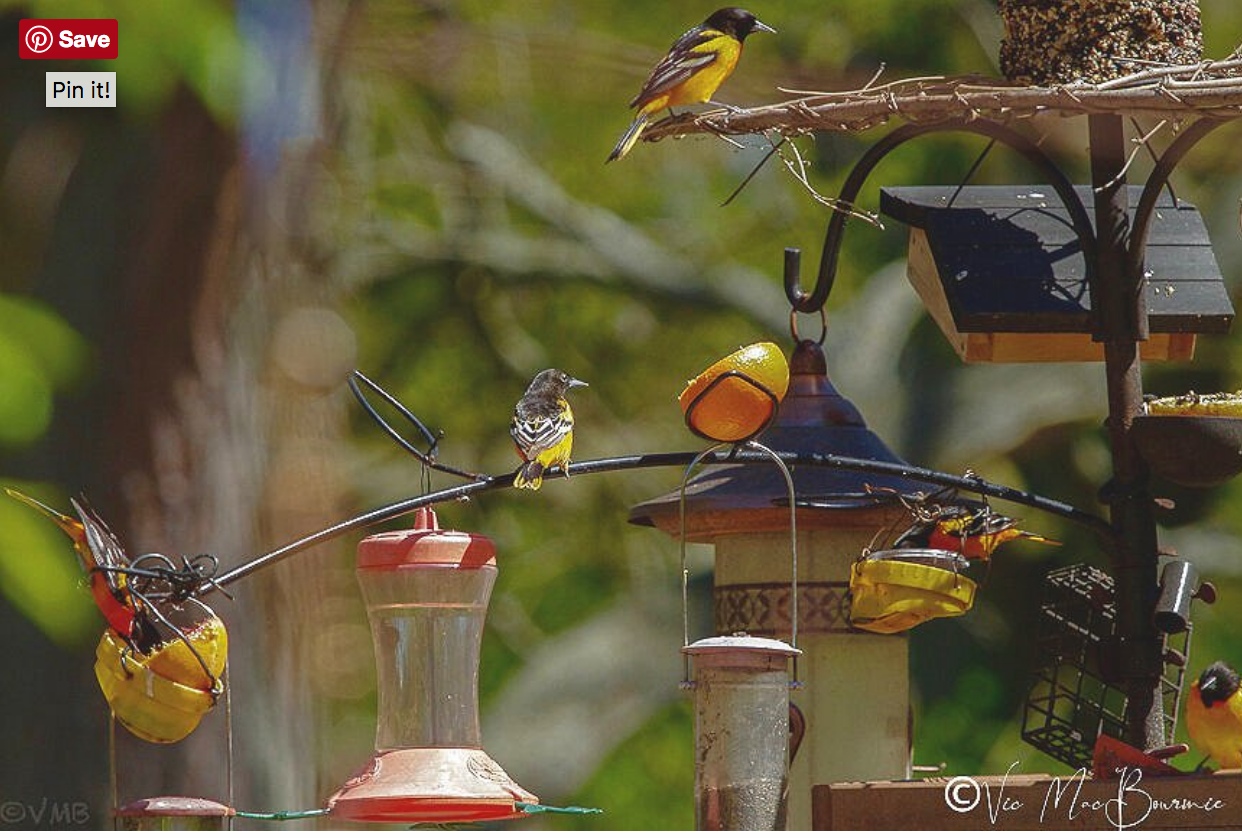
Bird feeder arm showing the Wild Birds Unlimited’s Decorative Branch Perch being put to use with Oriole feeders and orange halves and DIY jelly containers. On the far right you can see the cylinder used to hold the natural branch bird feeder arm. At the time there was no branch being used in the holder.
Our main arm is called the Decorative Branch Perch and consists of a heavy gauge, curved, approximately three-foot steel rod with four decorative wire leaves that are perfect for holding everything from orange halves to nesting material, not to mention the ability to hang small, lightweight feeder accessories from.
Of course, the stylized branch that can be moved around the pole for best positioning, is meant primarily as a perch for birds waiting their turn at one of the feeders, but I like to put it to use whenever possible.
More tips on setting up a proper bird feeding station on my earlier post.
It is a favourite spot for mourning doves to rest and I’ve seen hummingbirds also taking a breather on the thin wire that forms the stylized leaves.
Wild Birds Unlimited describes the Decorative Branch as: “the perfect way to give your birds a little R and R between feedings. Some birds will take turns eating at a bird feeder. Typically, they will wait out of view in a nearby tree or bush. Our decorative perch allows birds to remain in sight while they wait to eat. It can also be used to hang additional lightweight feeders.”
I put it to use most in the spring to stuff last year’s ornamental grass cuttings into the open wire leaves for the songbirds to use as nesting material, as well as oranges for the Orioles. The solid perch allows the birds to sit comfortably on the heavier wire and pull out the nesting material or work the orange halves.
Most of the year it works as a perch for birds just waiting to get to the feeders.
It can also be used to hang small accessory feeders to hold fruit of even meal worms for Blue birds and the like.

This blue jay was photographed on a natural branch fixed to a bird feeding pole via an accessory bird feeding arm attachment.
Natural branch bird feeding arm is excellent addition
The other bird feeder arm I use on the pole system is really nothing but a cylinder that fits on the pole system and holds a single, mid-size tree branch.
This, of course, looks more natural and allows me to choose the type of branch to use as the arm. All that needs to be done is to find a branch with the right diameter to fit into the hole and then tighten the screw to secure the branch in place.
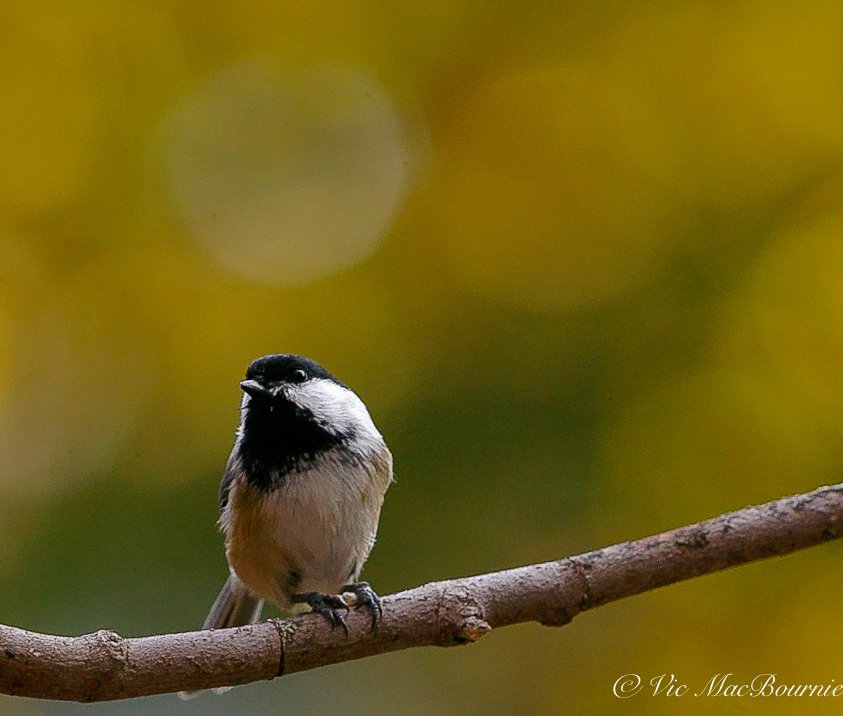
A chickadee sits on a natural branch fitted to an accessory on our bird feeding pole.
Although I use this primarily as a photographic tool to capture birds on an ever changing natural branch, it also comes in handy to hang small, lightweight feeders from. I can also spread bark butter (see my earlier post) on the natural branch to encourage woodpeckers, nuthatches, chickadees and other suet-loving birds to come to the branch to get their photographs taken.
The beauty of this bird feeder arm is that the branch can be easily changed to create a new look. Finding a branch with lichen already growing on it is ideal for photography. When that branch is finished, just add another.
The accessory can also be moved around the pole to put the bird in the best light or have it against a nice clean background.
I also find that backyard birds will readily go to the natural branch as a first choice for perching. The more textured surface provides them with a natural perch, and larger birds can get a better grip on the branch.
It also provides the perfect opportunity in the spring to cut a flowering branch from, say our crabapple tree or another flowering shrub, to use as a photographic perch for the songbirds.
But, even if you are not taking the birds’ photograph, the memory of a cardinal, indigo bunting or goldfinch perched on a flowering branch, is not one you’ll soon forget and the perfect welcome to spring birding season.
Other arms worth considering
There are several other bird feeder arms to consider that will work with whatever bird feeding system you are working with. Amazon, for example, lists several add-on arms that are designed to attach to a number of feeding poles. The Hang-IT multi-purpose add on arm for shepherds hook comes in several colours and is strong enough to handle full-size bird feeders. It claims to fit on any Shepherds hook and gets plenty of positive reviews from users.
There are so many different poles and arms that it’s impossible to list them all, but the yosager deck feeding station complete with bird feeding arms that resemble the Wild Birds Unlimited Decorative Branch Perch is a good choice for those who like to feed from their backyard decks.
It never hurts to get a helping hand feeding the birds
Whatever system you choose, it never hurts to get a helping hand feeding the birds. In this case it’s a helping arm, but you get the idea.
With a little ingenuity you could make your own bird feeding arms simply by attaching a sturdy branch to your pole system. A little wire and some duct tape or aheavy-duty clamp would certainly be enough to provide the birds in your yard with a safe, sturdy landing spot to wait their turn at the feeders.

How to create a natural log planter
Creating an old log planter does not have to be difficult. The next time you get trees trimmed, consider keeping the larger branches and stumps to either build a wood pile or, even better, a planter.
One of the best additions to a woodland/wildlife garden is a simple rotting log.
Not unlike a forest, where large branches and entire trees are left to slowly decay on the ground, our gardens benefit from the same rotting logs on our forest floors. These logs can quickly become home to any number of small woodland creatures, many of which are often unseen unless we really go looking for them.
If it’s large enough, you should see toads, snakes, even salamanders move in to the log along with a myriad of insects and fungi that all work in unison to break down the wood and add nutrients back to the garden.
The process is slow and might even go more or less unnoticed if it wasn’t for the birds and animals that visit the log looking for a quick meal.

A natural log planter is the perfect addition to a woodland garden. Place it along a path so you can enjoy it on your walks through the garden.
Don’t remove those large branches after tree trimming
One of the best decisions I made several years ago was to tell our local tree service company not to cart off the large branches they took down from our upper canopy trees and, instead, leave them be on the ground.
One area where a lot of branches fell was our massive garden of ferns (link to fern garden post). It was the perfect place to just leave the large branches on the ground to break down naturally.
Our massive ferns grow up through the large branches and hide them throughout the summer months. During the early spring and fall and winter, I get to monitor the slow breakdown of the large branches spread over the ground.
In another area of the garden, I used the large branches that were removed from the tree to create a natural woodpile to provide shelter and habitat for the backyard critters that need places like this to escape predators. I’m sure some of them use it as shelter throughout the winter.
In fall, I throw on a layer or two of fallen leaves to provide even more shelter and create an even better environment for the large branches to break down over time.
Five tips to find deadwood
If you do not have dead trees or stumps on your property to attract wildlife, you can always go out on a scouting trip to find a handsome trunk or large branch to place artistically in your landscape. Here are a few places to look for deadwood to create your planter.
If there is a natural woods nearby; ask permission to collect a few good-size pieces of deadwood. It’s best to collect soon after a storm blows down the branches, before wildlife have a chance to move in.
Call a nearby tree service company. They are usually willing to let you have anything you can haul off, or you may be able to arrange delivery for a small fee.
Check with your local cable, electric or telephone company. Trimming branches and clearing trees are routine maintenance and they are more than likely happy to let you take them.
Your local parks department and the town or city road crew may be able to help as well. They maintain public trees and are often looking to get rid of large branches.
Keep an eye out for possibilities in your neighbourhood. Your neighbours will probably be pleased to let you cart off their branches. Explain to your neighbours why you want them and how you will be using them. It’s a good way to raise awareness about the value of deadwood.
Deadwood does not have to be left on the ground.
In her book, Natural Landscaping, Gardening with Nature to Create a Backyard Paradise, Sally Roth dedicates several pages to the benefits of using deadwood in the woodland garden.
It is almost as useful standing up as it is lying down, she explains. An interesting log or gnarly branch can add a very artistic touch to a shade garden or a final bit of realism to a woodland garden.
If you have a large, long branch that is manageable, consider creating your own “snag” by simply digging a deep hole and planting the deadwood vertically.
I have a 8- to 9-foot branch planted in the back of our yard near my outdoor photo setup that is a regular stop for woodpeckers, nuthatches, red squirrels and chipmunks.
These are particularly prized by woodpeckers, and they make an excellent foundation for a feeding area. I have drilled holes in the branch where I insert bark butter regularly. You can also wire suet to them or hang a feeder. The dead tree is also the perfect landing spot for birds approaching the feeding station. Keep it far enough away that squirrels can’t leap over to the feeders.
Create a simple log planter
Letting nature slowly break down the logs is certainly one way to help wildlife, but using the logs to create a path-side planter is an even better one.
How often have you been out for a walk and saw the local arbourist either cutting down or trimming up a large tree in the neighbourhood. That’s a great opportunity to ask if they would drop off a large branch or two at your home. If you have access to a truck, you could obviously just throw it in the back and take it home on your own.
Once you have it home, you can go to work carving out a portion of the log where you can pack in a rich forest soil loaded with compost, rotting leaves and bits of fungi that will quickly go to work breaking down the wood.
If you are comfortable using a chainsaw, you can create a large hollow in the log in no time. If a chainsaw is not something you want to get involved with, you can create the planter with simple tools like a hammer and chisel.
To speed up the process, consider using a power drill to first create holes in the area you want to hollow out. Once the holes have been drilled 5-6 inches deep, you can begin chiselling out the wood. Depending on the size of the log, you may have to drill and chisel out the wood a few times before you have the look and depth you want.
If it’s possible, use a longer drill bit to create drainage holes through the log. Drainage holes may not be necessary since the idea behind the project is to create a rotting log, and the wood in the log will absorb a lot of the moisture anyway, but drainage holes might be appropriate depending on what you are planning to grow in the fallen-log planter.
I have seen many of these natural planters with colourful bedding plants filling them up. That’s fine if you are looking to pretty up a corner of the yard, but a natural planter looks and feels much more appropriate.
Think wildflowers like hepatica, maidenhair ferns, mushrooms and small succulents. A natural path-side planter where you can control things like soil PH, is the perfect place to grow Bunchberry (cornus canadensis) or other acid loving plants.
In his book, Landscape with Nature, Using Natural Design to Plan Your Garden, Jeff Cox writes that “you can make a totally natural planter by hollowing out the centre 1 foot deep.” He suggests planting the old log planter with ferns, begonias, impatiens, or hens-and-chicks, but I prefer a more natural approach using native wild flowers including trilliums, dog-tooth violets and even wild ginger along with hepatica and spring beauty. It might also be the perfect spot to try some native orchids.
A log planter can also be a great place to grow a small bonsai-like shrub – suggesting the rebirth from a dead tree into new life. Again, try using a native shrub like a serviceberry, or one of the many small-shrubby native dogwoods, and viburnums preferably one with berries.
Commercial alternatives to a natural log planter
If carving up an old wooden log with a chainsaw or painstakingly chiselling one out is too much, there are much simpler ways to achieve the overall look without lifting a finger.
Commercial stumps are available that give you the look of an old, hollowed out tree stump without the work and the eventual complete break-down. High quality concrete planters can look remarkably real.
This example of an old wooden log planter from Wayfair.com is a good indication of what is available.
The concrete containers that are made to look like a real tree trunk are perfect for the woodland garden. You can purchase ones that stand up more or less vertically to give height, or planters that are more like fallen logs that lie on the ground horizontally.
These have the added benefit of being able to be easily moved around the garden.
Although not made to look like a fallen log, this exquisite planter from Vivaterra is a pefect vessel to show off your mosses, ferns or even a small native bonsai.
Of course, you will lose out on many of the insects and small animals that would readily move into the more natural pathside planter, but you will be gaining a woodland aesthetic that will surely bring a smile every time you pass it by.

DIY: Turn a birdbath into a succulent planter dish (step by step guide)
This DIY succulent hummingbird feeder is a fun gardening idea that is easy to build and beautiful to look at.
How to make a succulent dish garden (with a twist)
Here is a Do-it-yourself project that is both easy to create and results in a lovely succulent dish garden.
I’ve added a little twist by creating a mini photo studio with the addition of a small hummingbird feeder. All you need to complete the project is an old bird bath, some cactus soil, crushed clay stone and a small hummingbird feeder.
The project can be completed in less than an hour and will surely brighten up your backyard and add a great spot to photograph hummingbirds coming to your garden.
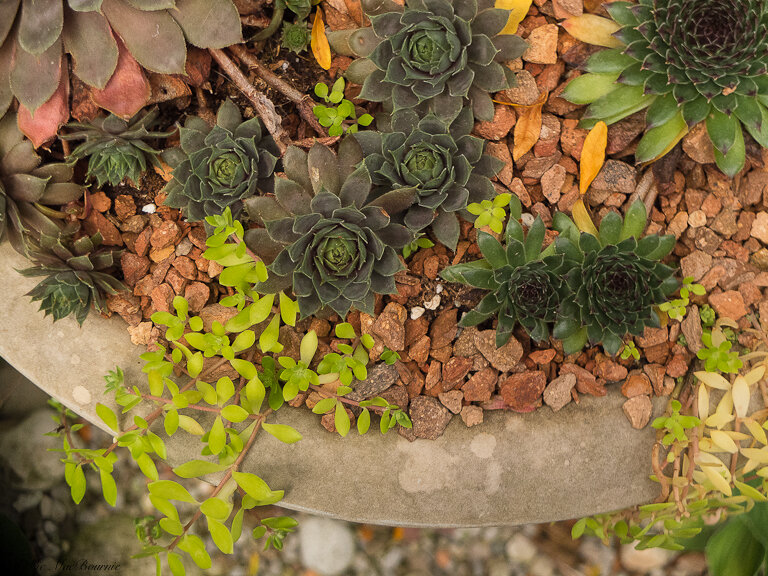
Succulents have certainly become popular recently. Here I have used a series of hens and chicks to make the project more hardy to stand up to our cold winters.
The popularity of succulents, however, is for good reason. Today’s succulents are outstanding. Large, small, colourful, tiny, easy to grow and even easier to maintain.
After all, the plants really don’t need a lot of care. Plant them in gritty, well-draining soil mixed with a little stone or pea gravel. Water them in extreme drought if necessary otherwise, just let them take care of themselves.
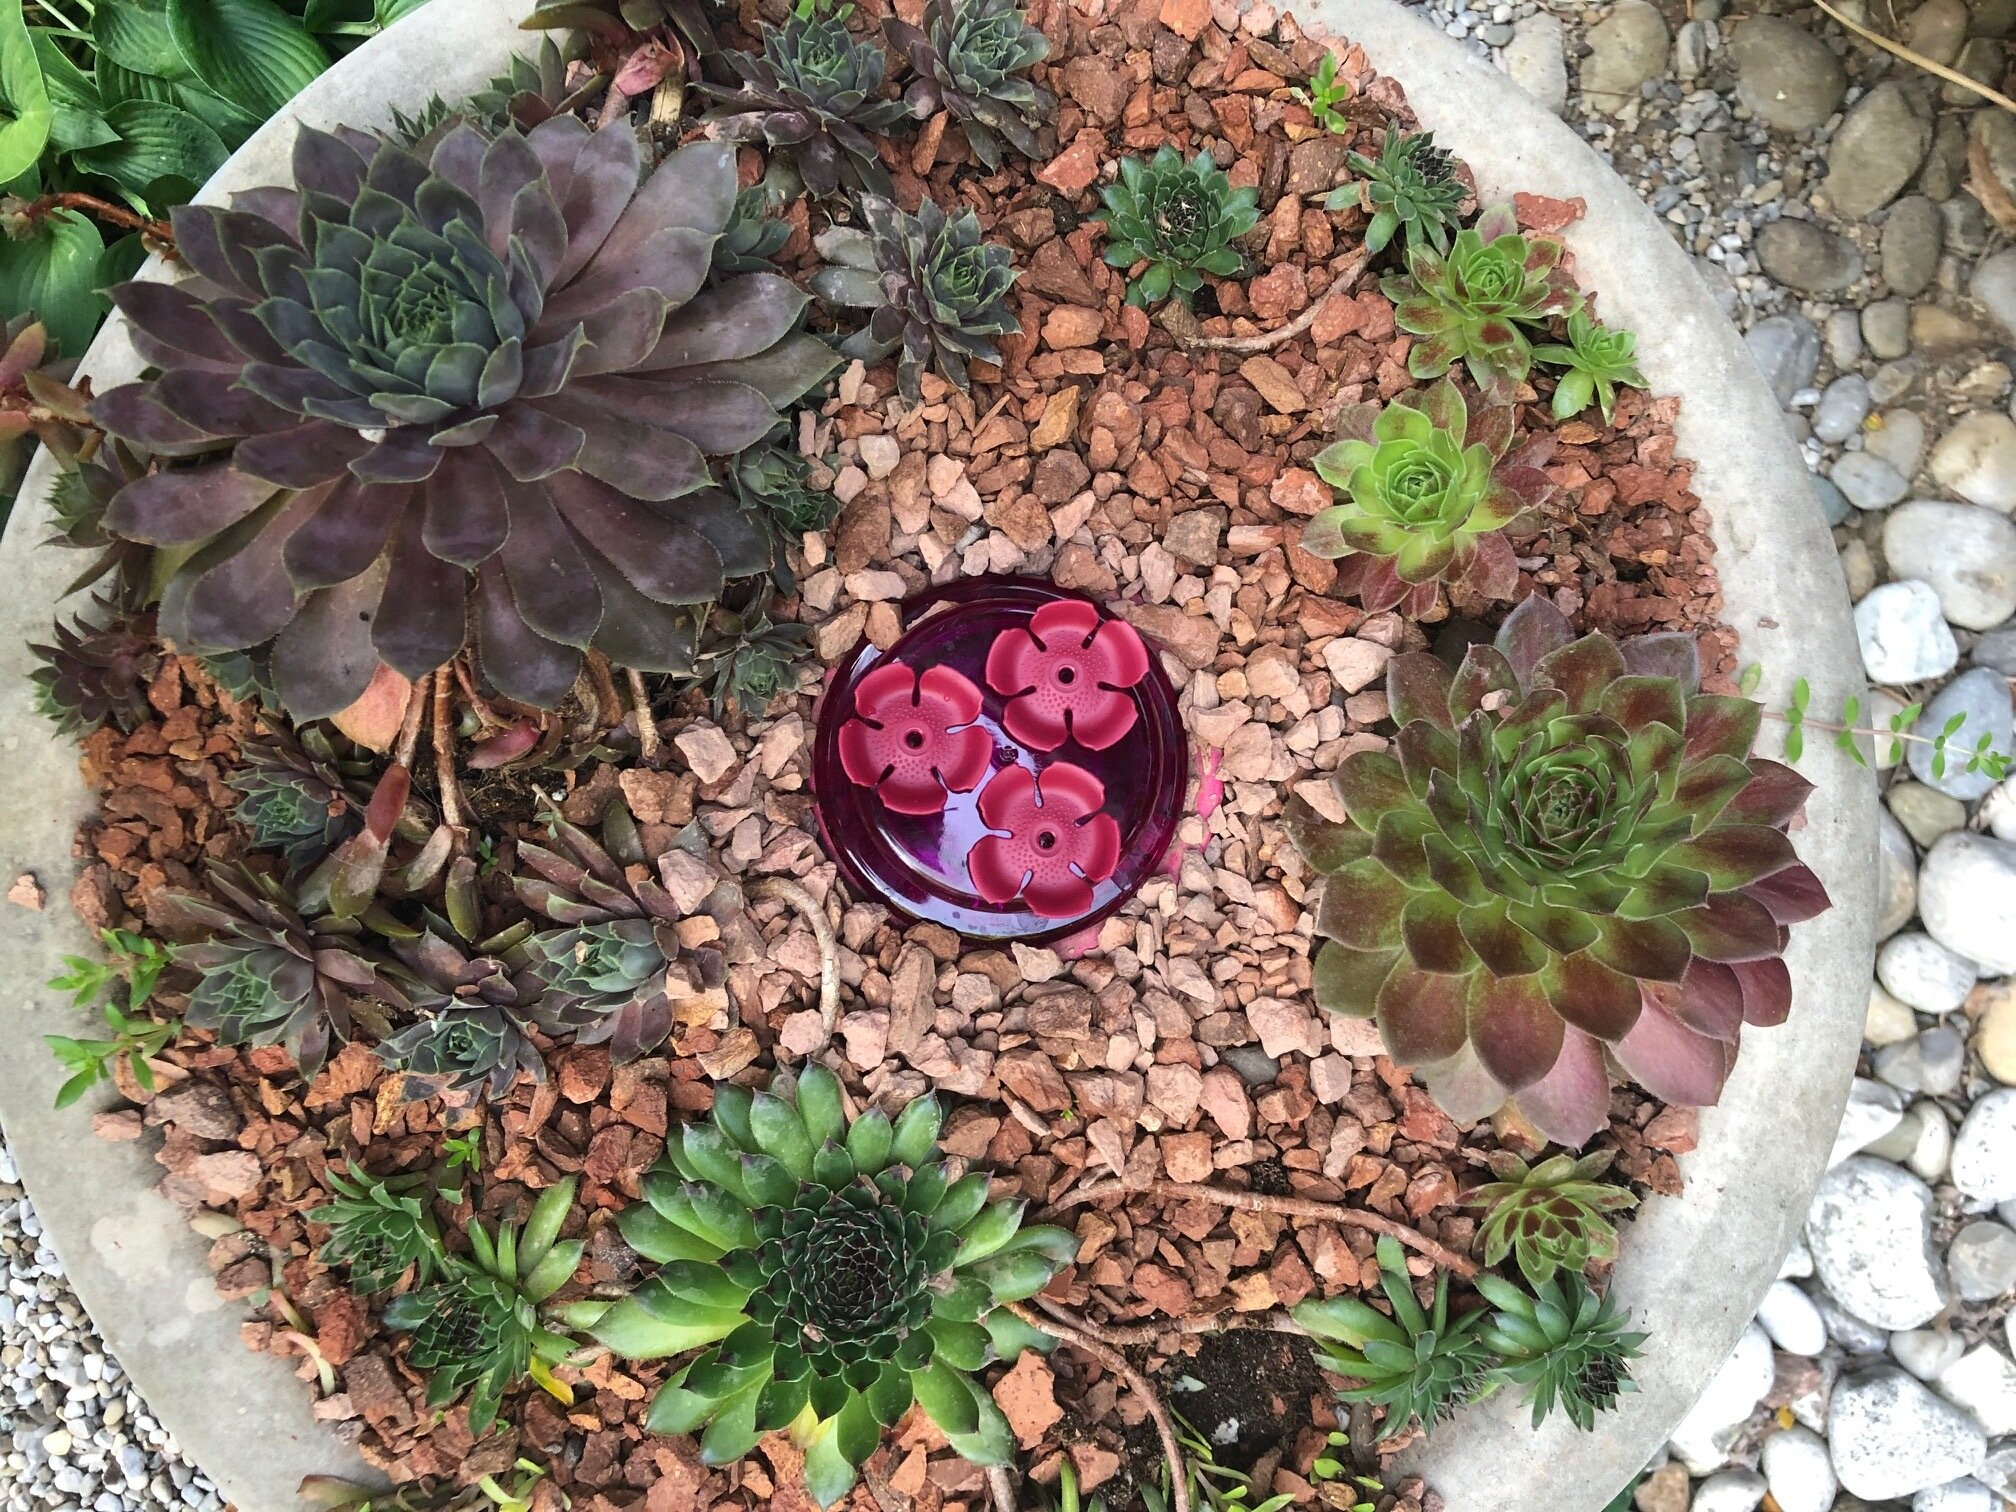
An old bird bath converted to a succulent planter with a twist – a Perky-Pet handhold/tabletop hummingbird feeder is buried in the stone. The set-up was designed as a potential stage for hummingbird photography.
So with all this in mind, and with an old leaky bird bath sitting empty in the yard, I figured it was a good time to create one of these popular planters.
We’ve had the planter for several years and, besides replacing some of the succulents last year after a brutally cold winter, it has become a focal point along our pathway. I can’t say that it has attracted many hummingbirds over its time, but I’ll keep experimenting with different hummingbird feeders to find one that keeps them coming back.
This small round hummingbird feeder fits the succulent dish perfectly.
A more detailed shot shows the vibrant colours of the stone, succulents in the DIY birdbath conversion.
I happened to have the small hummingbird feeder designed to teach the tiny birds to eat out of your hand.
Converting birdbath into succulent planter
The project was simple and involved just a few items that I had around the house, and an electric drill.
1) First, I drilled about five holes through the bottom of the fibreglass bird bath to allow good drainage.
2) Then, add pea gravel in the middle area where the hummingbird feeder sits.
3) Next, surround the pea gravel with store-bought cactus soil and mix it with pea gravel to keep it loose and well draining.
4) Now it’s time to plant the succulents around the edges of the bird bath, mixing large and small.
5) I added some sedum that was already growing in the garden
6) I also had a curved wire that looked perfect as a hummingbird resting stop, so that was placed in the container but far enough from the feeder not to interfere with any hummingbirds that might be feeding while in flight.
7) I filled the little hummingbird feeder and placed it in the middle of the succulent container.
8) Finally, red chipped clay stone was placed over the soil as a mulch and a nice clean backdrop for the succulents. The stones help to keep water from splashing up dirt onto the succulents and gives the whole container a more desert feel.

How to care for a succulent dish (birdbath) garden
Caring for a succulent dish – in this case a birdbath – is simple. Succulents do not need a lot of water. In fact, too much water would be the main reason for their demise.
Think desert landscape and you’ll know how much you’ll need to water your dish. I rarely water our succulent dish. Instead, allowing our summer rains to get the job done with the occasional watering works well.
Providing good drainage is probably the most important step you could do to ensure the survival of the plants.
Ours is planted is an area close to the house that gets mostly morning sun into early afternoon.
For more on gardening on a budget, check out my in-depth article here.
Gardening on a budget links
Ten money-saving tips for the weekend gardener
DIY Bark Butter feeder for Woodpeckers
DIY reflection pond for photography
Click & Grow is ideal for Native Plants from seed
Remove your turf and save money
Hiring students to get your garden in shape
If you are interested in backyard birds, please consider signing up for my backyard birds newsletter. The sign-up page is at the bottom of my homepage. Not only will the newsletter provide in-depth articles on attracting, feeding and photographing backyard birds, I am also working with local artisans to provide discounts on incredible bird-related feeders, houses and other goodies backyard birders will love. In addition there will be regular giveaways , including gardening books and birding items.
This page contains affiliate links. If you purchase a product through one of them, I will receive a commission (at no additional cost to you) I try to only endorse products I have either used, have complete confidence in, or have experience with the manufacturer.

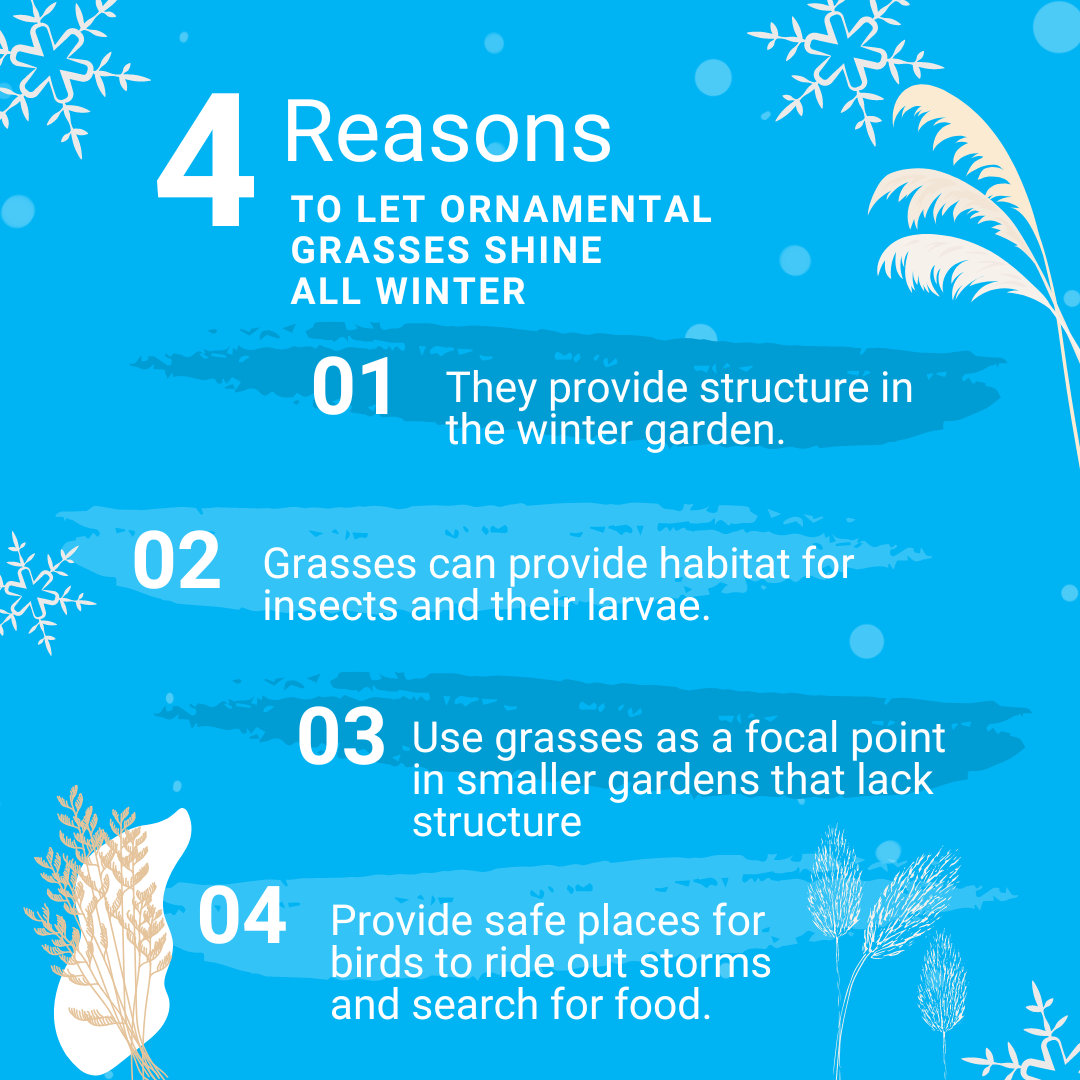
Why leave ornamental grasses standing through winter?
Ornamental grasses have become popular additions to our gardens for summer and fall interest, but they really come into their own in winter where they add structure and even movement in the winter garden.
Grasses provide structure and habitat for the garden in winter
There are two reasons I leave our grasses standing all winter. First, wildlife – from insects to birds – benefit from the standing grasses and second, I just love the look of the wheat-coloured grasses providing structure in the garden from the fall through to the following spring.
There is another important reason to leave the grasses standing, but we’ll get to that in a minute.
During the winter months, when snow is covering the ground, our grasses provide amazing structure to the garden and are often the first element I focus on when looking for photographic subjects. The results can range from high-key images of the delicate wisps of wheat-coloured grasses against a pure white background, to an image of a bird tucked away in the grasses waiting out a heavy snowfall.

Red Squirrel among the Northern Sea Oats in winter.
In the early part of winter, capturing the seed heads poking out from the snow is a favourite subject, however, as winter draws on, the seeds heads are either eaten by the birds or dispersed from the cold winds.
Be sure to take advantage of the early part of winter to catch images of the seed heads in the snow.
It’s also a good time to capture the spent flower heads from the Black Eyed Susans with snow caps on before the goldfinches strip the seeds from the flower heads.
Are ornamental grasses perennial?
You may ask if ornamental grasses are annual or perennial? The answer is, of course, it depends. But it’s safe to say that most ornamental grasses you purchase are hardy perennials and will return year after year. Most ornamental grasses are very hardy but a few, including the large red- or purple-coloured fountain grass (Pennisetum setaceum) that is popular to use in containers, is a fast-growing – up to 4-feet – annual in most areas. It is actually hardy in tropical zone 9.
Because most ornamental grasses are perennial, they will require cutting down when they have expired. There is no problem leaving perennial or annual grasses up through the winter. Both will provide structure and beauty throughout the cold months.
Annual grasses, including the annual purple fountain grass, can simply be removed and discarded in the spring along with the cuttings of the perennial grasses.
I like to pile them on top of a natural compost heap to give the birds an opportunity to take the grass to build their nests. I also stuff handfulls of the dried grass in the suet holders in spring for the birds to take as nesting material.
More on Ornamental grasses:

Northern sea oats close up covered in snow.
Grasses help form the structure of a winter garden
Ornamental grasses might be the last thing you think of when looking for winter structure and interest in the garden. Typically, we look to evergreens to form the basic structure of a winter’s garden. Not everyone, however, has room to plant large evergreens such as spruce, pines or cedars.
That’s when ornamental grasses rise to the challenge.
Small enough to suit even the most compact gardens, these grasses can provide four-season interest with winter, arguably, being the time they shine the most. In many gardens, they are the only non-woody plant still standing, and their tan colour helps them stand out against a snowy or just drab winter background.
They can also add movement when the winds of winter blow, and their vase-like structure adds another dimension to our garden.

Miscanthus still standing tall after an early snowfall. Notice the “flower heads” are still intact. Later in the winter birds and strong winds will make them disappear.
A third reason to leave your ornamental grasses
There is another very important reason to leave grasses standing throughout the winter, and that is to protect the roots of the grasses from extreme temperatures, especially the constant freezing and thawing that is common over the course of our winters.
If you are like me and fall garden clean up amounts to putting away the hummingbird feeders, patio umbrellas and garden chairs, then you’ll benefit from a buildup of leaves around the plants which will form a nice layer of insulation around the roots of the grasses. The grasses will often fold in on themselves as well, providing additional “winter mulch” for the plants, wildlife and insects that count on the grasses for protection and habitat.

The Miscanthus grasses in the foreground help to give the garden structure and interest even if they are covered in heavy snow.
This insulation layer will help keep the roots from experiencing the freeze-thaw cycles that can uproot some plants, especially if they are newly planted and the roots have not yet set in completely. Or, if you recently planted a clump after dividing a larger clump of your ornamental grasses in the fall.
This is also the area around the roots where insects will burrow in to survive the winter or lay eggs for next spring.
It’s not uncommon to see Juncos and other insect-eating birds foraging around the leaves at the roots of our grasses looking for insects and larvae.
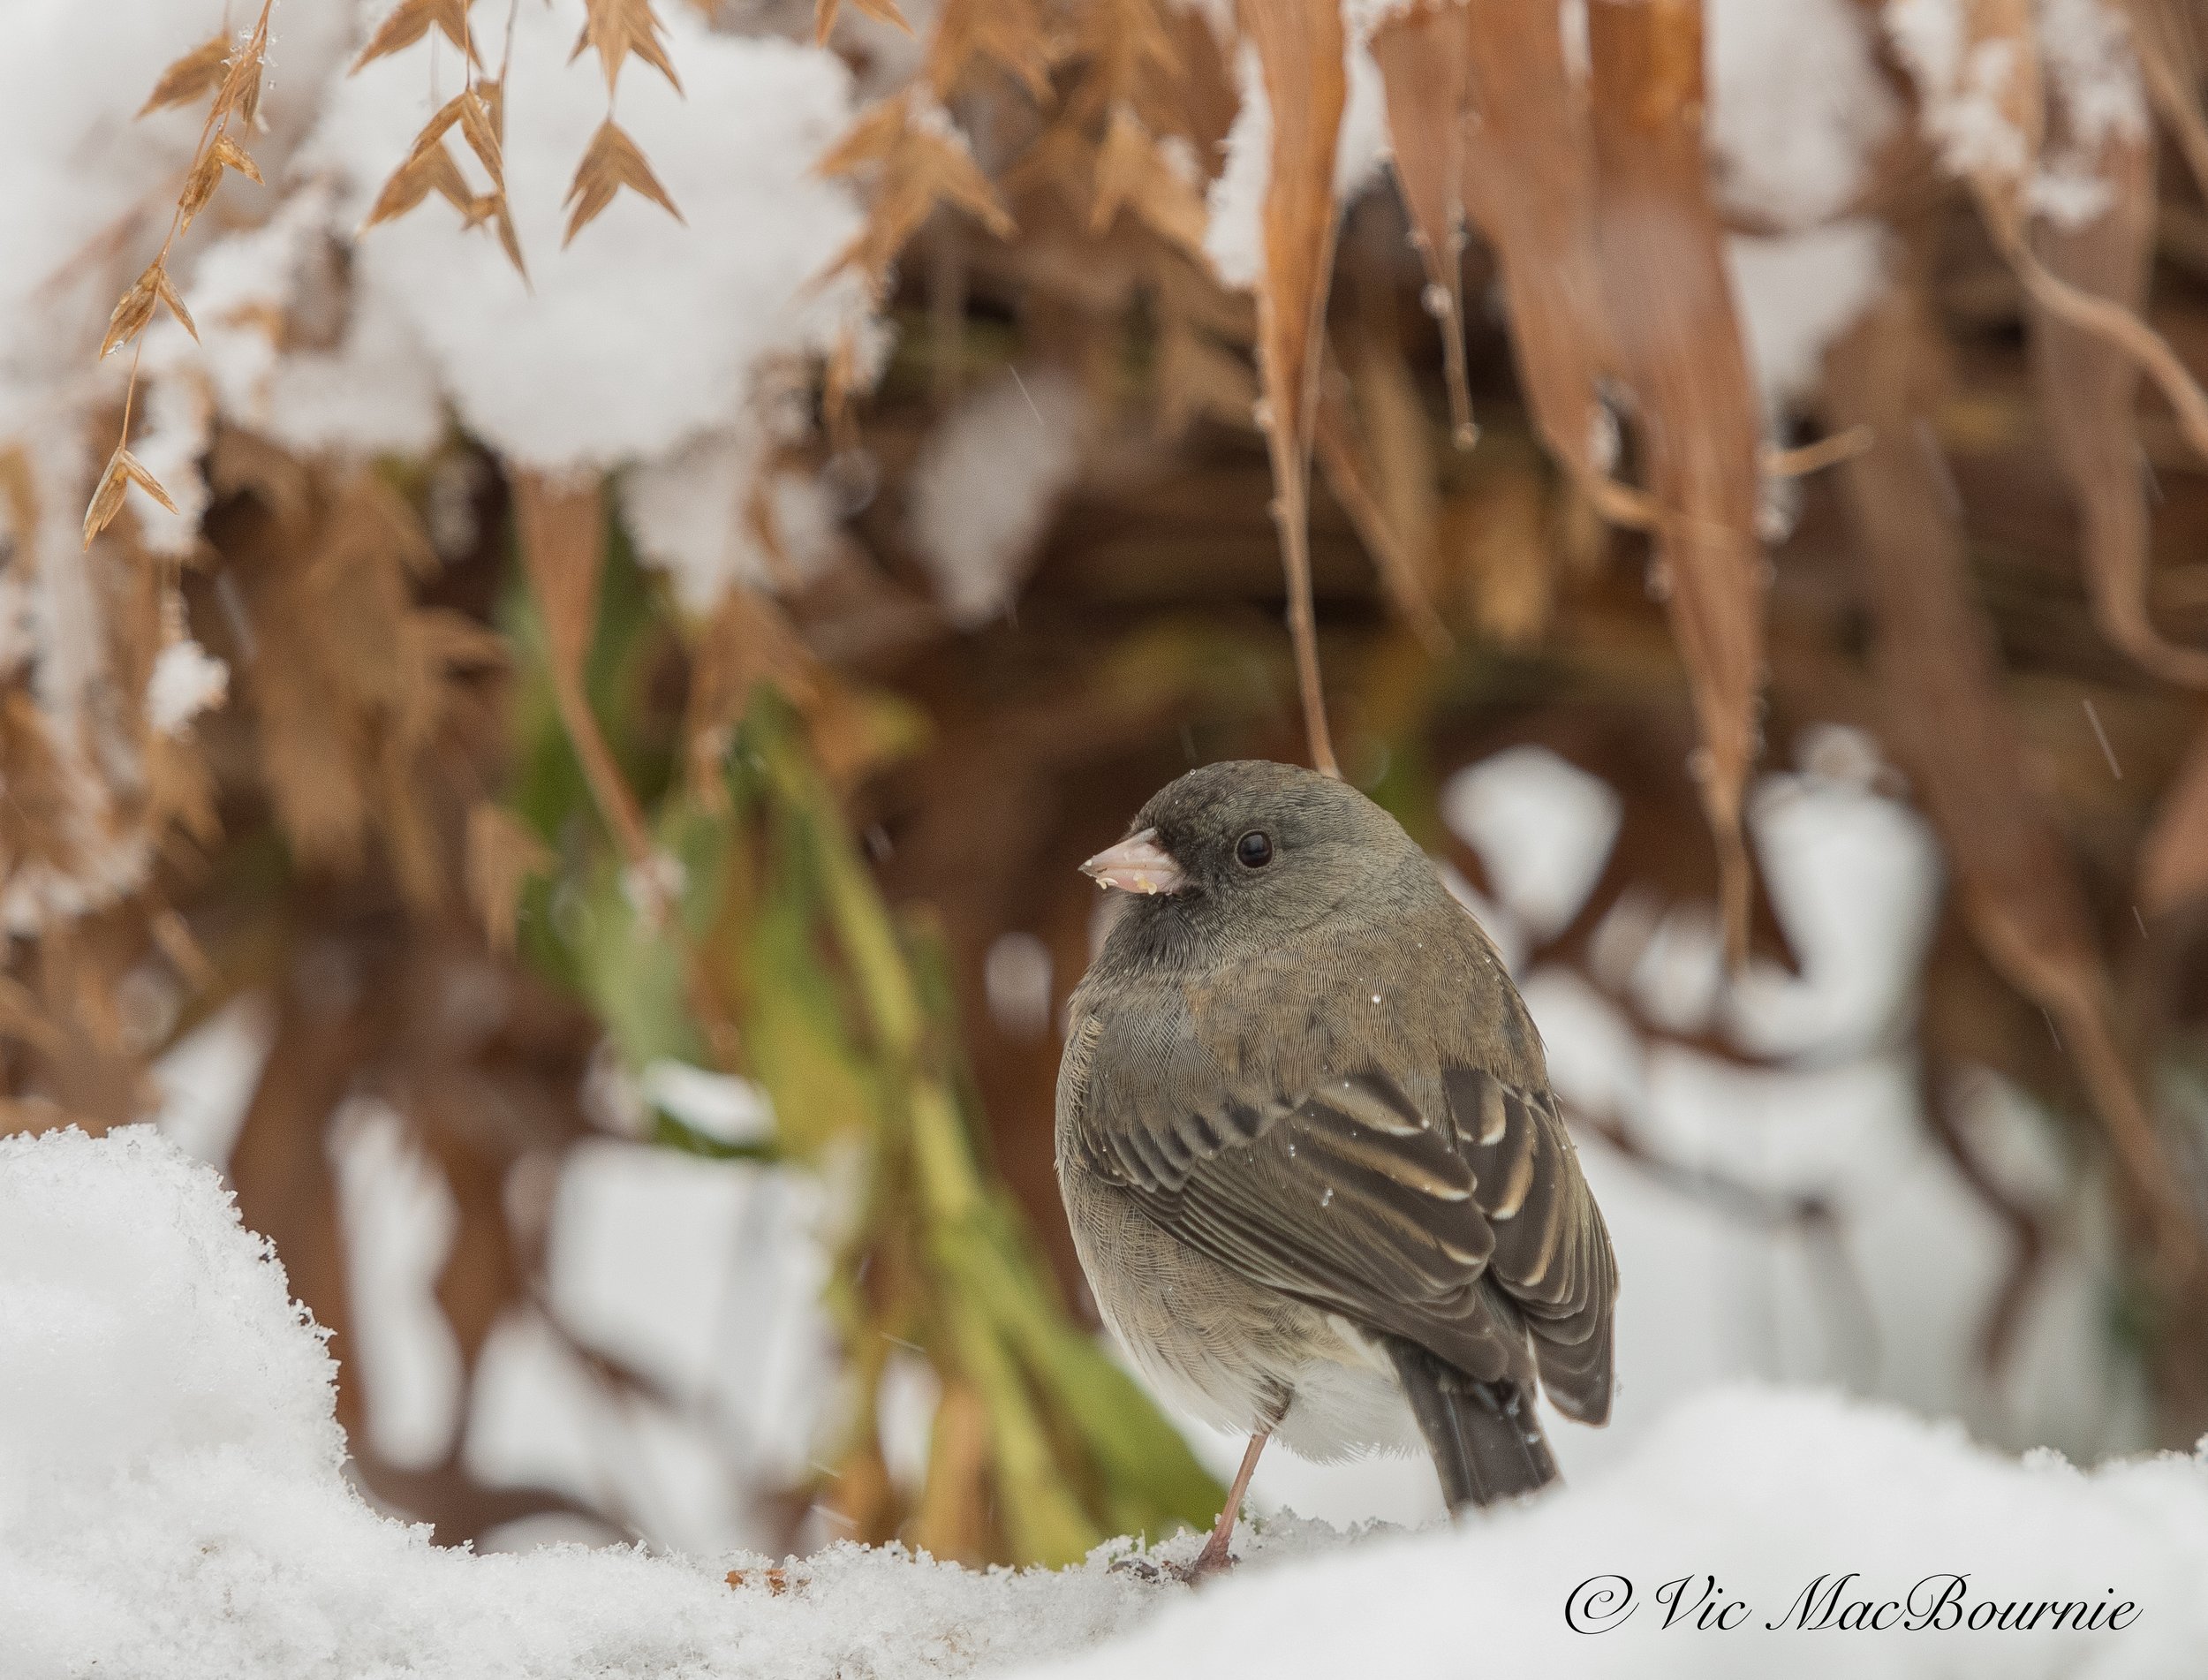
A Dark-eyed Junco among the Northern Sea Oats during an early snowfall.
Ornamental grasses can be a haven for birds in winter
The larger grasses that form sturdy upright branches can provide protection for birds in winter. I have seen birds go into the thick grasses during winter storms to escape the high winds and extreme cold. Some of the grasses get bent over and form a perfect perch for the birds.
Ornamental grasses would not be the first places the birds choose to ride out a winter storm, but if large evergreen trees are scarce in your neighbourhood, tall grasses would probably provide the next best natural shelter.

Snow laden grasses stand out against the stark background.
Best Ornamental grasses for winter interest
Some grasses are definitely better than others for winter interest. Some of the smaller grasses are covered early by snow and others are not vigorous enough to stand up to the harshness of our winters.
Look for native grasses whenever possible to provide the most benefits for wildlife and ensure you are not contributing to invasive non-native grasses spreading into natural areas.
The miscanthus grasses are particularly good for winter interest. They stand over six feet tall in summer with their feathery upright and very attractive pinkish seed heads. In winter, ours usually get knocked down to about four-feet high, allowing them to still stand above even the highest snow accumulations.
The stems turn a lovely beige-tan colour with the beautiful plumes lasting well into winter.

A combination of a garden light and a hint of Japanese Forest grass (Hakonechloa) makes for an interesting winter scene.
I also find our smaller fountain grasses to be excellent in the first half of the winter before the snow gets too high and buries the plants. But even a tiny bit of the grasses peaking up through the snow can result in a lovely, delicate photographic image. If you are searching for images, look for a single grass blade or grouping of three delicate beige grass blades forming an arc in the snow. If the seed head still remains, it’s a pure bonus.
The hybrid fountain grass Karly Rose is a larger fountain grass that carries lovely pink seed heads in late summer and can withstand more snow in winter before it is buried.
Panicum grasses are also a strong performer with great winter interest.
Calamagrotis Karl Foerster, a popular grass used in both commercial and residential landscaping is another grass that works well in the winter landscape. It’s upright habit and dense growth keeps it performing well into winter even in areas with high snowfall.

These grasses poking out of the snow work nicely with the white birch trees.
Photographing grasses in winter
Grasses, either covered in snow or mostly buried in winter’s ground cover, can be a rewarding photographic experience. But it’s usually not as simple as grabbing your camera and snapping a picture.
Successfully capturing the beauty of grasses in winter involves a number of factors that need to be considered.
The key to success is recognizing the amount of snow in the image. If you are photographing wisps of delicate grasses against a background of snow, it’s important to maintain the delicate look of the image. This would be an example of a high key image where the photograph has a clean white background with just a delicate hint of colour.
To create this image we want to “open up” our lens to allow more light into the scene.
What does this mean and how do you do it?
Shooting a snowy (or white sand beech) scene will trick the camera into thinking there is an incredible amount of light available. As a result, the camera will reduce the amount of light hitting the sensor (film) and give you snow that is very blue or, in the case of black and white photography, very grey. We’ve all seen the Instagram images of a lovely snow scene where the snow is blue and the real subject is too dark.
This is just the result of the camera doing what it does and using the metering system to create a “middle grey” image of the scene.
To compensate for this situation, and ensure the snow stays white, photographers say we have to “open up.” What they mean is we have to add back the light the camera wants to take away from the scene.
Today’s modern cameras are very good at recognizing various lighting conditions, but an abundance of snow is too much for most camera meters.
Below is an example of a typical underexposed snow scene. Compare it to the image below with the proper exposure.

An example of an underexposed snow scene where the snow turns grey or blue as opposed to holding its clean white look.

The same image shows a properly exposed scene where the white snow maintains its proper colour.
Escaping the blues: Simple solutions to photographing in the snow
The solutions to getting white snow are simple.
• If you are shooting in a program mode, (SP, AP or P mode) where the camera is automatically determining the proper exposure, try using the +1, +2 or even +3 compensation override to add the light back to the subject and make the snow white.
Be careful not to add too much compensation or you will (blow out) or take away the detail and texture in the snow. (If you are shooting a snow scene with a lot of blue sky, it’s unlikely any compensation would be necessary.)
• Possibly the easiest way to get the proper exposure is to go to the camera’s programmed shooting modes and look for the snow or sand/beach modes. Use these modes to photograph the snowy landscape. These modes automatically account for the brightness and make adjustments to keep the snow white. You may, however, have to use the camera’s compensation function (maybe +1) to tweak the scene depending how much snow is in the image.
In addition to the snow/sand modes, many of today’s compact cameras also include an “art mode” that allows the photographer to experiment with more artsy images. Set the camera to “high key” to create a delicate, ethereal look that might suit your image perfectly. This would work in a situation where you are moving in close on just a few strands of grass with a pure white background.
• Finally, if you are shooting in manual mode, get the camera’s suggested exposure and then use the +1, +2,+3 compensation to find an exposure that looks right. You can just check the back of the camera to get a feel for how the final image will look.
Bracket your snow scenes for best results
Getting properly exposed images in winter can be tricky, so it is probably a good idea to use bracketing whenever possible.
Bracketing is a process where you tell the camera to shoot a series of images at different settings – most often three images – where one image follows the camera’s suggested meter reading, another is a stop over and the final is a stop under. The result are three images where you have the opportunity to pick the one that works best for you.
I would suggest setting up the bracketing function before going outside so that you don’t have to fiddle with it in the cold.
Of course, some of these adjustments can be made in Lightroom or photoshop after you have taken the images, but it’s best to get it right in camera.
With a few simple adjustments to your approach, there is no reason to put the camera away during winter. Your garden takes on a completely different look in winter and its an opportunity to capture the delicate beauty of winter.
It’s also an opportunity to see the potential weaknesses in your garden’s structure. A picture never lies. Use your winter images to improve the garden structure come spring.
It’s just another good reason to buy more plants.
Use a camera with a viewfinder when shooting in the snow
It can be extremely difficult to see what you are photographing if you are using a camera without a viewfinder and being forced to use the camera’s LCD screen. If you are going out to shoot in the snow, either choose a camera with a built-in viewfinder or consider purchasing a separate viewfinder for the camera. The are usually a few you can choose from that would work with the camera.
There are also attachments available that can fit over the back of your camera to shade the LCD screen.

Pentax Q review: Why you need one in 2024
Just how small is the Pentax Q? This image of the camera being dwarfed by a chipmunk is a good indication of the size of the camera.
Fun camera for garden and wildlife photography
The Pentax Q might be tiny, but it takes a back seat to no camera in its class.
This full-featured miniature camera, first released in 2011, boasts a very nice interchangeable lens system ranging from a fisheye all the way up to the 35mm equivalent of a 70-200 f2.8 telephoto zoom lens. Even the 70-200 fits in the palm of your hand, but has the telephoto pull to capture wildlife in the garden.

This sunset image was taken with the Pentax Q7 and hard-to-get 08 wide angle lens.
The entire system fits into a tiny package. And when I say tiny, i mean tiny.
If that’s not enough, these cameras come complete with a set of features, filters and shooting modes any full-sized DSLR or mirrorless camera would be proud to boast about. Add surprisingly good ergonomics for a miniature camera that was originally advertised as looking completely at home on the end of a keychain.
Sounds weird right? Maybe, but keep reading to find out how this camera went from a weird distraction in 2011 to one of the coolest camera in the years that followed.
For more images taken with the Pentax Q, check out my Pentax Q photo gallery.

Image shows how small the Pentax Q is beside this tiny chipmunk.
What more can you ask for with the Pentax Q?
How about a system so small that you can fit two Q camera bodies, at least three lenses ranging from wide angle to a 70-250 f2.8 telephoto, filters and even a Fuji X10 and Lumix point-and shoot camera in a Lowepro camera bag meant to handle a single DSLR camera body and a small wide angle zoom.
Forget the camera bag, a Pentax Q complete with the 70-250mm f2.8 lens equivalent will slip into a coat pocket or a woman’s purse. Heck, throw in the 50mm equivalent fast F1.7 prime and a miniature wide angle or fisheye lens into the purse or coat pocket too – there’s still plenty of room.
• If you are looking for a Pentax Q, or the many lenses in the system, or any other piece of hard-to-find photographic gear, be sure to check out KEH Photographic for an outstanding selection of used equipment at great prices.

The Pentax Q combined with the exquisite TTArtisan optical viewfinder is the perfect combination. For more on the TTArtisan viewfinder, check out my full story here
TTArtisan optical finder is the perfect accessory
If the lack of viewfinder on the Pentax Q is a little annoying, the TTArtisan optical viewfinder is an exquisite accessory that not only adds utility to the camera system but also makes the setup look awesome taking it to a whole new coolness factor. For my complete review of the TTArtisan 28mm finder, check out my comprehensive review here.
Click on the link for my comparison post between the two viewfinders pictured below.

Two external optonal viewfinders on the Pentax Qs. The viewfinder on the left is the TTArtisan 28mm finder and the one on the right is the tiny Lichifit 28mm finder. Both have their place on the Pentax Q line of cameras. Click here for my post comparing the two viewfinders.
And what about the photographic results?
Well, I think the results here speak for them self. I took the Pentax Q and three lenses out for an afternoon of fall photography and came away with more than a few keepers.
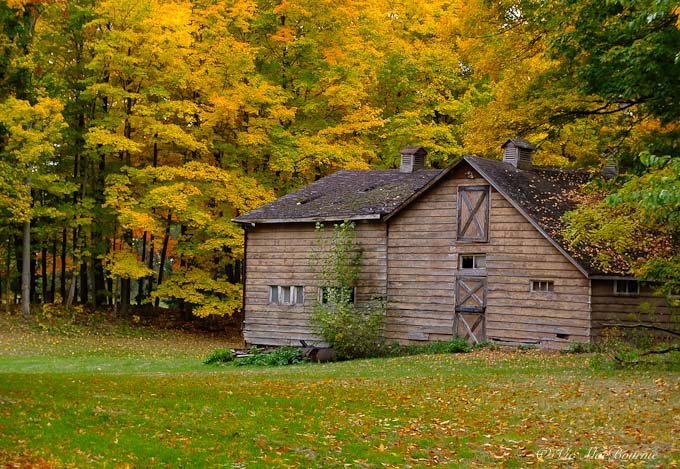
Image taken with the Pentax Q of an old home set among the fall colours.
Fall colours in a wetlands taken with the Pentax Q.

Fall leaves ablaze in vibrant colour.
Are these fall images of high enough quality that you would want to supersize into posters or murals, or use for professional work with a client? Probably not.
But, for everyday use with the end result of making prints in the 4X6 to 11X14-inch range, or – more likely these days – posting on social media accounts or on web sites – these images can stand up to the scrutiny. They are sharp, contrasty with great colour even at moderately higher ISO settings.
Maybe it’s the fine Pentax lenses or the fact that Pentax took the bold decision to remove the anti-aliasing filter from in front of the sensor that resulted in this sharpness, but whether you are viewing jpegs right out of the camera or Pentax’s RAW images, after a little post-processing, there’s no short changing the results here.
A view from Hamilton Mountain over the city during fall with the Pentax Q.
But let’s not kid ourselves. The sensors on these cameras are tiny.
Tiny sensors but great results
In fact, the original Q’s sensor was a back-illuminated CMOS, 1/2.3” (6.17 x 4.55 mm). The Q7, introduced later in June 2013, uses a larger 1/1.7” type sensor (7.44 x 5.58 mm). Both fell into the point-and-shoot-sized sensor and many critics in those days simply wrote the camera off as nothing but a toy.
Heck, even some of the lenses were called “toy” lenses. Probably not a great marketing decision by Pentax at the time.

The colour extraction filter (set to purple) helps to isolate this salvia flower petal against the grey leaves. The Pentax Q allows you to choose from a host of colours to isolate in your image. You can even choose to isolate two separate colours.
Pentax Q boasts big features in a tiny package
There isn’t time to get into all the features packed into these tiny cameras. Besides, I’m not really big on all the gimmicks camera manufacturers pack into their cameras to convince buyers they have to buy the camera. But, there is no denying that the features in this camera would be welcome in some of the more expensive DSLRs offered at the time.
It sports a 12.3mp sensor, it’s own dust removal system, ISO settings from 125 - 6400 and a sensor shift shake reduction system to help users get sharp images even in low light. Some of the lenses even have built-in neutral density filters.
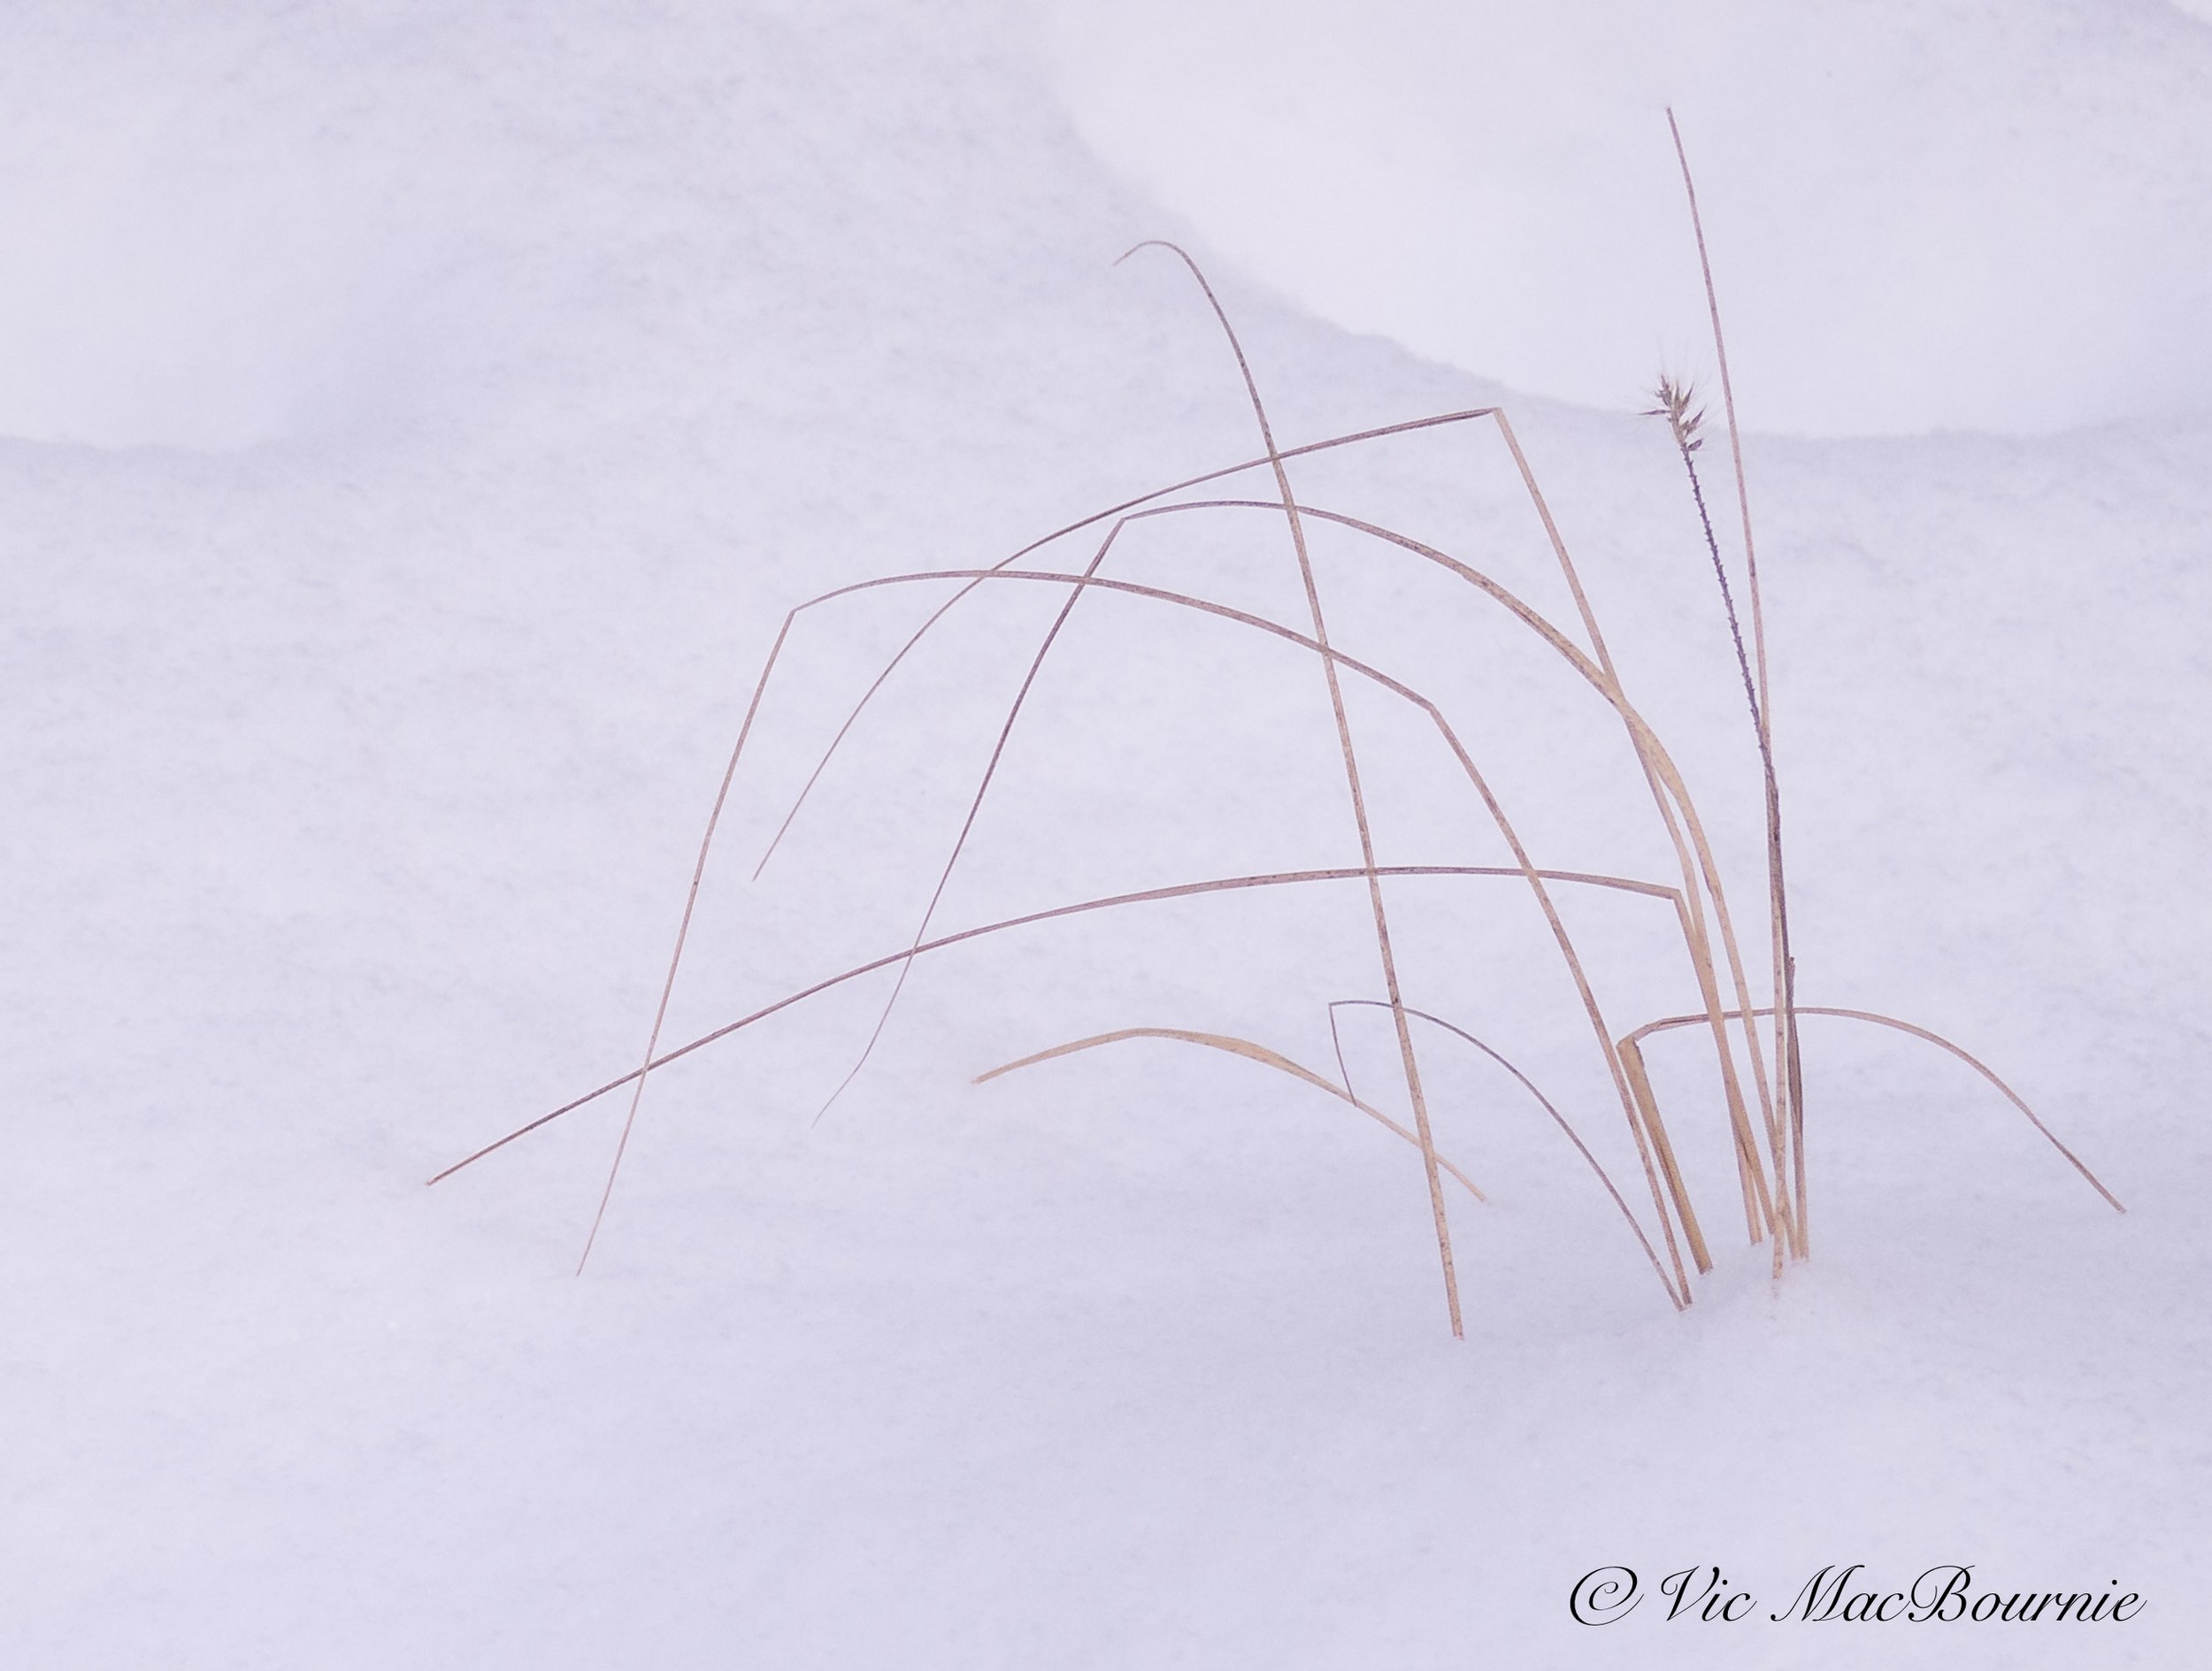
This is an extreme crop of at least 50 per cent with the Q 06 lens. I think the image stands up well despite the crop on the small sensor.
How about HDR, a built-in intervalometer, creative “bokeh” blur settings, single and multiple colour extraction filters, and highly adjustable B&W capabilities to name just a few. It shoots RAW, has fully manual settings and for Pentax lovers the green button will bring you back to normal exposure no matter how far off you may have wandered.

Another image taken with the Pentax Q and the 06 lens with a minimal crop.
Are you thinking these cameras might make for a nice street photography package? I took the Pentax Q with the 01 Prime lens (47mm equivalent) to an emergency animal hospital, while I waited for my dog, Holly, to get her new pacemaker checked by the cardiologist. (Yes you read that right).
• Here is a gallery of results of that one-hour wait at the Emergency Animal Hospital shot with the 01 prime (50mm) in a photojournalistic style with the camera’s B&W mode.
• For my full story on The Pentax Q as a lomography camera with the 07 Mount Shield Lens go here.
• For my full story on the Pentax Q and 110 vintage lens.
This thumb grip link works nicely on the Pentax Q and makes the camera even more ergonomic. The one linked to does not block the dial and your thumb clears the LCD so it does not block your view.

Five reasons to buy a Pentax Q today
Even today it remains among the smallest and most competent mirrorless cameras with interchangeable lenses.
They are now very inexpensive on the used market. If possible, buy an entire package including several lenses to get the best bang for your money.
You are already sitting on some great Pentax or other manufacturer’s (Olympus, Canon, Nikon) vintage 35mm lenses and all you would need to use them on the Q is an inexpensive adapter.
You love small, exquisitely built cameras and lenses and don’t care about mega sensors.
You love the idea of turning your 50mm macro into a 250mm macro or the 100mm f2.8 portrait lens into a 500mm super zoom for about $35.
You have a set of the exquisite Pentax Auto 110 lenses and are itching to use them on a modern digital camera. See my full review of using Auto 110 lenses on the Pentax Q

New England Asters taken with the Pentax Q's blur mode that allows you to control bokeh in the images.
Even the pop-up flash is cute, cool and quite useful.
Lot’s of fun, creative and artistic stuff here to keep even the most bored photographers, inspired.
Did I mention the fully customizeable creative wheel thingy in the front of the camera to control favourite creative settings fast and conveniently. Yea, there’s that too.
(I’ll put a link at the bottom of this post from Pentax Forums for anyone who wants to get into the fine details of the camera system.)
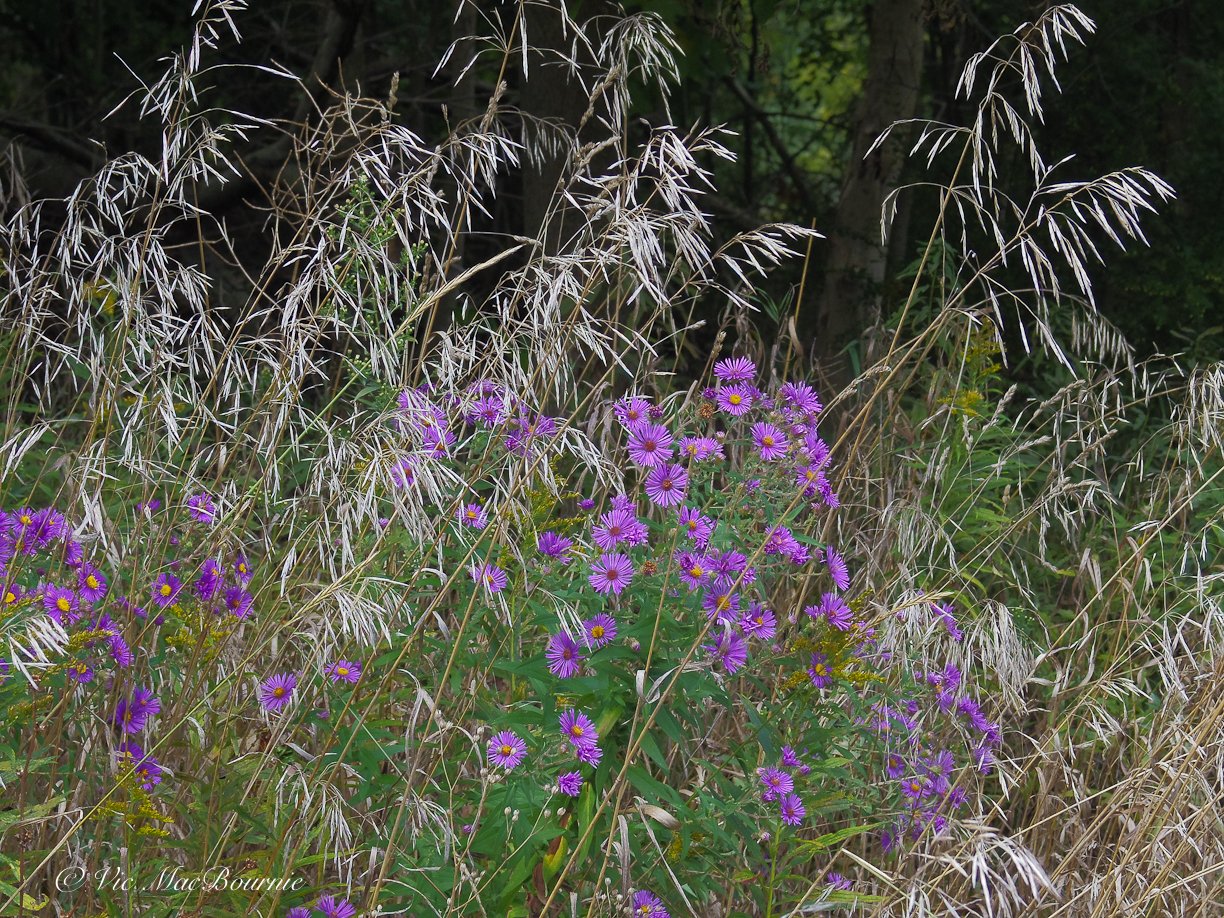
This image of native New England asters and grasses shows the detail that the Pentax Q is able to achieve.
How long was the Pentax Q manufactured?
Over the years this miniature camera system, that had a relatively short life span ranging from the original Q’s introduction in 2011 to after the release of the Q-S1 in 2014, gained a cult-like following.
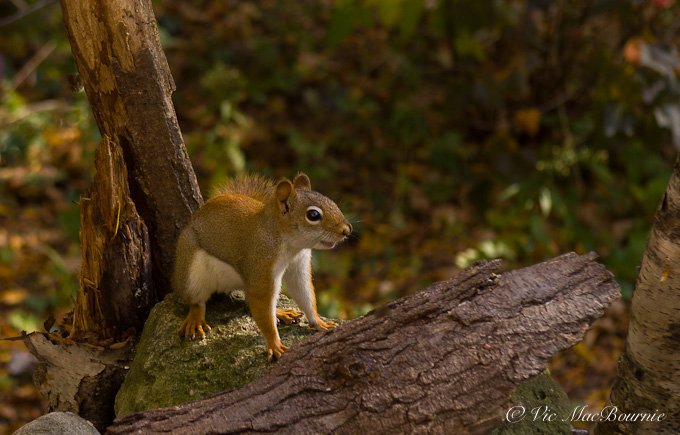
This Red Squirrel was photographed with the Pentax Q and the 06 telephoto lens wide open at F2.8. The lens can deliver soft backgrounds if the subject is far enough away from the background.
Eight Pentax Q lenses deliver top quality results
Pentax introduced a total of 8 miniaturized lenses beginning with the excellent 01 standard Prime with a focal length of 8.5 mm (47mm equivalent for the Q, Q10, and 39mm for the Q7, Q-S1 with the larger sensors.) More lenses followed: 02 standard zoom (27-80 range equivalency, 23-69mm), 03 Fisheye (17.5mm, 16.5mm), 04 Toy wide angle lens ( 35mm, 33mm), 05 Toy lens (100mm, 94mm), 06 Telephoto zoom (83-249mm, 69-207mm), 07 Shield mount lens (63mm, 53mm) and finally the 08 Wide Zoom (21-32mm, 17.5-27mm).
The final lens, the 08 wide angle, is a quality-built lens but extremely expensive. It still remains a highly sought after lens with a big price tag even on the used market, if you can find one. I have just recently acquired this lens and can confirm that it is an outstanding lens both in its photographic qualities as well as its build qualities. (See image below.)

Moss on rocks in woodland taken with Q07 and 08 wide angle zoom lens.
I should not forget another group of lenses that were made for the Q years before Pentax engineers even knew digital cameras were ever going to be a thing, and that’s the Pentax Auto 110 line of lenses. With a simple adapter, these tiny lenses look like they were made for the Pentax Q. For my complete story on using these lenses on the Pentax Q, be sure to check out my story here.

Blue Jay photographed with the Pentax Q and the 06 telephoto zoom, which is approximately 70-250mm in 35mm equivalence.
What happened to the Pentax Q cameras and lenses?
Was the Pentax Q system made of simply inferior products meant for the trash heap almost from the day it was announced?
Far from it.
In true Pentax style, these cameras were not only ahead of their time, but engineered to the finest Japanese craftmanship. The result was a hefty price tag (about $700 plus with a basic lens), one that most serious amateur photographers – who they were originally aimed at – just weren’t ready to spend for such a small-sensored camera. That initial cost would rise as you add other lenses to make the system more complete.
In those days, not unlike today, the size of the sensor meant everything. This was before social media took off so photographers were more focused on obtaining the highest resolution images possible.
Fast forward to today when 95 per cent of all digital images never get past Instagram, Facebook and Vero, where the size of the original image plays only a small part in the camera-buying decision.
Our cell phones are just one example of how the size of sensors mean less and less to the end user. Convenience and the coolness factor are far superior to size these days.
The Pentax Q colour extraction filter can pull out colours out of an otherwise B&W image. Here, I pulled out red and purple.
Where can you buy the Pentax Q?
One quick look on Ebay.com and you’ll find your share of Pentax Q cameras and lenses. Most are from Japan where the Pentax Q has always been a very popular camera. The difference is that on today’s used market, you can pick up the camera and a couple of lenses for a fraction of what you would have paid back when they were available in stores.
In fact, when I purchased my Fujifilm X10 back in 2011, the Pentax Q had just been released. The owner of the camera store urged me to get the Pentax over the Fuji. I loved the little Pentax camera but could not justify the cost of the system. The Pentax Q cost as much as the Fuji but the X10 came complete with the excellent 28-112mm equivalent built-in lens. By the time you added a few of the Pentax Q lenses, you were into a large financial investment and one I was not willing to make at the time.
I suspect, I wasn’t alone.
Today that close to $1,000 investment can be had for maybe $200 for a camera and a couple of lenses. I was able to purchase an Original Pentax Q and standard O2 lens on Kijiji for $60 Cdn. – a real sweet deal. And Ebay is full of great deals – maybe not quite that good but still very reasonable.
But that is just the beginning.
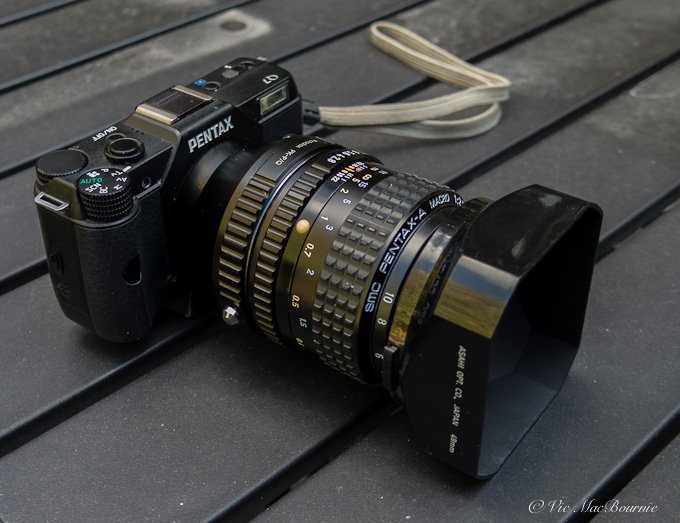
The Pentax Q shown here with the Q to Pantax K adapter and a 50mm f2,8 macro lens which becomes a 250mm macro lens with the 5.6 crop factor of the Q's tiny sensor.
Adapters make the Pentax Q useful in 2024
A lot has changed since Pentax first introduced their miniaturized mirrorless little gem.
If it was great then, new, inexpensive adapters have turned the Pentax Q into one of the coolest little mirrorless cameras on the market.
In 2012 Pentax announced the Adapter Q for K-mount lenses with a 5.6X crop factor. This little device changed everything, but it took time for other manufacturers like Fotodiox and K&F (amazon link to list of adapters) to follow and change the world of Pentax Q owners.

The 50mm f2.8 macro lens on the Pentax Q making it a 250mm with the crop factor.
The small sensors and the fact it is a mirrorless camera makes adapting vintage – even ancient lenses – to the camera simple and inexpensive.
There are adapters to mount classic Pentax, Olympus, Nikon and Canon 35mm lenses to the Pentax Q. But it doesn’t stop there. There is an inexpensive adapter for Pentax’s venerable classic 110 camera with its interchangeable lenses. These sweet little miniature lenses will fit the Pentax Q now too.
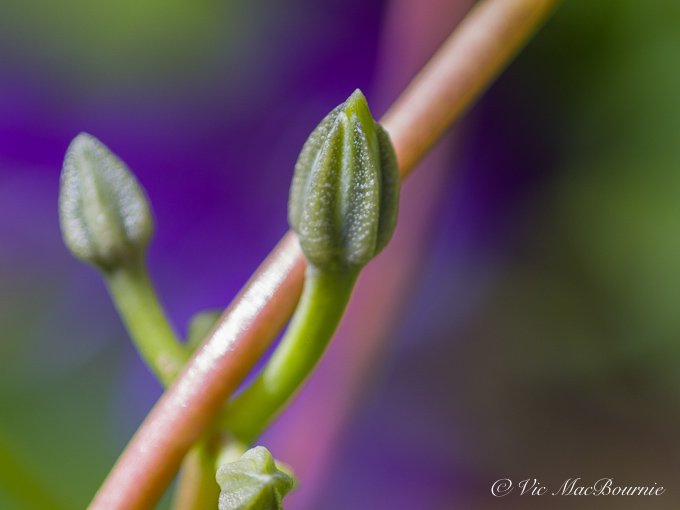
This image shows how much magnification the 50mm macro can achieve on the Pentax Q. And, just look at that lovely background. Not bad for a tiny-sensored camera.
Oh, and did I mention those ancient miniature D-mount lenses from your dad’s or grandfather’s 8mm cinema camera. Yep, they have an adapter too. Cost me $3 for the adapter and I have four d-mount lenses I found attached to old 8mm cameras I had been using as paperweights that I can now attach to the the Q and explore the world around me.
I will be doing separate posts looking at these lenses as well as breakdowns of some of the Q-mount lenses.
And, if you are looking for cinematic quality in your images, what better than a lens from the 1930s-40s to create the mood.
Oh, and did I mention C-mount cinema lenses…
You get the idea.
A $30 adapter and a couple of my classic Pentax K and Ka lenses together with the Pentax Q turns the system into one that we could only dream of a few years ago.
The crop factor is about 5.5X which means normal lenses become telephoto equivalents and telephoto lenses become super telephotos.
Let’s do some quick math.
My older 50mm f2.8 macro becomes a 250mm f2.8 macro lens. My 100mm F4 becomes the equivalent of a 500mm macro. My 40mm pancake becomes a 200mm pancake lens. My 300mm F4.5 A* becomes a 1500mm F4.5 telephoto. My old 75-150mm zoom becomes a 375mm to 750mm zoom.
Just imagine the possibilities.
I remember always wanting the A* 200mm macro lens in its day, but it was the price of a small used car. Today, I can mount a 50mm F2.8 A manual focus macro lens on the Q and get a 250mm macro F2.8 equivalent lens. It’s like I’ve died and gone to heaven.
I’ve included a few example images above of of the Pentax 5omm in action just to get readers thinking about the possibilities. Notice the beautiful soft background the lens was able to achieve even on a point-and-shoot-sized sensor.
Stay tuned for future posts on the Pentax Q where I’ll provide more specific insight and examples of what can be done with these ancient lenses.
If you are into fine details (and after you finished reading this complete post, of course) check out this post at Pentax Forums. It’s all here in fine detail.)
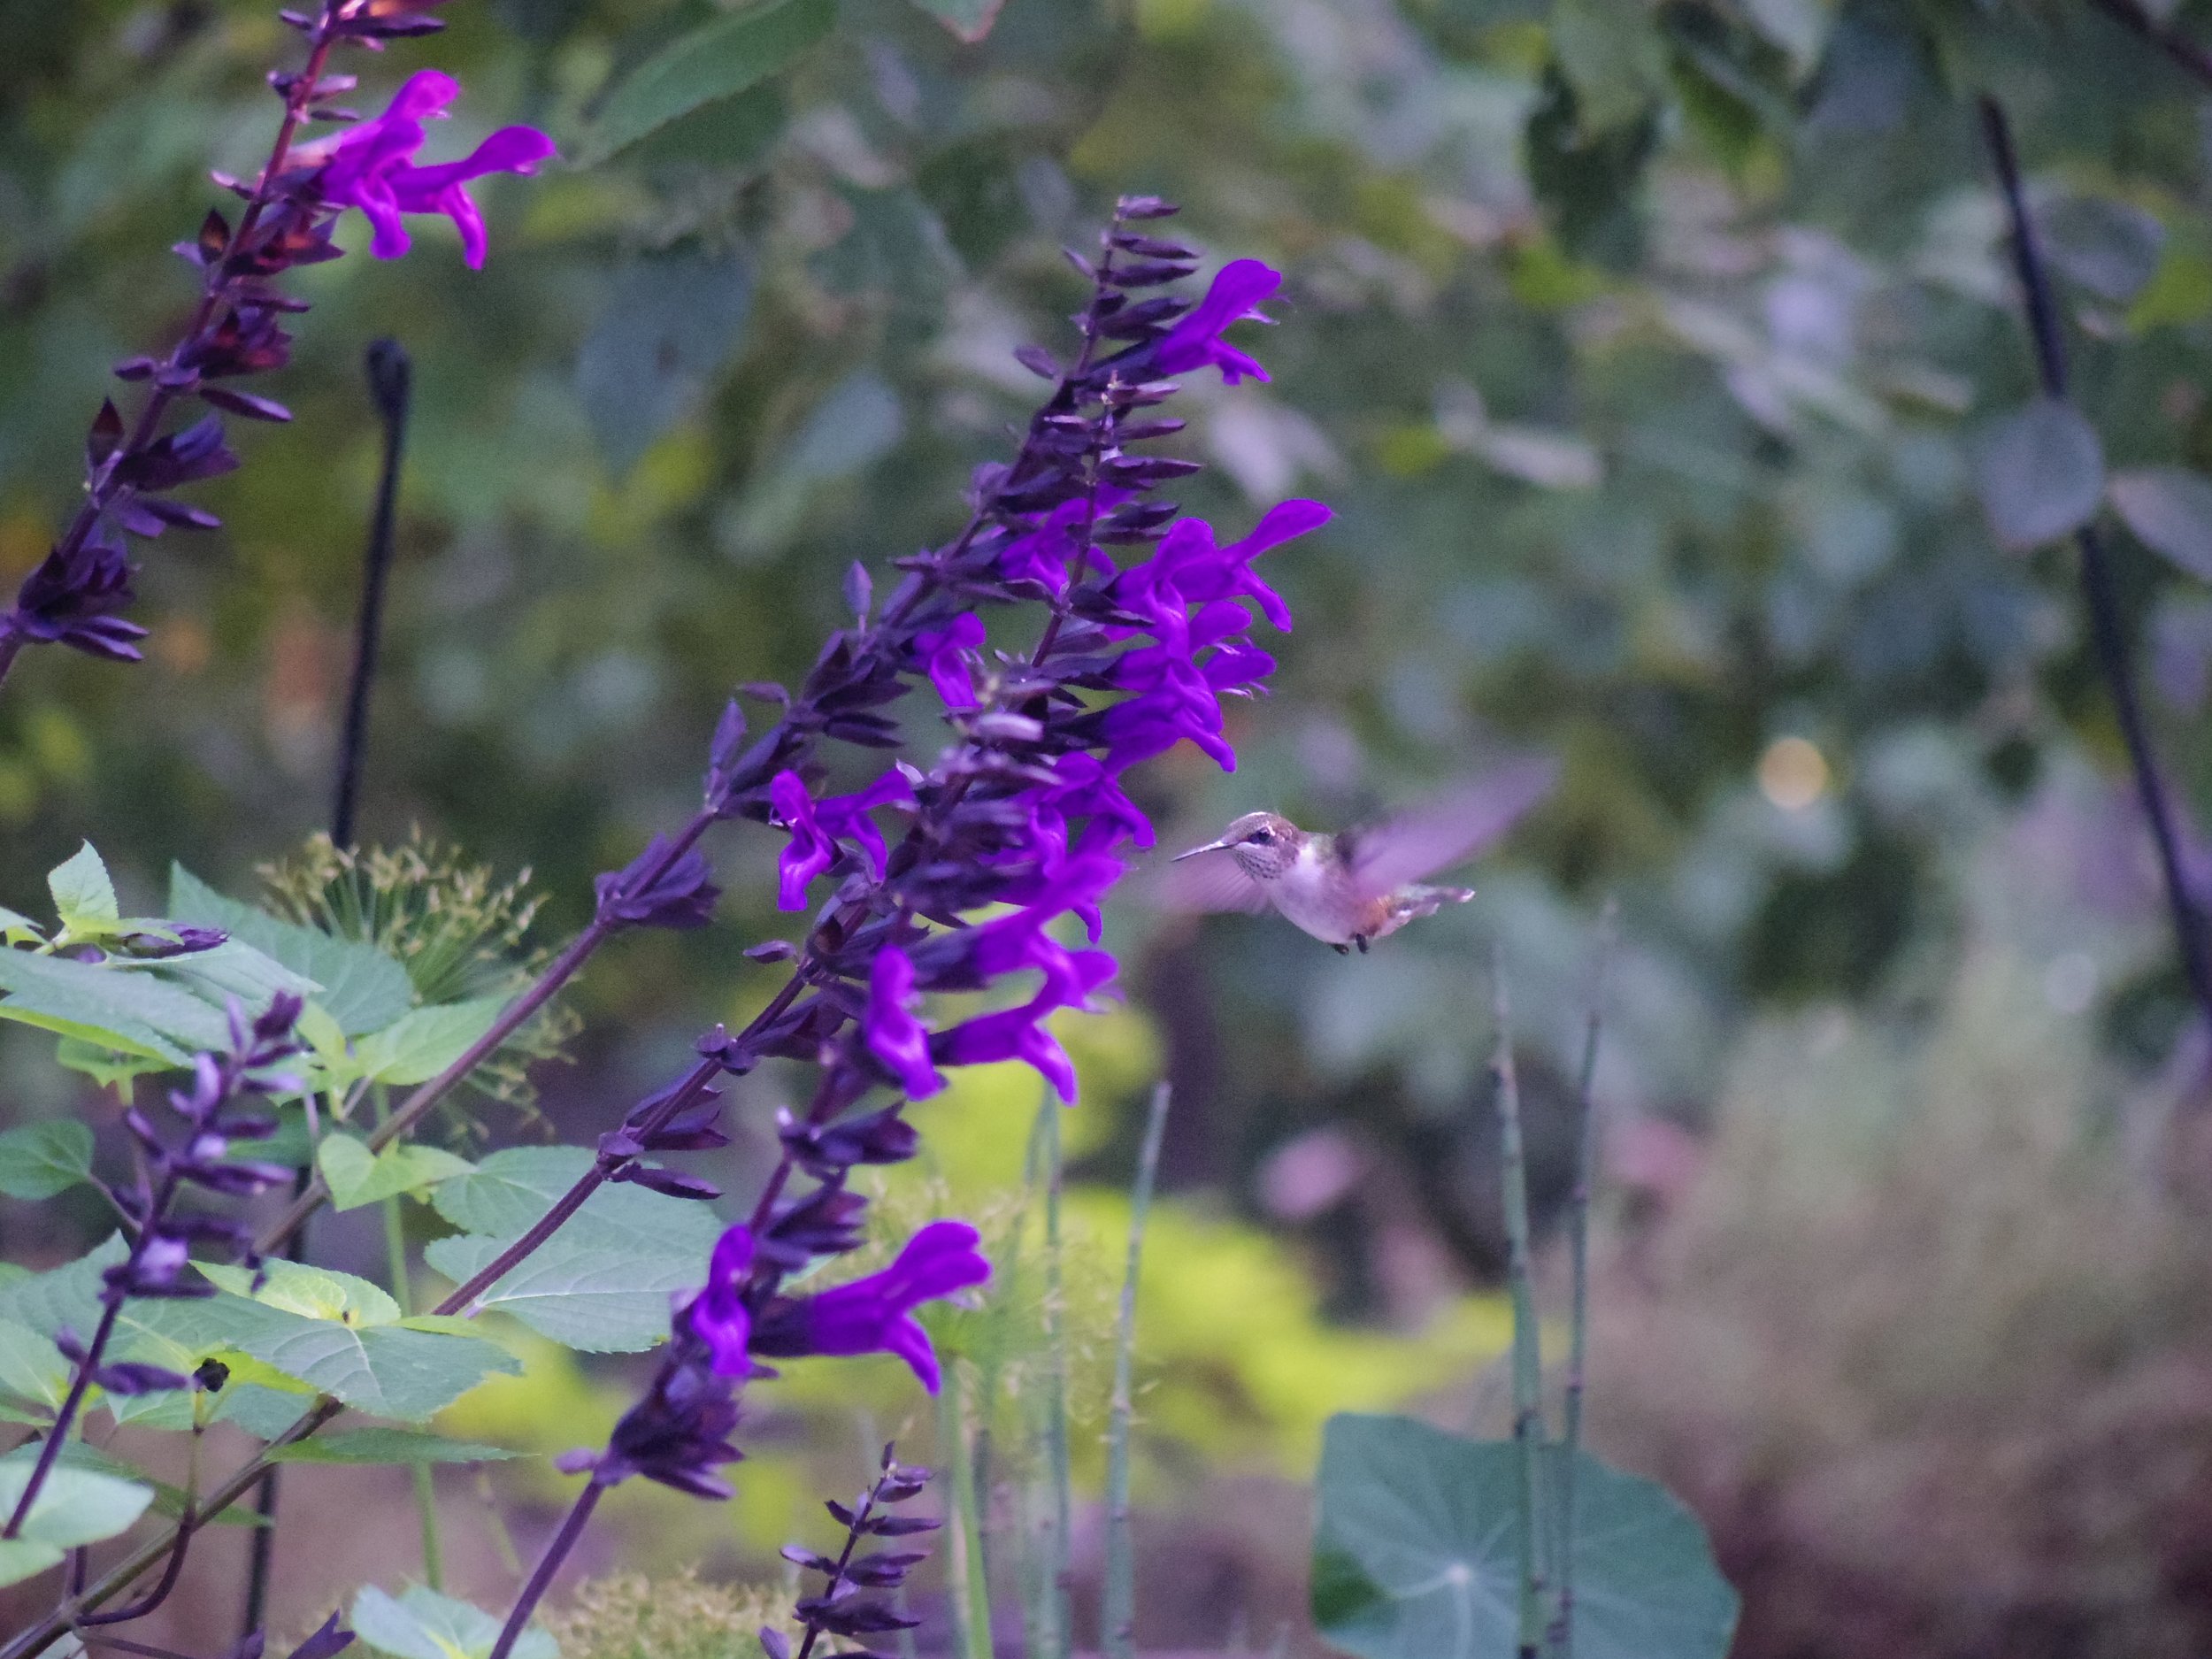
Hummingbird and salvia shot with Pentax Q and 06 telephoto zoom.
Is the Pentax Q worth buying in 2024 and beyond: Pros and Cons
Is the Q worth it in 2024?
Absolutely.
Is it the only camera you should pack in your arsenal?
Probably not.
Is it capable of getting great images for social media like Instagram, Vero, Facebook etc?
Absolutely.
Hello, World!
But the Pentax Q is far from perfect. It’s certainly beginning to show its age when it comes to focusing and where it lacks the latest technology. Trying to see the back LCD screen in bright light is near impossible and, although using the classic 35mm-style lenses with at adapter is super fun and cool, don’t be surprised if you struggle nailing the focus.
Yes, the Q has focus peaking and magnification factors to help with focus, but if you struggle to be able to even see the back LCD, you are not going to have an easy time focusing.
There is no built-in LVF (fiewfinder) to help frame the image. Well, I should not say there is no viewfinder. There is an optional viewfinder that works with the 01 Prime lens, but it’s expensive and not really all that great, according to users. It does look cool on the camera, however, giving it a real rangefinder look.
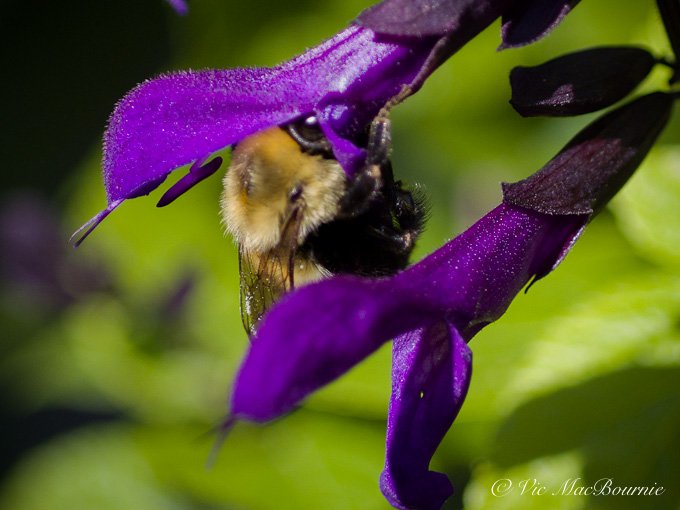
Bee on salvia taken with Pentax Q and vintage 50mm macro.
There are more issues with the camera and lens system that some users may think are worth noting, but with the price of these sweet, miniature cameras coming down as much as they have, it’s too easy to overlook the minor problems and just enjoy the camera and all it has to offer.
For a fraction of the price of a new smartphone, you can walk into a party with your Q and turn some heads.
At the same time, take it out on the street and you can virtually go unnoticed with this tiny camera.
Slip it in your purse or pocket and you’re ready to go anywhere. Even out in the garden for a morning of shooting. Heck, these Pentax Qs even have a macro feature on them for capturing our favourite flowers, bees and butterflies.

Author Profile: Vic MacBournie is a former journalist and author/owner of the award-winning website Ferns & Feathers. He writes about his woodland wildlife garden that he has created over the past 25 years and enjoys sharing his garden photography with readers.

Karen Hutton: Exploring the world of macro/close-up photography
Karen Hutton’s creative approach to macro photography takes out the technical details that turn many new photographers away from exploring close-up photography. Her approach is perfect for garden photographers looking to create beautiful images.

Karen Hutton likes to use macro and close-up photography to tell a story.
KelbyOne course takes creative approach to macro photography
It doesn’t take long to see that Karen Hutton’s high-energy personality is contagious.
Her YouTube videos are a dead giveaway of her energetic approach to photography and life. And, it’s this high-energy approach to travel and landscape photography that has made her a popular speaker, educator and voice for photography.
She is a Professional Fujifilm-X Photographer, living in California where she spreads her love for her chosen profession to anyone who will listen.
• Click on the link if you want more on KelbyOne on-line photographic courses.
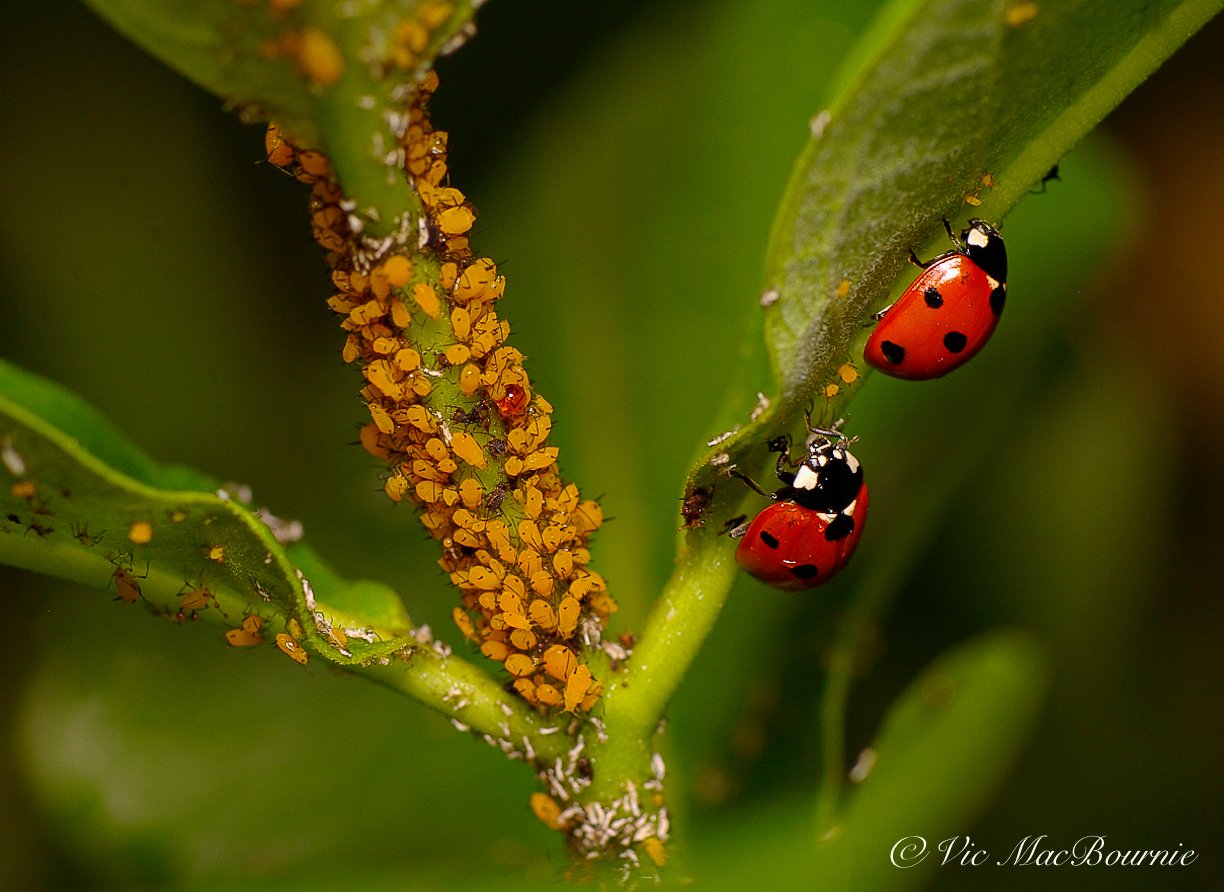
Lady bugs and aphids on Milkweed plants.
“I believe in discernment, truth, wisdom, strong artistic choices, love and the power of uplifting others,” she writes on her impressive website. “I believe that art is love made visible.”
Karen also believes in simplicity. When asked by Ferns & Feathers how her course would benefit someone who is inexperienced in the world of macro, she is quick to explain that her goal is to take the complexity out of macro photography. “It’s creative and meditative” she explains adding that
“It approaches macro in a less technical way, and more as: A way of seeing + thinking,” she explains. It’s “a way of telling stories; a way of being and of well-being; a way to understand beyond ourselves. Thus, (the course is) more an exploration that anyone can enjoy.” Karen explains.
“The course breaks down the stages of storytelling (like a filmmaker does) in a simple way that any photographer can use to shape their images in a more meaningful way. As a for instance, by finding relationships, then using the light to paint, bathe and wash your characters with it in interesting ways to create an emotional impact, you tell an interesting story with your images.”
Readers who don’t have an expensive camera and maybe count on their cell phone or a simple point-and-shoot compact camera are not left out from enjoying the macro experience.
“The course is built for anyone, regardless of the type of camera they have. It’s about a way of sensing, thinking and seeing… which is a different kind of approach and welcomes any kind of gear,” Karen explains, when asked about gardeners who like to take pictures with their smartphones or compact cameras.
Karen emphasizes the importance of telling the story of the hidden beauty of our gardens.
We how the beauty of our gardens by “telling (showing) the great stories found within the garden. Stories about what you love, how the various elements interact with one another – and finding meaning in all of it.”
If you want to experience some of Karen’s macro photography, take 5 minutes to watch her video in collaboration with Fujifilm on the Great American Road Trip. In this video she uses the road trip to explore the details found along the route.

Karen Hutton
It’s not hard to fall in love with her approach and her work. Whether it’s capturing the spirit of the Sierra Nevada mountains of her California home, intimate details of her travels to France and Italy, or capturing beautiful light of St. Thomas on the Hill in the Upper Sava Valley of Slovenia.
“A lifetime of chasing – and creating with – light began when I was 8 or 9,” she writes. “I had a vision about the transformational power of light, which ignited a sense of purpose that leads me to this day.”
Her outstanding images, humour and genuinely positive outlook, are inspirational to those looking to discover their artistic voices in photography.
If you are looking to upgrade your camera equipment and maybe purchase that macro lens you always wanted, be sure to check out the used camera equipment at KEH Camera Exchange. You can also trade in your old equipment to help defray the costs of your new, used equipment.
Macro photography in our gardens can be extremely rewarding. For more on shooting close-up images in our gardens, be sure to check out my comprehensive post on macro/close-up photography. I have also done a separate post here on flower photography.
But how does all this high energy translate into macro photography?
After all, The world of close-up photography demands the maker slow down, study the world in minute detail and find intimate compositions that can be almost invisible to the naked eye.
• Click on the link if you want more on KelbyOne on-line photographic courses.
In one of her many videos, Karen talks about the importance of discovering the natural world and the smaller details that are so easily overlooked.
“There is so much beauty that fills our world.” Karen explains. “And it comes at every shape and scale and texture. I am awestruck by amazing vistas and cityscapes, but as a citizen of the earth, I want to look, I want to appreciate the smallest components as well as the grand design.”

Karen Hutton’s on-line course turns the focus on creative macro photography.
Review: Karen Hutton’s hour-long macro/close-up photography course
I was fortunate enough to have taken Karen’s one-hour photography course on macro and close-up photography.
After viewing the on-line course on my laptop in the comfort of my home, I can say without a doubt that this course is aimed at people looking to experience the world of close-up photography in a creative rather than a highly technical approach.
It is not aimed at a master of macro photography. That’s not to say there is nothing for the experienced macro photographer to take away from the on-line course, Karen incorporates plenty of excellent tips and approaches to macro and close-up photography for even the most experienced photographers.
The course is, however, aimed at photographers looking to expand their creative horizons and experiment in a world they may never have explored to any great degree in the past.Technical explanations are kept to a minimum, there are no complex descriptions of using flash, and even discussions around lenses are kept to a minimum.
For those of us who are more gardeners than photographers, I think this course is the perfect introduction to macro and close-up photography.
It will challenge you to look at, and approach, your garden and photography in a new more creative way. Karen’s whole approach is to see macro photography as one part of a larger story that begins with seeing the subject in a wider context before moving in on the more intimate details.
It’s the ideal vision for our woodland/wildlife garden approach. Although the single flower is beautiful in itself, it is really just one part of the larger concept that makes up our woodland gardens. The native trilliums in our gardens, for example, depend on the tree canopy for their survival. The tree canopy, therefore, is part of the the trilliums’ and other spring ephemerals larger story and should be included in our story as we explore the details of our trilliums.
It’s an approach that tells a more creative and complete story, as we move in closer and closer to our subjects.

It’s storytelling in a very intimate way.
She refuses to get hung-up on the true definition of macro and, instead, shows how “close-up” photography can be captured with everything from a point-and-shoot camera, to a telephoto lens or a simple zoom lens with a macro feature. Most of us have at least one of these tools in our camera bag.
Karen begins the course by showing students how they can tell a story by moving from a distant view of their subjects through to the middle, medium and finally the more intimate macro or close-up views.
Along the way she uses images to illustrate her story-telling approach to close-up photography.
She touches on the importance of light, explaining the varying emotions that different light can evoke in an image.
She talks about exploring macro at home using everything from kitchen utensils and garden produce to backyard flowers.
Finally, she explores design and movement in close-up images, and wraps it up with the importance of capturing natural patterns in nature.

Macro on-line course is both inspirational as well as informative
In conclusion, Karen’s creative approach to teaching macro photography makes it more accessible to all of us. It inspires us to think about why we are trying to capture an image; why we even want to capture the image, and how we can best illustrate the intimacy of that moment.
Karen’s approach of using macro photography as a means to tell the complete story of our gardens is an approach that inspires us to look deep into what makes our gardens special.
“The course breaks down the stages of storytelling (like a filmmaker does) in a simple way that any photographer can use to shape their images in a more meaningful way. As a for instance, by finding relationships, then using the light to paint, bathe and wash your characters with it in interesting ways to create an emotional impact, you tell an interesting story with your images.”
If you are looking for technical expertise on lenses, lighting and how to obtain 1:1 images of your favourite flower, I suggest you may want to look elsewhere. But if you are looking to be inspired to take your close-up and macro photography to another level, Karen’s course might be the spark that ignites a whole new world of photography.
Karen’s courses are available at KelbyOne, The Ultimate source for Photography Education on the web.

What is the KelbyOne on-line photography program?
Before I explain the KelbyOne on-line photography program, let’s take a look at the founder of the program, Scott Kelby. I was introduced to his work many years ago when I purchased one of his incredibly informative Photoshop books from my local Costco. Since then, he has gone on to write a plethora of books and articles on everything from Lightroom and Photoshop to getting the most out of your iphone camera.
Scott is the brains behind KelbyOne, the extensive on-line photography educational program boasting more than 100 of the world’s best and most entertaining photographers sharing their knowledge and expertise with the photographic community and anyone looking to expand their knowledge about their hobby or their chosen profession. It’s all online and can be accessed from your computer, tablet or even from your phone. There is no need to leave the comfort of your home to gain a wealth of knowledge.
Courses on everything from travel photography, to portraiture, to creative landscapes and Black & White photography are just a few of the more than 900 on-line courses available.
Students can purchase courses individually for as low as $9.95 or by monthly subscriptions for less than $20.00. There is also a yearly membership for those looking for the ultimate learning experience. The courses offer something for everyone whether your are a beginner, hobby photographer, or a seasoned professional.
“Our goal here is to make learning something that you look forward to. This way you, our community of photographers, can move past the hurdles and bring to life the images that are stuck inside of you. We feel like the content has to be fun, cinematic, and inspiring, and taught by the most personable and experienced photographers in the industry,” states the KelbyOne site.
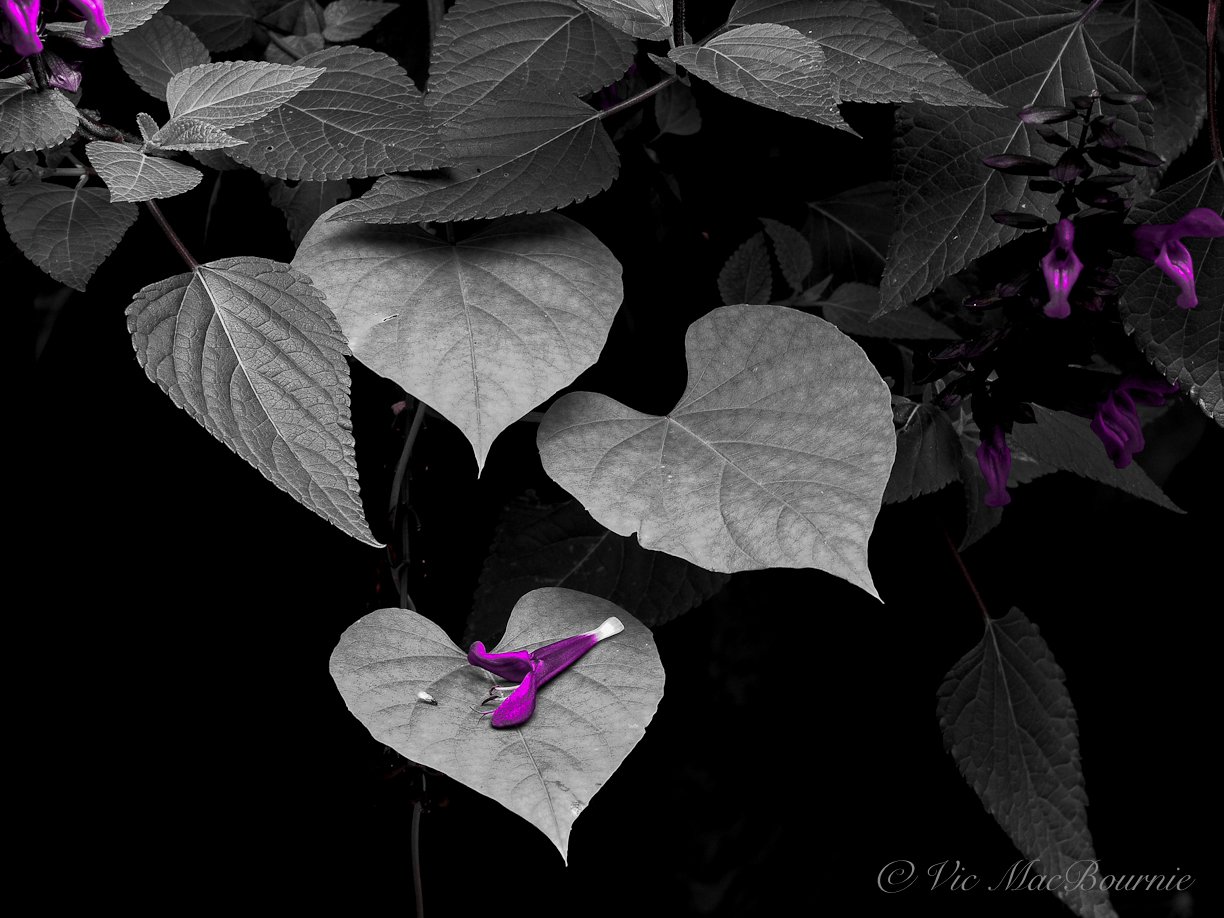
Get the most out of your compact camera: Ten tips to better photos
Getting the most out of your compact camera involves getting acquainted with the camera’s features, many of which can be hidden in menus.
Beginners should focus on scene modes for best results
Getting the most out of your compact camera is the first step to creating your best photographic images.
Hidden in the depths of many compact cameras are a host of creative filters, scene modes and special effects that most photographers either never explore in any meaningful way, or don’t even know their little camera offers these capabilities. Beginning photographers will benefit from learning how to take advantage of these filters and scene modes to get the most out of the camera.
Reconsider leaving your camera on automatic and explore the scene modes to maximize your results.
For more on Photographing your garden, be sure to check out my comprehensive post on Flower Photography in your Garden.

In this image, I used a in-camera filter available in most digital cameras that takes a B&W photo of the image but lets the user choose a colour or two colours that are displayed. In this case, the dark purple salvia flower was highlighted.
The best advice I can give is to:
Place your camera manual on the table beside your favourite couch and read it – several times. If it’s a digital manual, download it to your computer and keep your computer nearby. Keep it handy for the first two or three months until you believe you know every part of the camera and its features. (I like to flip through the manual while watching television.)
Leave the camera in the same spot beside the couch. Pick it up regularly and go through the menus learning the features and how to quickly access them.
Now go out regularly with the intent of using these features, filters and scene modes. Get comfortable with them to the point that you can access them quickly and efficiently even if they are buried deep in the menus.
Don’t believe what you read that you have to use manual modes like aperture and shutter priority. There is a time to use these modes, but often the scene modes will serve you better, especially if you understand what is happening to your camera when you use these specialized modes. Many camera manuals will actually provide a brief explanation of what settings are used on the camera in the various modes.

The macro mode in the Fujifilm X10 was used to capture this image of the forest floor. Photographing images like this is a great way to experiment with using the various features and modes in the camera.
Eleven tips to improved photography with compact cameras
Know your compact camera and how to quickly access menus and features.
Keep the ISO as low as possible. You are dealing with a small sensor that will get noisy (grainy) quickly in high-ISO settings
Use in-camera stabilization to help keep ISO levels low and images sharp.
Treat the camera like a DSLR and put it on a tripod if you are shooting landscapes to get the sharpest images possible with low ISO and a high aperture. Use the self-timer feature to set the shutter without touching the camera.
If you are using a tripod, turn off in-camera stabilization.
If you are using in-camera stabilization, use proven traditional methods to hold the camera steady, including bracing yourself against a wall or tree, pushing the viewfinder up to your eye to help brace the camera or using a monopod, say at a sporting event. No need to turn off the in-camera stabilization if you are using a monopod.
Gently press the shutter button rather than jamming at it to take the picture. Pressing the shutter quickly and with force may cause camera shake and make the photo look out of focus.
Use the burst feature to shoot multiple images of a scene to ensure one of the images is sharp. Use side-by-side comparisons in post processing to pick the sharpest image.
Consider setting the in-camera bracketing feature to ensure you obtain the best exposure. Obtaining perfect exposure is more important on a compact camera than it is on a larger sensored camera, because the smaller files cannot handle as much post processing.
Shoot in RAW whenever possible and if you are comfortable doing post processing in programs like Lightroom or Photoshop. If you don’t like processing RAW images, consider using the Raw plus jpeg setting to ensure you have the opportunity to post process an important image if necessary but still retain the more convenient jpeg image.
Take advantage of the scene modes provided by most compact cameras, but also take the time to learn what the camera is doing in these scene modes so you can make adjustments if necessary.

Here, a combination of macro mode and B&W mode is used to capture this image of the forest floor. Fujifilm’s X10 enables the photographer to experiment with B&W digital film including the use of B&W filters that darken skies or lighten foliage. Experimenting with these features helps to prepare you for the time when you need them.
What compact camera features should I focus on?
Focus on the camera features you use the most and get totally comfortable using them.
Garden photographers, for example, might want to get acquainted with, macro mode, sports /action mode, portrait mode, and pet mode. These are obvious features that come to mind but night-shooting mode including night portraits are shooting modes that you might want to get familiar with before you are forced to use them.
Macro mode is obviously a feature for garden photographers to get comfortable using. Just set the camera on the macro mode and go out into the garden to experiment getting up close to flowers and insects. Don’t wait until you come across a beautiful butterfly to learn how macro mode works. By experimenting with the macro feature, you will get comfortable, for example, with how close you can get to the subject.
You’ll also learn how far away you can be while using the zoom feature to get in as close as possible. This is particularly useful to get images of butterflies from a distance.
Don’t be afraid to experiment. There is no cost to this exercise accept your time.
Try shooting with and without flash to see how the results change and how your camera handles flash up close.
The macro feature is just one of many camera features to focus on.
If, for example, you are going to watch your childs’ ball game, take the camera and use the opportunity to experiment with the action or sports mode. Set the camera on “action mode” and fire away.
Feel free to use the manual modes to capture game action, but unless you are very comfortable setting the aperture and shutter speeds setting the ISO and turning on burst modes, let the camera’s technology do most of the work for you.
Afterall, camera manufacturers have put a lot of thought into coming up with the best camera settings for the various modes.
One of my favourite cameras for creative modes is the Pentax Q. For my comprehensive post on this tiny camera, check out my post on The Pentax Q, and why you need one in 2022.
What are the best compact and micro 4/3rd cameras for 2022?
If you are wondering what the best compact cameras for 2022 are, here is a short list of some of the top compact cameras Fuji, Sony, Lumix, Canon and Leica.
The Fujifilm X100V, boasts an APS-C sensor and 24.3 megapixels along with its 23mm, fast f2 lens. It’s got a hybrid optical electronic viewfinder and a 3-inch fixed LCD screen. This is for more serious photographers who are looking for fine craftmanship and are happy with using a prime lens rather than a more versatile zoom lens. I’ve included a few links from various locations if you are interested in purchasing the camera.
Fuji X100V (Adorama)
Fuji X100V (B&H)
Fuji X100V (Amazon)
Sony ZV1 boasts 20.1 megapixels in in 1-inch sensor. It sports a fast 24-70mm zoom lens and a 3-inch screen. This enthusiast camera has very fast auto focus and a screen that can be moved to multiple views. This camera lacks a viewfinder but is a very capable camera for video.
Sony ZV-1 (Adorama)
Sony ZV-1 (B&H)
Sony ZV-1 (Amazon)
Not quite a “compact” camera but the Panasonic Lumix G9 is a mirrorless, 20.3 megapixel camera with a 3-inch LCD and interchangeable lenses in the micro 4/3rds category. It is a professional photo and video camera that has class leading dual image stabilization and outstanding video.
The Panasonic DMC-ZS 100K is a compact point and shoot 20megapixel camera with a 10X optical zoom ranging from 25-250mm (35mm equivalent). Like your phone, it has a touch screen on the back and is fully equipped to handle any challenge you may face.
Panasonic DMC-ZS100K (Henry’s Cda)
Panasonic DMC-ZS100K (Adorama)
Panasonic Lumix G9 (B&H)
Panasonic Lumix G9 (Amazon)

Adding punch of colour to images can be done with in-camera filters. Here, “vivid film” was chosen to add a punch of colour to the photograph of the container pond along side containers of flowers.
How does “sports/action mode” work on a compact camera?
Let’s examine what happens to the camera when you set it on “sports/action mode.”
Most cameras, when set on “action mode” will make a series of alterations to your camera settings to best capture fast-moving subjects.
First, the ISO setting on the camera will set the ISO to a high number to give the camera it’s best chance of stopping any action.
Second, it will set the shutter speed to a higher level to reduce the blur caused by the action on the field.
Third, it will set the aperture to provide as much light as possible so that the shutter can fire at a rate fast enough to stop the action. As a result, the depth of field will be limited.
The camera will likely choose continuous-focus mode as well as burst mode or continuous shooting mode.
The camera may choose other features to enable your best action photos, such as turning off the flash and turning on anti-shake mode if it is not already in use.

This Panasonic Lumix camera’s mode dial shows the various modes available to the photographer including a custom mode (CUST), scene mode (SCN), two my scene modes (MS1-2), a movie mode, intelligent mode, program mode as well as aperture, shutter and full manual mode.
All of these actions are turned on in a fraction of a second and the camera is ready for capturing the big game.
Knowing what the camera is doing in sports mode, should also give you ideas of how to use this mode for other subjects.
If I see a fox trotting through the garden, “sports/action mode” is the first mode I go to to capture the scene. With only seconds to capture the fox as it trots through the garden, there is no time to make the changes necessary to capture the scene.
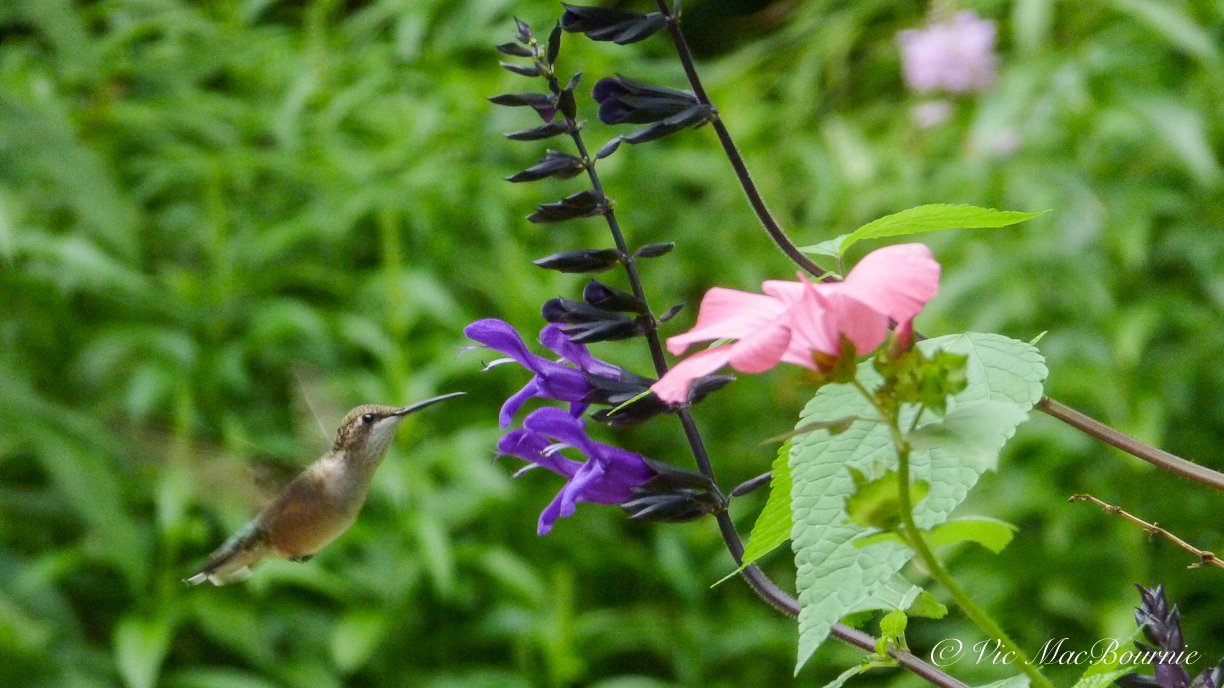
A fast shutter speed was used to help stop the motion of this hummingbird. Using action or sports mode will help you capture images of birds and animals in the garden. Using TV or time value will also help you capture the action if you choose a shutter speed of 500/sec or faster. Finding a compromise between a high shutter speed and setting a high ISO is key to capturing good, usable images.
The action mode is likely the one I would choose to capture kids playing at the park, or the dog having a great time in her pool or the hummingbird working the flowers while I sip my morning coffee.
Why use the custom features over scene modes?
Many high-end compact cameras also have custom modes that enable you to set the camera for your most-used situations such as portrait, B&W images or action photography.
Custom modes are excellent alternatives to using scene modes because they allow you to dial in all the settings you need to create the desired effects. For example, action mode may allow your camera to automatically pick an ISO setting higher than 1600, but you know that the resulting image is not very good. The custom setting would allow you to limit the ISO to say 800 or 1000 ISO.
How does portrait mode make better people photos?
We’ve discussed some of the camera settings in action mode, let’s look at what goes on in portrait mode. There is more to the portrait mode than you might think. Although each camera manufacturer will set their portrait mode differently, the number of changes might surprise you.
Consider the following possibilities:
Change the f-stop to wide open to create a pleasing background
Take several images at once in and out of focus to help create a lovely soft background
Change the colour calibrations to create a warmer, more pleasant skin tone for portraiture. Some camera manufacturers – including Fujifilm cameras – have included the colour parameters of their former portraiture films so that users can experience classic portrait film in digital form.
Add a softening filter or effect to create the illusion of softer, blemish-free skin.
Lower the ISO for a less grainy or noisy effect.
Turn the flash on or off. If the flash is on, add red-eye reduction. (My Fujifilm X10 even has a handy feature where the camera takes the portrait with and without flash. The photographer can then choose the image they like best.
I’m sure there are other changes depending on the camera manufacturer, but these changes to the camera settings should give you a good idea how much thought goes into creating the best settings for successful images using the scene modes and why you should consider using them.

These two images show how effective using the HDR mode can be. The above image shows the non-HDR image where the lighting between the hi-lights and shadows is extreme. By using the HDR mode, the PentaxQ took two fast images exposing for the hi-lights and shadows and then combining them into one image (see below).

The final HDR image finds a middle ground between the highlights and shadows. HDR can be used effectively in a number of situations where the lighting extremes call for it.
Other modes, such as HDR (see above), combine several photos taken in quick succession to remove the extreme highlights and shadows and give you a properly exposed image. (Useful when shooting a cityscape from inside your condo when you want to balance the indoor light with the outdoor light.
Other modes and what they do:
Scenic modes often enhance blue skies and add punch to green foliage.
Kid modes enhance skin tones while capturing fast-moving subjects.
Pet modes allow you to capture fast-moving subjects.
Food modes (popular for instagram) enhance colour to create more appetizing food.
Sunset modes enhance warm colours creating more dramatic sunrise and sunset effects.
Fireworks mode uses long exposures to capture the fireworks.
There are many more modes that are set up to help photographers get good images in unusual or difficult situations. Once again, experiment with the modes that you expect to use regularly.
When is the best time to use manual modes
So far, we have discussed the benefit of using scene modes rather than the manual modes such as aperture priority mode (AV), or shutter priority mode (TV) or full manual mode (M).
Once you become more comfortable with the camera, using manual modes gives you more control of the camera. The scene modes are very good most of the time, especially in difficult or unusual situations, but there are times when you want full control of the camera settings.
In these situations you can set your aperture and shutter speed and let the ISO change automatically to create the proper exposure. It’s a good idea to restrict the ISO to a specific range (depending on the camera) so that the ISO levels do not go so high that they degrade the image.
By controlling the aperture, you gain control over the depth of field in the image including the perceived sharpness of the subject and/or the softness of the background.
By controlling the shutter, you gain control over the ability to stop movement or create movement in the image. You would want to stop the motion of a flower getting blown in a gentle breeze, but show the movement of a stream cascading over rocks creating the effect of soft, moving water.
Although there are scene modes in many cameras that help you create the effect of flowing water, having complete control allows you to change the look of the water in greater detail.
Final thoughts on maximizing your compact camera
For most beginning photographers, the compact camera is often the first and the best camera to purchase. Becoming familiar with the features and getting comfortable with the camera menus helps to quickly access the features when you need to and takes much of the thinking out of using the camera whether in the garden or on vacation.
By making use of the scene modes and the various filters built-in to these cameras, you can take professional looking images that just might surprise you and your friends.
As you get more comfortable with the camera, learning when to use the scene modes and filters will probably be the most difficult part of getting great photos.
Finally, when you are comfortable with the camera and understand its inner workings, you can move to more manual control and take your pictures to another level.
Over time, getting great images and developing a good eye will become second nature and you will know you have discovered the joy of photography.

Pentax F* 300mm f4.5 ED IF: My favourite wildlife lens
Capturing memorable backyard wildlife and birds often depends on getting close. The Pentax F*300mmF4.5 has long been the lens I reach for to achieve my best results when it comes to wildlife photography.
A 300mm lens is the perfect wildlife lens

This Barred Owl was captured in the nearby woods with the Pentax K5 and a 1.4 converter on the 300 f4.5. The image is heavily cropped but still retains sufficient image quality.
The Pentax F* 300mm f4.5 ED IF full frame lens is the only lens I reach for when it comes to serious bird or wildlife photography.
My best images time and time again are shot with this 35-year-old lens, with its exquisite glass, outstanding build quality, handsome looks and the most beautiful bokeh I have ever seen. What more can a person hope for?
I’ve shot with this lens for years, but it wasn’t until I began focusing on backyard wildlife that the lens came into its own capturing impressive digital images and proving to me once and for all that there is no reason to upgrade to a more modern lens.

Coyote in winter coat
This loan coyote was captured with the 300mm f4.5 in a woodlot near our home. It was photographed at ISO 3200 on my Pentax K5 at 1/2000 sec, at f6.3. The image was cropped and post processing applied via Lightroom.
It’s not perfect, but nothing is really.
It came into its own recently when, while out looking for snowy owls in the woodland and farmlands around our home.Although the light was failing and the owl was at some distance, the combination of the 300mm, a 1.4 converter and some judicial cropping allowed me to get close enough to capture useable images of the owl.

A cardinal takes a drink from the bird bath. The creamy background is almost as beautiful as the cardinal.
The Pentax 300mm F4.5* lens is neither the fastest at f4.5, nor is it the best auto focusing lens with its ancient screw-drive system, but when it comes to bokeh – that soft milky background we all strive for in our images – I think it’s pretty tough to beat this lens.
Be sure to check out my F* 300mmF4.5 photo gallery to see more images taken with this superb lens.
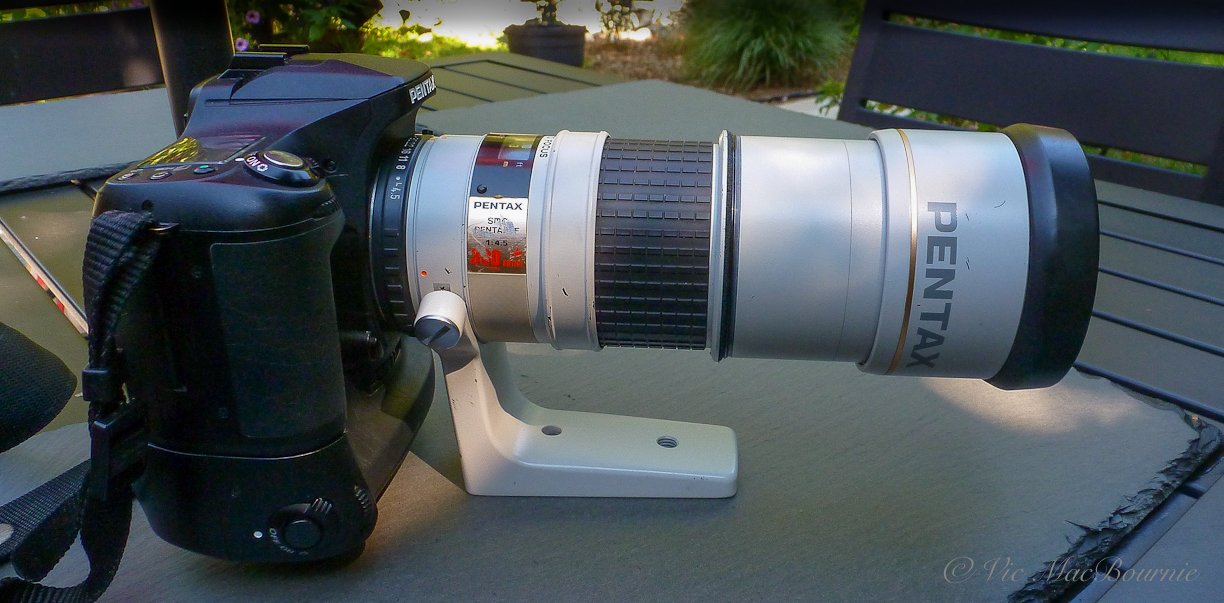
The Pentax F*300mm F4.5 ED IF is an exceptional, compact 300mm lens with beautiful bokeh that gives me 450mm on a cropped sensor.
A great lens is one that you can shoot wide open and still get sharp images. This compact, all-metal lens, with a heft that tells you it was built when quality of build was at least as important as image quality, is sharp wide open. Stop it down to F8 and it’s tack sharp with even better contrast and colours that will leave you almost speechless – grasping for descriptive words that do it justice. The cropped sensor on my K5 and ist-D cameras gives me the equivalent of a 450mm lens.

A Red Wing Blackbird calls out for a mate in spring.
Imagine a Pentax 300mm mounted on the miniature Pentax Q line of cameras. You can do that but you would end up with a 1500mm F4.5 lens.
For my comprehensive post on the Pentax Q cameras and lenses, check out the Pentax Q, why you need one in 2022.
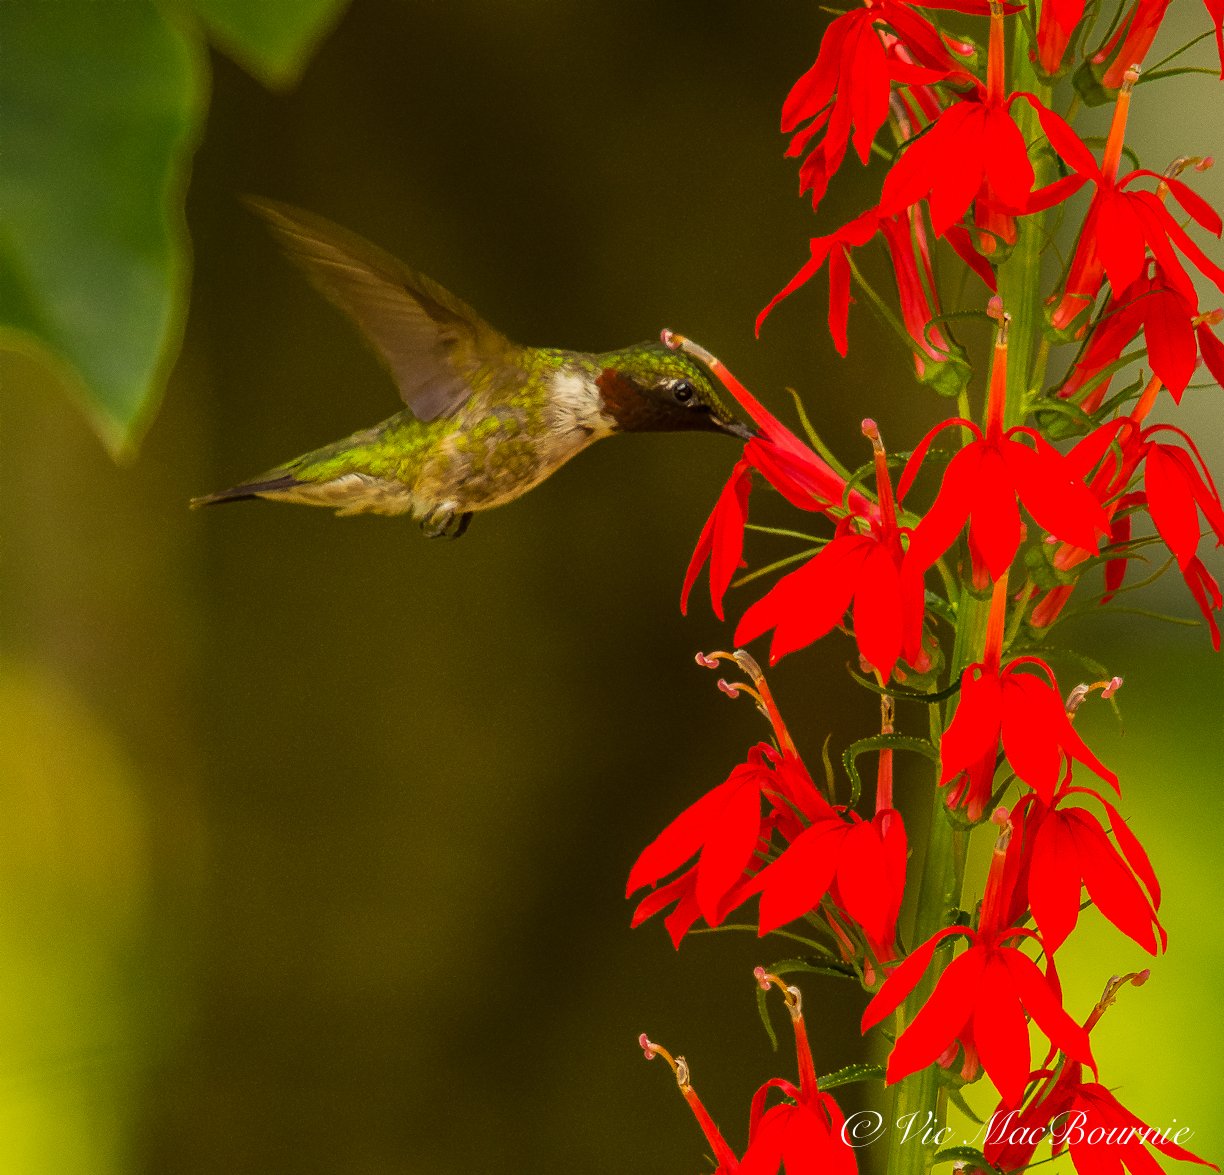
Even in low light, the Pentax 300mm F4.5 is able to capture the moment, and with a cropped sensor it becomes the equivalent of a 450mm.
If this sounds a little too good to be true, then, by all means, don’t take my word for it.
“Great Image quality and small size really impressed me. Exceptional build quality. Similar image quality to the 77 limited. Love it! This lens alone would keep me with Pentax for ever.”

Consider these comments from the folks on Pentax Forums:
“I can’t add much to the glowing praise of this lens posted by almost every single reviewer on this forum. The 300mm f4.5 F* is sharp enough wide open, becoming razor sharp by f6.7 to f11. Color rendition is outstanding. Chromatic aberration is extremely well controlled. Autofocus performance is as good as any older screw drive lens …”

This white egret was captured in a nearby wetlands with the F* 300mmf4.5 lens.
And more from the Pentax Forums: “As for the quality of the glass, I feel humble and not up to showing it off to it’s full potential. The sharpness and resolution are to my eye amazing. The 300mm focal length gives plenty of reach and while only f4.5, with the low light abilities of modern cameras, I was able to take many shots in what I thought were very challenging low light conditions.”
“Great Image quality and small size really impressed me. Exceptional build quality. Similar image quality to the 77 limited. Love it! This lens alone would keep me with Pentax for ever.”
“This is the lens everyone should dream on.”

The red squirrel was photographed at the outdoor photo studio/reflection pond with the F* 300F4.5 lens.
In the world of Pentax, this lens has a cult following.
And why not?
Its compact size makes it easy to carry even on long hikes.
Its built-in tripod mount features a high mount that rotates to quickly allow for vertical images.
Its built-in lens hood can be left non-extended maintaining the lens’s compact size, or extended out to provide excellent coverage. An added bonus is the rubberized front that prevents damage both to the lens and the hood itself.
Its handsome looks, complete with the brand name stamped on its antique-white hood, announces that you are shooting with a premium product.
Its full-frame design means you are shooting with a 420mm on APS-C sensor cameras like the highly praised K5 (and my ancient *ist-d.
The gold emblem on the side of the lens screams classy, high-end lens.
The 67mm filter size is a common enough size that you either have in your collection of filters, or can find high-end B&W filters used on ebay or at your local camera store.
Manual focus is put into gear by a solid shift of the collar on the barrel of the lens. Shifting into manual focus is just the beginning of the satisfaction of using the lens in manual mode. Focusing is smooth with just enough resistance to make you think you are using a classic SMC manual focus M-series lens.
Add a 1.4 converter and not only is it still sharp, but it becomes a fast super telephoto lens in the 580mm range.

The bokeh of this lens takes centre stage in this image of a blue jay in our crabapple tree.
I could go on forever but what really matters is how this thing handles out in the field.
Similar modern 300mm lenses are available for Canon Amazon link ( Adorama link) Shop Canon direct; Sony Amazon Link (Adorama Link)(Keh Camera Used) (B&H Photo link); Nikon Amazon link (Adorama Link) (B&H Photo) and Fuji Amazon Link (Adorama link) and, of course, Pentax Amazon link (Adorama Link) so be sure to check them out.

A cottontail stops eating to have its picture taken.
How I like to use the F*300mm F4.5
I like to combine the 300mm focal length on a tripod attached to either my Pentax K5 or ist-d converting it into a 420mm F*4.5.
While this is often enough to capture many of the more friendly birds, chipmunks, red squirrels deer and fox that are regular visitors to the yard, adding a Tragopan photographic blind into the mix along with an outdoor, natural photo studio brings out the magic this lens has to offer.
Be sure to check out my full post on the Tragopan photographic blind.
The lens is exceptional but getting subjects in front of it is key to letting it shine.
The Tragopan blind, together with the home-made photo studio, is almost like bringing an endless line of beautiful models in front of your lens with the background of your choosing.

A red squirrel in winter at the outdoor photo studio where I included grass seed heads from native Northern Oat grass.
The blind gets me extremely close to the subjects. The reflection pond/photo studio puts the subjects in the perfect photographic environment, and one I can easily change for seasonal interest.
In the blind, I set the lens, which is on the heavy side at more than 1200 grams, on a tripod.
Add some well-hidden bird seeds behind a stone or lichen-covered tree branch and get ready for action.
The water itself is a great way to bring in birds and small mammals to a specific location. When I’m not inside the blind photographing the action at the photo studio, the reflection pond becomes a bird bath keeping the birds accustomed to the water feature.
Be sure to check out my post on building a DIY outdoor photographic blind.

A chipmunk appears to almost be praying as she looks into the lens. But look at that bokeh in the background.
The setup allows me to maximize the possibilities of the lens. Add an external flash, a polarizing filter; shoot wide open or stop it down to F8 or F16. Heck, I’ve even experimented with the camera’s built-in filters to create interesting effects.
I’ve also used the blind together with the F*300 F4.5 to capture images of our local fox. Although it is not particularly skittish, by using the blind and the 300mm, I’m able to capture the fox in a more intimate and natural environment.
If I’m out it the field or shooting birds in flight, I’ll often put the lens on a monopod to allow a little more flexibility.
Although I like to think of the lens as primarily a wildlife and birding lens, I will also pull it out to photograph flowers if I’m trying to create beautifully soft backgrounds. The lens has the ability to isolate flowers growing in a busy environment.
It also can be used for larger butterflies and other insects. Although its close-focusing abilities are good at 2 meters, with a maximum magnification at 0.17x, the addition of extension tubes can get you in close. The added magnification of the APS-C sensor enhances the ability to capture smaller insects and butterflies.

Skunk up close and personal with the F*300mm 4.5 lens.
Information below is from the Pentax Forums website
Image Format: Full-frame / 35mm film
Lens Mount: Pentax K
Aperture Ring: Yes (A setting)
Diaphragm: Automatic, 8 blades
Optics: 9 elements, 7 groups, (including 3 ED elements)
Mount Variant: KAF
Max. Aperture: F4.5 – Min. Aperture F32 Focusing
Auto Focus (screwdrive)Min. Focus: 200 cm Max. – Magnification 0.17x
Filter Size: 67 mm
Internal Focus: Yes
Field of View (Diag. / Horiz.) APS-C: 5.5 ° / 4.6 °
Full frame: 8.2 ° / 6.9 °Hood: Built-in, slide out
Weather Sealing: NoOther Features: Push-pull AF/MF Focusing Ring,
Tripod Mount Diam x Length
84 x 160 mm (3.3 x 6.3 in.)Weight
880 g (31 oz.) w/ Tripod Foot: +240gProduction Years: 1987 to 1991
Engraved Name: smc PENTAX-F* 1:4.5 300mm ED[IF]

Review: Panasonic’s Lumix DMC-ZS8 in the garden and on the road
The Lumix DMC-FZ8 travel camera gets the job done whether you are photographing your garden or taking the handsome little camera on vacation.
Sweet little Lumix performs like a master chef for a fast-food price
Is a $10 camera all you need to capture great garden photography while at home or travelling the world? The short answer is yes, absolutely.
For just about the price of a Big Mac extra value meal, I was able to score a Lumix DMC-ZS8 compact travel camera complete with a Leica 24 to 384mm lens in excellent condition. Admittedly, it was a very good purchase, but these “great buys” are out there if you are willing to take the time to search them out.
The Lumix ZS8 is a categorized as a travel camera, meaning it is the perfect single camera to take on vacations because it can technically handle almost anything you can throw at it while still being small enough to fit into your pocket or purse. The ZS8 fits all those requirements and more.
Getting the most out of your compact, point-and-shoot camera is key to successful photography. Take some time to check out my comprehensive post on Getting the Most Out Of Your Point-and-Shoot Camera.
Check out my earlier post on using the travel camera in the garden and my comprehensive post on Garden flower photography. If you want to see more images from the Lumix ZS8, please check out my Lumix ZS8 Gallery of images.

This little Lumix packs a solid macro feature along with its long reach at the telephoto end.
So many excellent compact cameras that were put away in drawers following the release of the iphone and other smart phones are sitting collecting dust and deserve to get a second chance at life. If you have one or two in a drawer or sitting on a shelf, why not give them a good workout in the garden where these cameras can really show off their stuff? You might be surprised how capable they are and how fun they can be to use.
Click on the link to see a complete list of Panasonic’s Point and Shoot cameras.
If you are looking to upgrade your camera equipment or simply add a few of your favourite lenses, consider checking out the used equipment deals and KEH Camera Exchange. If you are looking to trade in your older equipment, KEH is also an excellent place to consider your trade-ins.
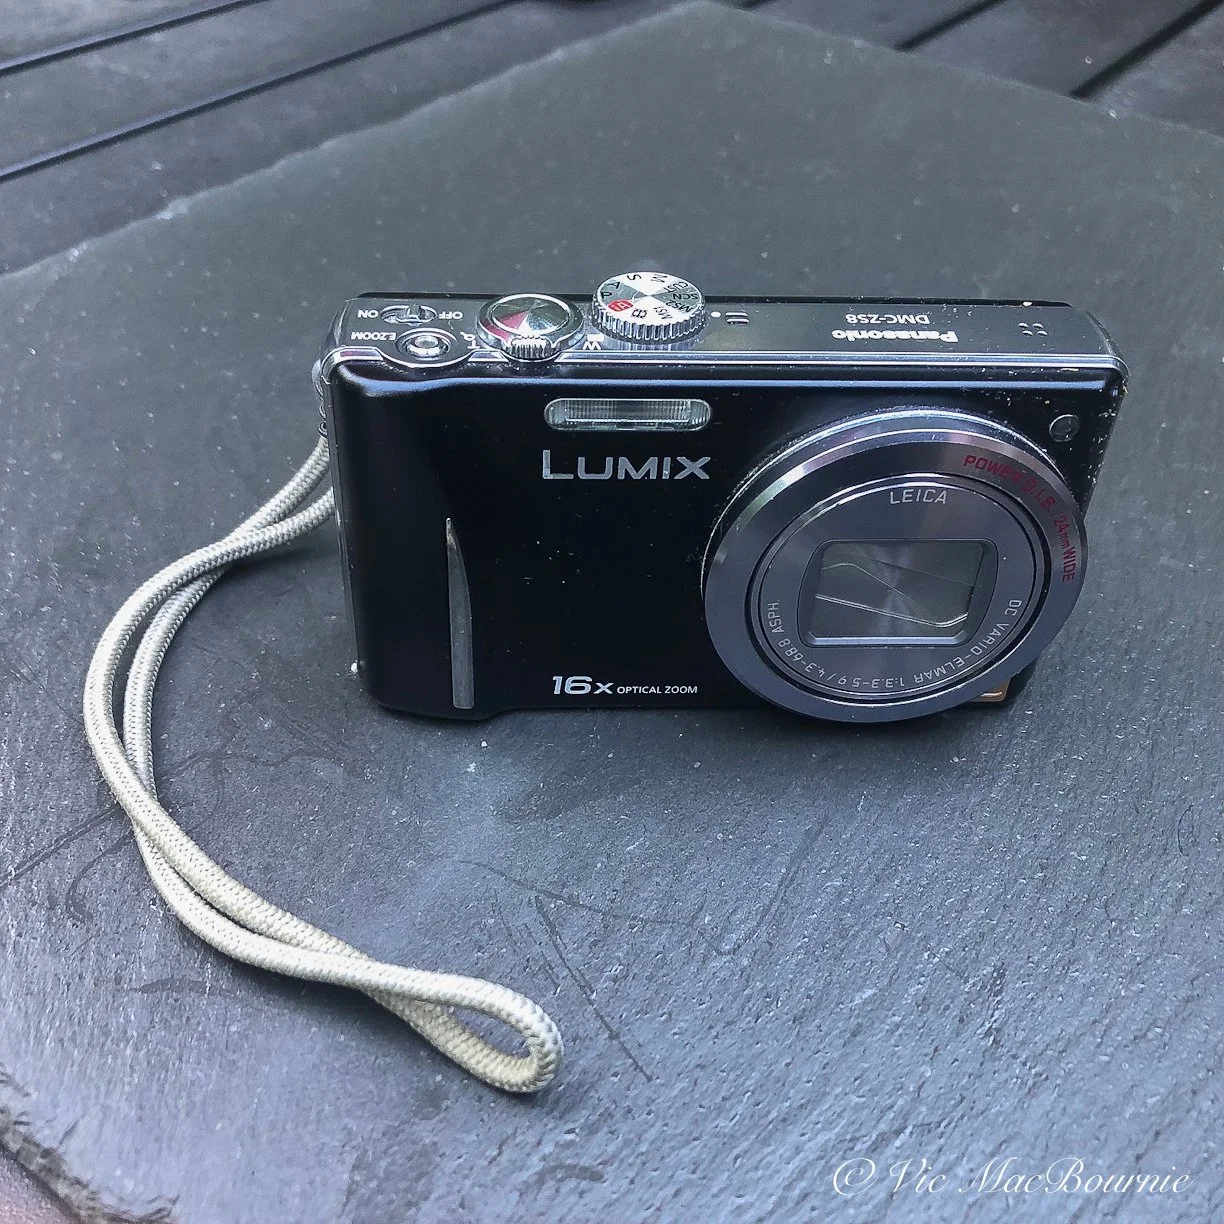
The very handsome black and chrome Lumix FZ8 is a design found in several earlier Lumix travel cameras.
In my reviews of classic, older digital cameras, I like to use real world images from my garden and on the road to provide readers with the type of images they can expect from the camera if they own one or choose to track one down on the used market. For those of us who enjoy playing with older, digital cameras, I hope these reviews will pique your interest in high-end compact, DSLRs and other mirrorless cameras.
If you want more information on using your compact camera to photograph flowers in your garden, be sure to check out my comprehensive article on Garden Flower Photography.
If you are interested in older digital cameras, check out my reviews of the extremely popular Fujifilm X10, Canon’s PowerShot Elph 500 and the Casio EXILIM Pro EX-P505.

While not easy, capturing fast-moving wildlife is possible with the Lumix ZS8.
When was the Lumix ZS8 released?
Back in 2011, when the Lumix ZS8 travel camera was released with a suggested retail price of just under $300 U.S., it was considered one of the leaders in its class competing with the likes of the Canon Powershot SX230 HS, the Nikon Coolpix S9100, Pentax RZ10, Samsung WB210, Sony Cyber-shot HX9V, including the Lumix flagship Panasonic Lumix DMC-ZS10 which came with GPS and a different sensor and better video, but is essentially the same camera.

A pollen-laden Bumble Bee on a native Obedient plant is a little easier to capture than a frenetic hummingbird.
The Panasonic Lumix DMC-ZS8 has a high resolution 14.1megapixel CCD sensor, with a 16X super zoom (ultra wide-angle 24-384mm (35mm equivalent) Leica lens and 1280 x 720 high definition (HD) video. All this wrapped in a high-build-quality, all-metal camera with a 3-inch TFT, LCD Display with 230K-Dot Resolution.
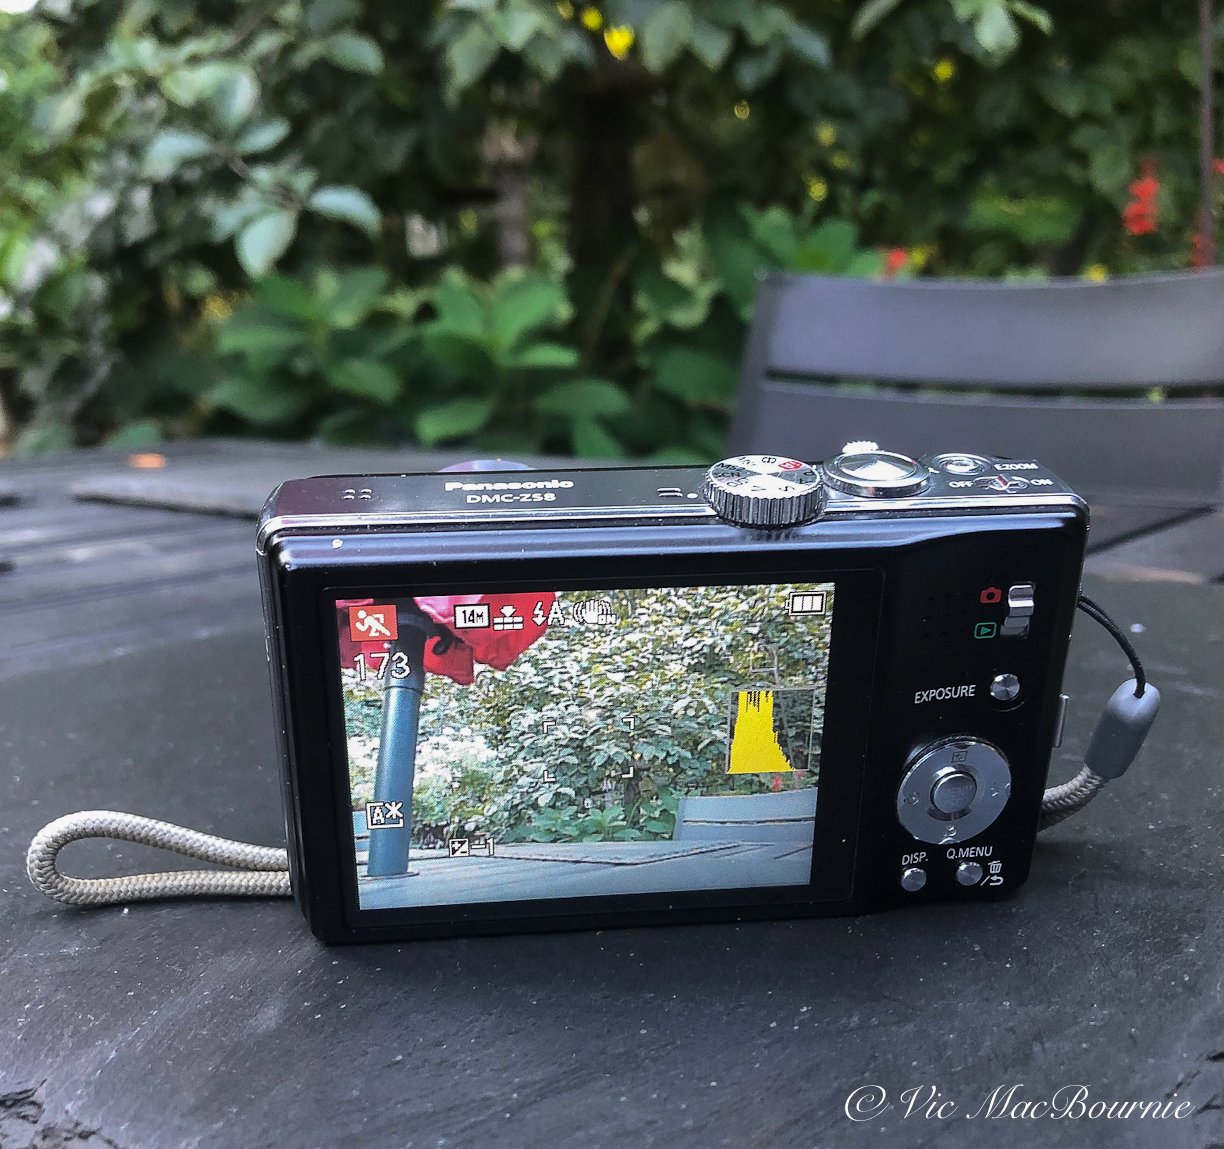
The rear LCD panel in the Lumix FZ8 and back buttons.
What’s all this jibberish mean?
It means the Lumix DMC-ZS8 was very good when it was released in the hey day of high-end compact digital cameras, and, if these results are any indication, this sweet little Lumix is still a very good camera today.

The camera particularly shines when you can slow down and handle subjects carefully whether you are in the garden or out for a road trip. This scene was captured while out for a drive in the nearby farm country.
Is the Lumix DSC-ZS8 still good in 2024
How does the Lumix ZS8 measure up to today’s modern cameras?
Let’s not fool ourselves. Technology is constantly evolving, especially in the world of digital photography. Today’s cameras can be incredibly good. In fact, for many of us, the evolution of digital cameras including compact, high-end point and shoots have evolved well beyond many of our needs and wants.
That’s where these classic digital cameras fit in.
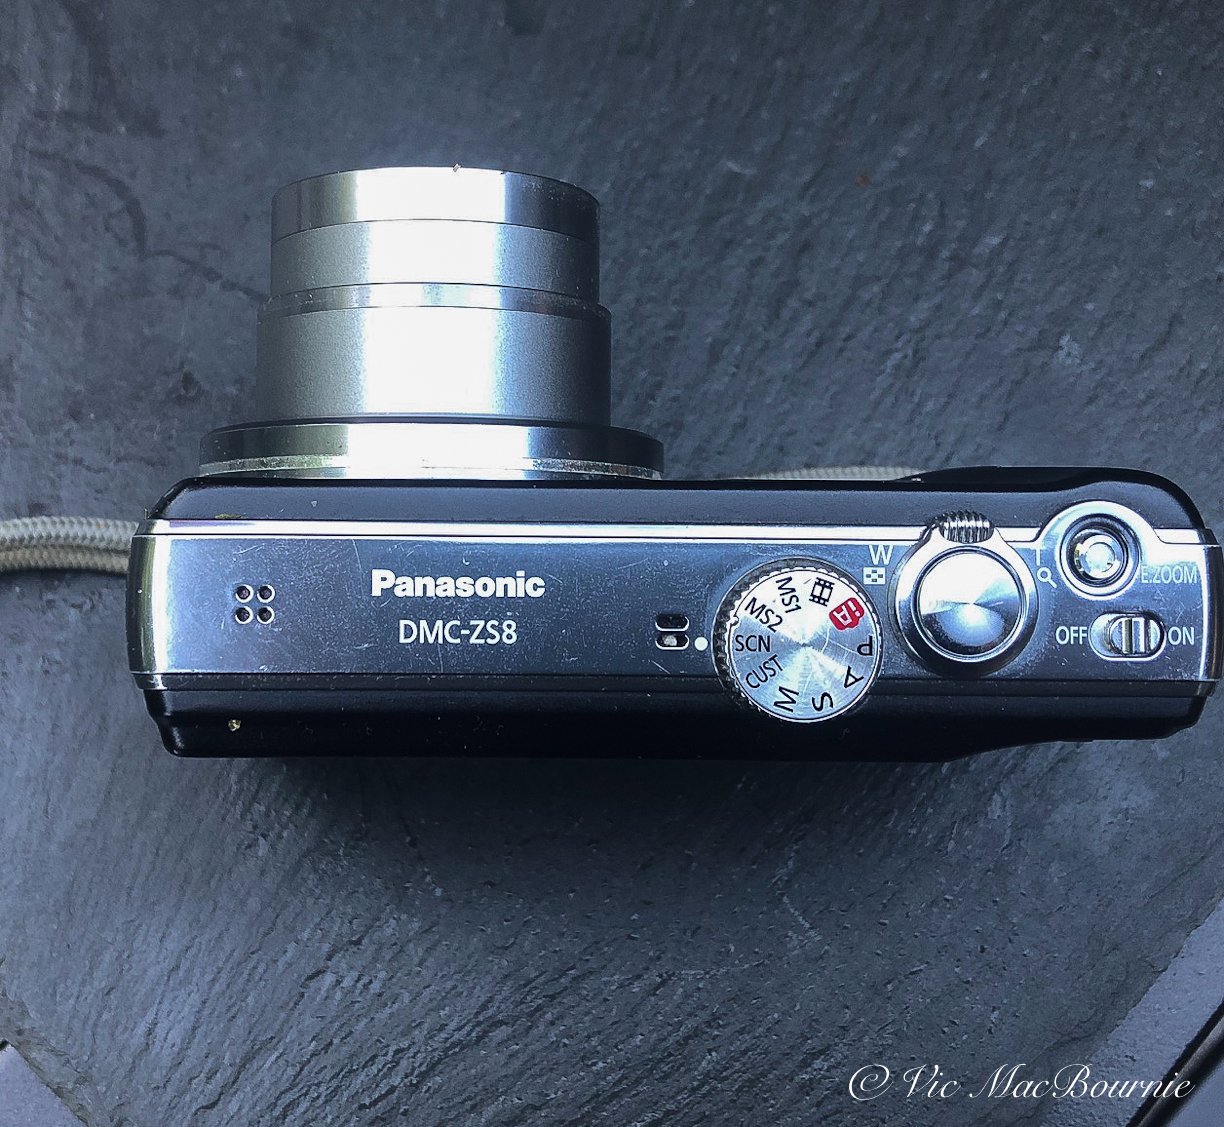
The top view of the Panasonic Lumix DMC-ZS8 showing the impressive Leica lens 24-384 (35mm equivalent).
Older cameras suffer from smaller sensors, and slower focusing capabilities which might make getting a prized shot more difficult or the quality of the image substandard to today’s cameras if you like to compare images pixel by pixel. Shooting in less than desirable conditions will push the capabilities of these older cameras.
Bump the ISO up to 1600 to get a handheld photograph in the poor light of early morning or late evening and you might be disappointed.
By disappointed, I mean the image may not seem sharp as a result of digital noise – a grainy look that is not necessarily obvious until you move in close to the image on your computer. Today’s larger sensors can better handle low light and produce less grain. The result are images that look sharper.
If that really matters to you, than older cameras like the ZS8 may not be worth using.
For most of us who primarily use our images for social media or make prints no larger than 8X10” or 11X14”, the FZ8 and other compact cameras are more than sufficient to get the job done. Even if you are planning to create your own garden photo book (highly recommended by the way) these cameras, with proper techniques, will give you beautiful results.
Consider using a tripod and setting the ISO to 100 or 200 when lighting is not at its best and chances are you’ll be more than pleased with the results.
In fact, some fans of classic cameras will tell you that the CCD sensor on the Lumix ZS8 will give you better results than you are likely to get on more modern CMOS sensors. I have to admit the files coming out of this camera are very impressive when lower ISO settings are used and/or there is enough light to properly handhold the camera.
The camera does boast an impressive anti-shake feature that can give you up to two stops of light-saving stability.
What does getting two stops of light mean?
It basically means that you can hand hold the camera and still get sharp photos even if the light is low. It’s in reference to the shutter speed. A low shutter speed means getting sharp images in low light is difficult because of camera shake when taking the picture. You gain the ability to take sharp images in low light by anti-shake features built into the camera as well as “fast lenses” that allow more light to hit the sensor.
Okay, so we know that the Lumix ZS8 is capable of taking good photos, but there are so many other factors that play a role in whether you fall in love with a camera or put it back in the drawer.
This camera is not going back in the drawer any time soon.

A grab shot on the road shows the camera’s ability to capture great images with lots of colour in good light.
What are the pros of the Lumix ZS8
Quite frankly this camera is easy to love. From its impressive build quality, including the camera’s feel in your hand and the solid, tactile feel of the control buttons, to the simple yet effective menus that allow users to easily set up the camera to their liking. It all comes together in this sophisticated-looking little camera that has full manual controls.
Add to that:
• Two macro settings will get you in close to flowers, butterflies and other garden creepy crawlers.
• The quick menu button alone will set most of us free from having to search through menus looking for basic commands to get the shots we want. The Quick menu button in the bottom right on the back of the camera allows you to easily set burst mode, autofocus mode, white balance, ISO settings, file size and the camera’s back LCD mode.
• As already mentioned, the camera’s 24 to 384mm F3.4-6.4 Leica lens is reason enough to search out one of these cameras at a great price. It’s not a super fast lens, especially at the long end at F6.4, but, again, using a tripod or a monopod will go a long way toward achieving memorable images.

A city scene in fall shot with the Lumix ZS8.
• The 13-year-old camera uses easy-to-obtain SD cards for memory and has a series of mode scenes (29 to be exact) that makes getting photographs in specific situations, whether portraits, shots of your children, pets, snow scenes and night scenes, or landscapes extremely easy.
• The flash on the camera is also a good performer and puts out plenty of light to use as a fill-in flash or a regular flash if you are working in a close distance.
• In addition to the 29 scene modes, the camera’s top function wheel boast two “my scene modes” that allows you to quickly go to your favourite scene modes whether that’s portrait mode, landscape mode… pet mode…
• The camera has Panasonic’s IA mode (intelligent auto) that looks at the scene and sets the proper scene mode to ensure proper exposure etc. This is excellent for quick shots on the move and beginner photographers who don’t want to get involved in learning the technical details of the camera.
• In addition, the camera has three custom modes that allow you to set camera settings that you can access easily. I have set up a high-quality custom feature where the settings are optimized for the highest quality image for landscape photography, a black and white custom feature, and a high-speed custom feature.
• A solid tripod mount right square in the middle of the camera’s bottom plate ensures a balanced mount.

Lumix DMC-FZ8 is a smart looking camera that is small enough to fit in your pocket or purse but with enough features to be the only camera you will need on vacation.
… and some cons
• The small sensor (like all compact cameras) makes getting good images difficult in low light situations. Trying to photograph fast-moving hummingbirds was an exercise in frustration between the slow focus and movement caused by using lower ISO settings. You will never match the speed of high-end DSLRs or mirrorless 4/3rds sensors, but it is possible if you are patient.
• The camera does not have a RAW setting so everything is in jpeg format. RAW would have been nice to pull the most out of the camera’s impressive CCD sensor but the jpegs right out of the camera are very nice.
• No hot shoe for external flash.
• The camera feels comfortable enough in my hand, but it’s tiny size may not feel ergonomically correct for everyone. Always use the wrist strap in case you drop the camera.
Is a Lumix camera a brand to search out on the used market?
Although this review is for the 14.1 megapixel, DMC-ZS8, there are a number of Lumix cameras that were released using the same or a similar design. As the camera design evolved, Panasonic added larger sensors with more pixels and features, but generally kept the same impressive design.
I think it’s safe to say that all these Lumix cameras with this design are worth purchasing today. They are high quality cameras that feel substantial in your hand and are fitted with high quality Leica lenses.
Panasonic built compact cameras for Leica, while Leica provided lenses for Panasonic. The result is that the companies put out almost identical cameras and simply rebranded them for their buyers. In some cases, Leica released almost identical cameras to the Lumix brand for considerably more money.
The original buyers of these Lumix cameras saved a considerable amount of money by purchasing the almost identical Panasonic camera over the equivalent Leica model. Over the years, the Leica cameras have maintained their high prices based on the prestigious brand. The Panasonics have not fared as well even though they have held up extremely well. Now, the difference in prices between the Leica version and the Lumix has widened ever farther making now the perfect time to purchase one.
You know the old saying – buy low. It’s hard to imagine these cameras going much lower.

Focus on Casio’s EXILIM Pro EX-P505
The Casio EXILIM Pro EX-P505 is a 20-year-old, 5 megapixel camera that continues to perform in the garden and as an everyday camera.
From Springsteen to the garden, this little Casio continues to rock
The Casio EXILIM Pro EX-P505 – now that’s a mouthful – spent most of its life in a drawer in my basement after using it as a pocketable snapshooter for the first year or two. Its greatest achievement was taking it to a Springsteen concert in Buffalo N.Y. where it actually performed admirably in the low lights of the concert venue.
But overall, I wasn’t happy with the early results and really didn’t have a lot of use for the camera in those days when carrying a massive DSLR and complete lens system seemed a whole lot easier than it does today.
But the tiny, odd-shaped Casio EXILIM Pro EX-P505, 5 megapixel camera is looking a whole lot better these days after spending some time with it in the garden. Sure, it’s dated, but it’s also packed with features, has a decent lens, makes the most out of its size and even has a fully tilting viewfinder. And did I say it’s a lot of fun to try to squeeze out some impressive images from its tiny 5 megapixel sensor.
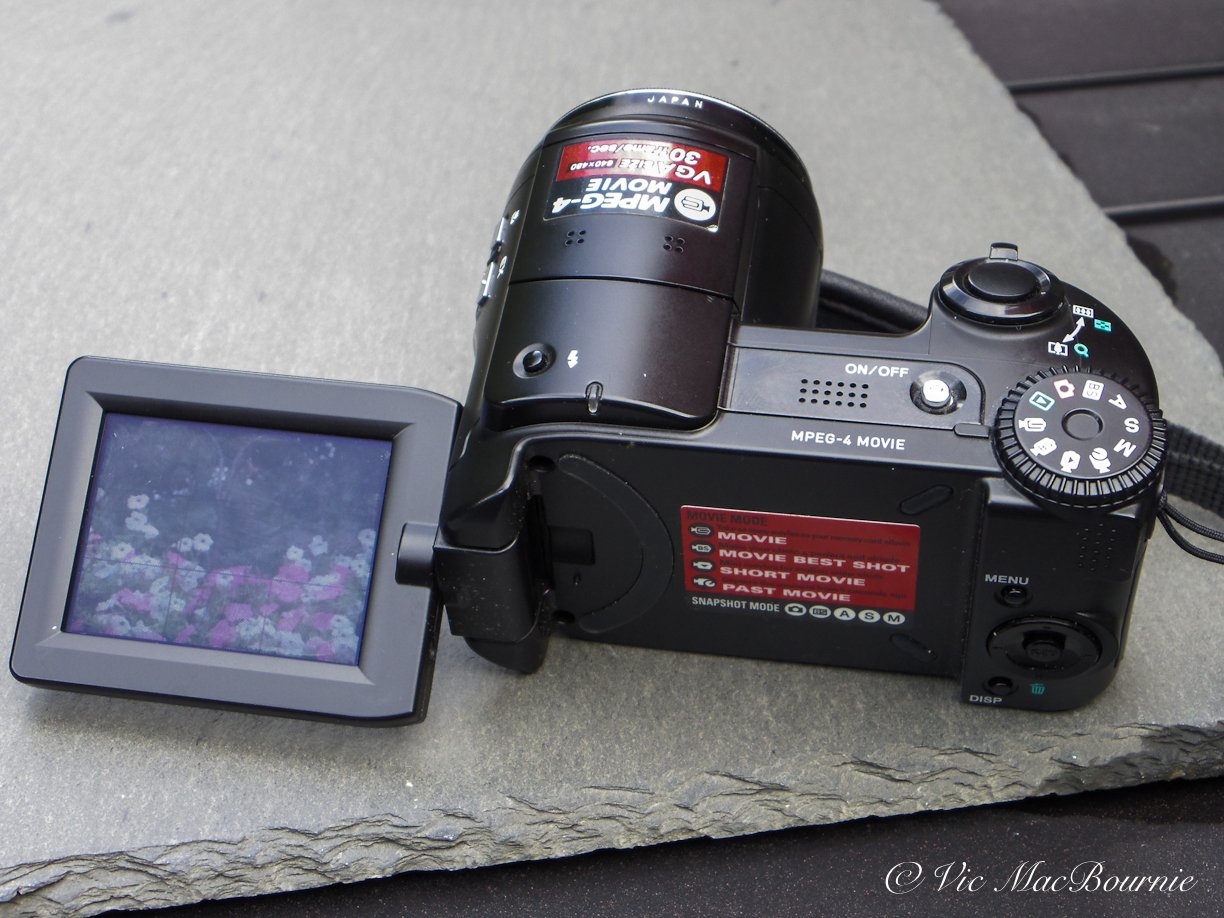
Casio’s Exilim Pro EX P505 with its reticulating screen makes taking pictures from a low angle a whole lot easier.
This review is actually part three of my multi-part feature on using older digital cameras in the garden and on the road. You can check out these links to my reviews of the Fujifilm X10 and Canon’s PowerShot Elph 500.
For tips on maximizing your compact, point-and-shoot cameras, be sure to check out my comprehensive post on Getting The Most Out of Your Compact Camera.
Here are a few more links you might want to check out on Photographing flowers in your garden, Best camera for garden photography and Ten tips for great garden photography.

The Casio EXILIM Pro EX-P505 caught this Lavatera flower in full bloom handling the bright pink colour and texture of the flower nicely.
Okay back to this weird looking Casio camera. The P505 was considered quite a departure for Casio complete with its SLR-like appearance, large lens barrel and five times optical zoom. If I recall, I bought the camera for its movie-making capabilities back in early 2006 when using a camera to make movies seemed revolutionary. The camera was unveiled in March of 2005 and YouTube had just been unleashed on the public in February of 2005.
You could say this camera was cutting edge.
This Casio camera was actually the first Casio digital camera to use the MPEG-4 codec for encoding video and can record full VGA (640x480) video at 30 fps with stereo audio –yes you read that right folks – at 4.2 or 2.2 MBit/sec (approx. 30 / 60 mins on a 1 GB card).

The screen can be neatly stored away on the back of the camera for compact shooting.
Cool, but what about the pictures? Can this thing take decent pictures with its tiny 1/2.5-inch, 5.0 megapixels CCD sensor and 5x optical zoom lens, with a macro mode that allows us garden photographers to get a flower photo as close as 1 cm. away?
Quick answer: “Yup, it sure can.” And, guess what, it’s pretty darn fun to use with its 2-inch TFT colour rotating screen that tilts and makes taking angled shots simple.
The lens is just okay for today’s standards, giving you a 5 X optical zoom with a 35mm equivalent 38 - 190 mm starting at F3.3 at the wide end and going to F3.6 at the telephoto end. For anyone who cares, that’s delivered with 10 elements in 8 groups, including aspherical Focus distance.
The screen is small in today’s standard and the resolution is nothing to write home about. I think it was the relatively poor quality of the screen that made me think the actual files were not going to be good. Don’t make that mistake. It should come as no surprise that the files are much better than what you see on the back of the camera.
All that said, let’s take a look at a couple of those images taken recently in my garden.

The 20-year-old Casio EXILIM Pro EX-P505 captured the reds of the Cardinal flower against the greens of the foliage.

The Casio caught the tapestry of colours in the native flowers from the reds of Monarda to the yellows of the Rudbeckias.
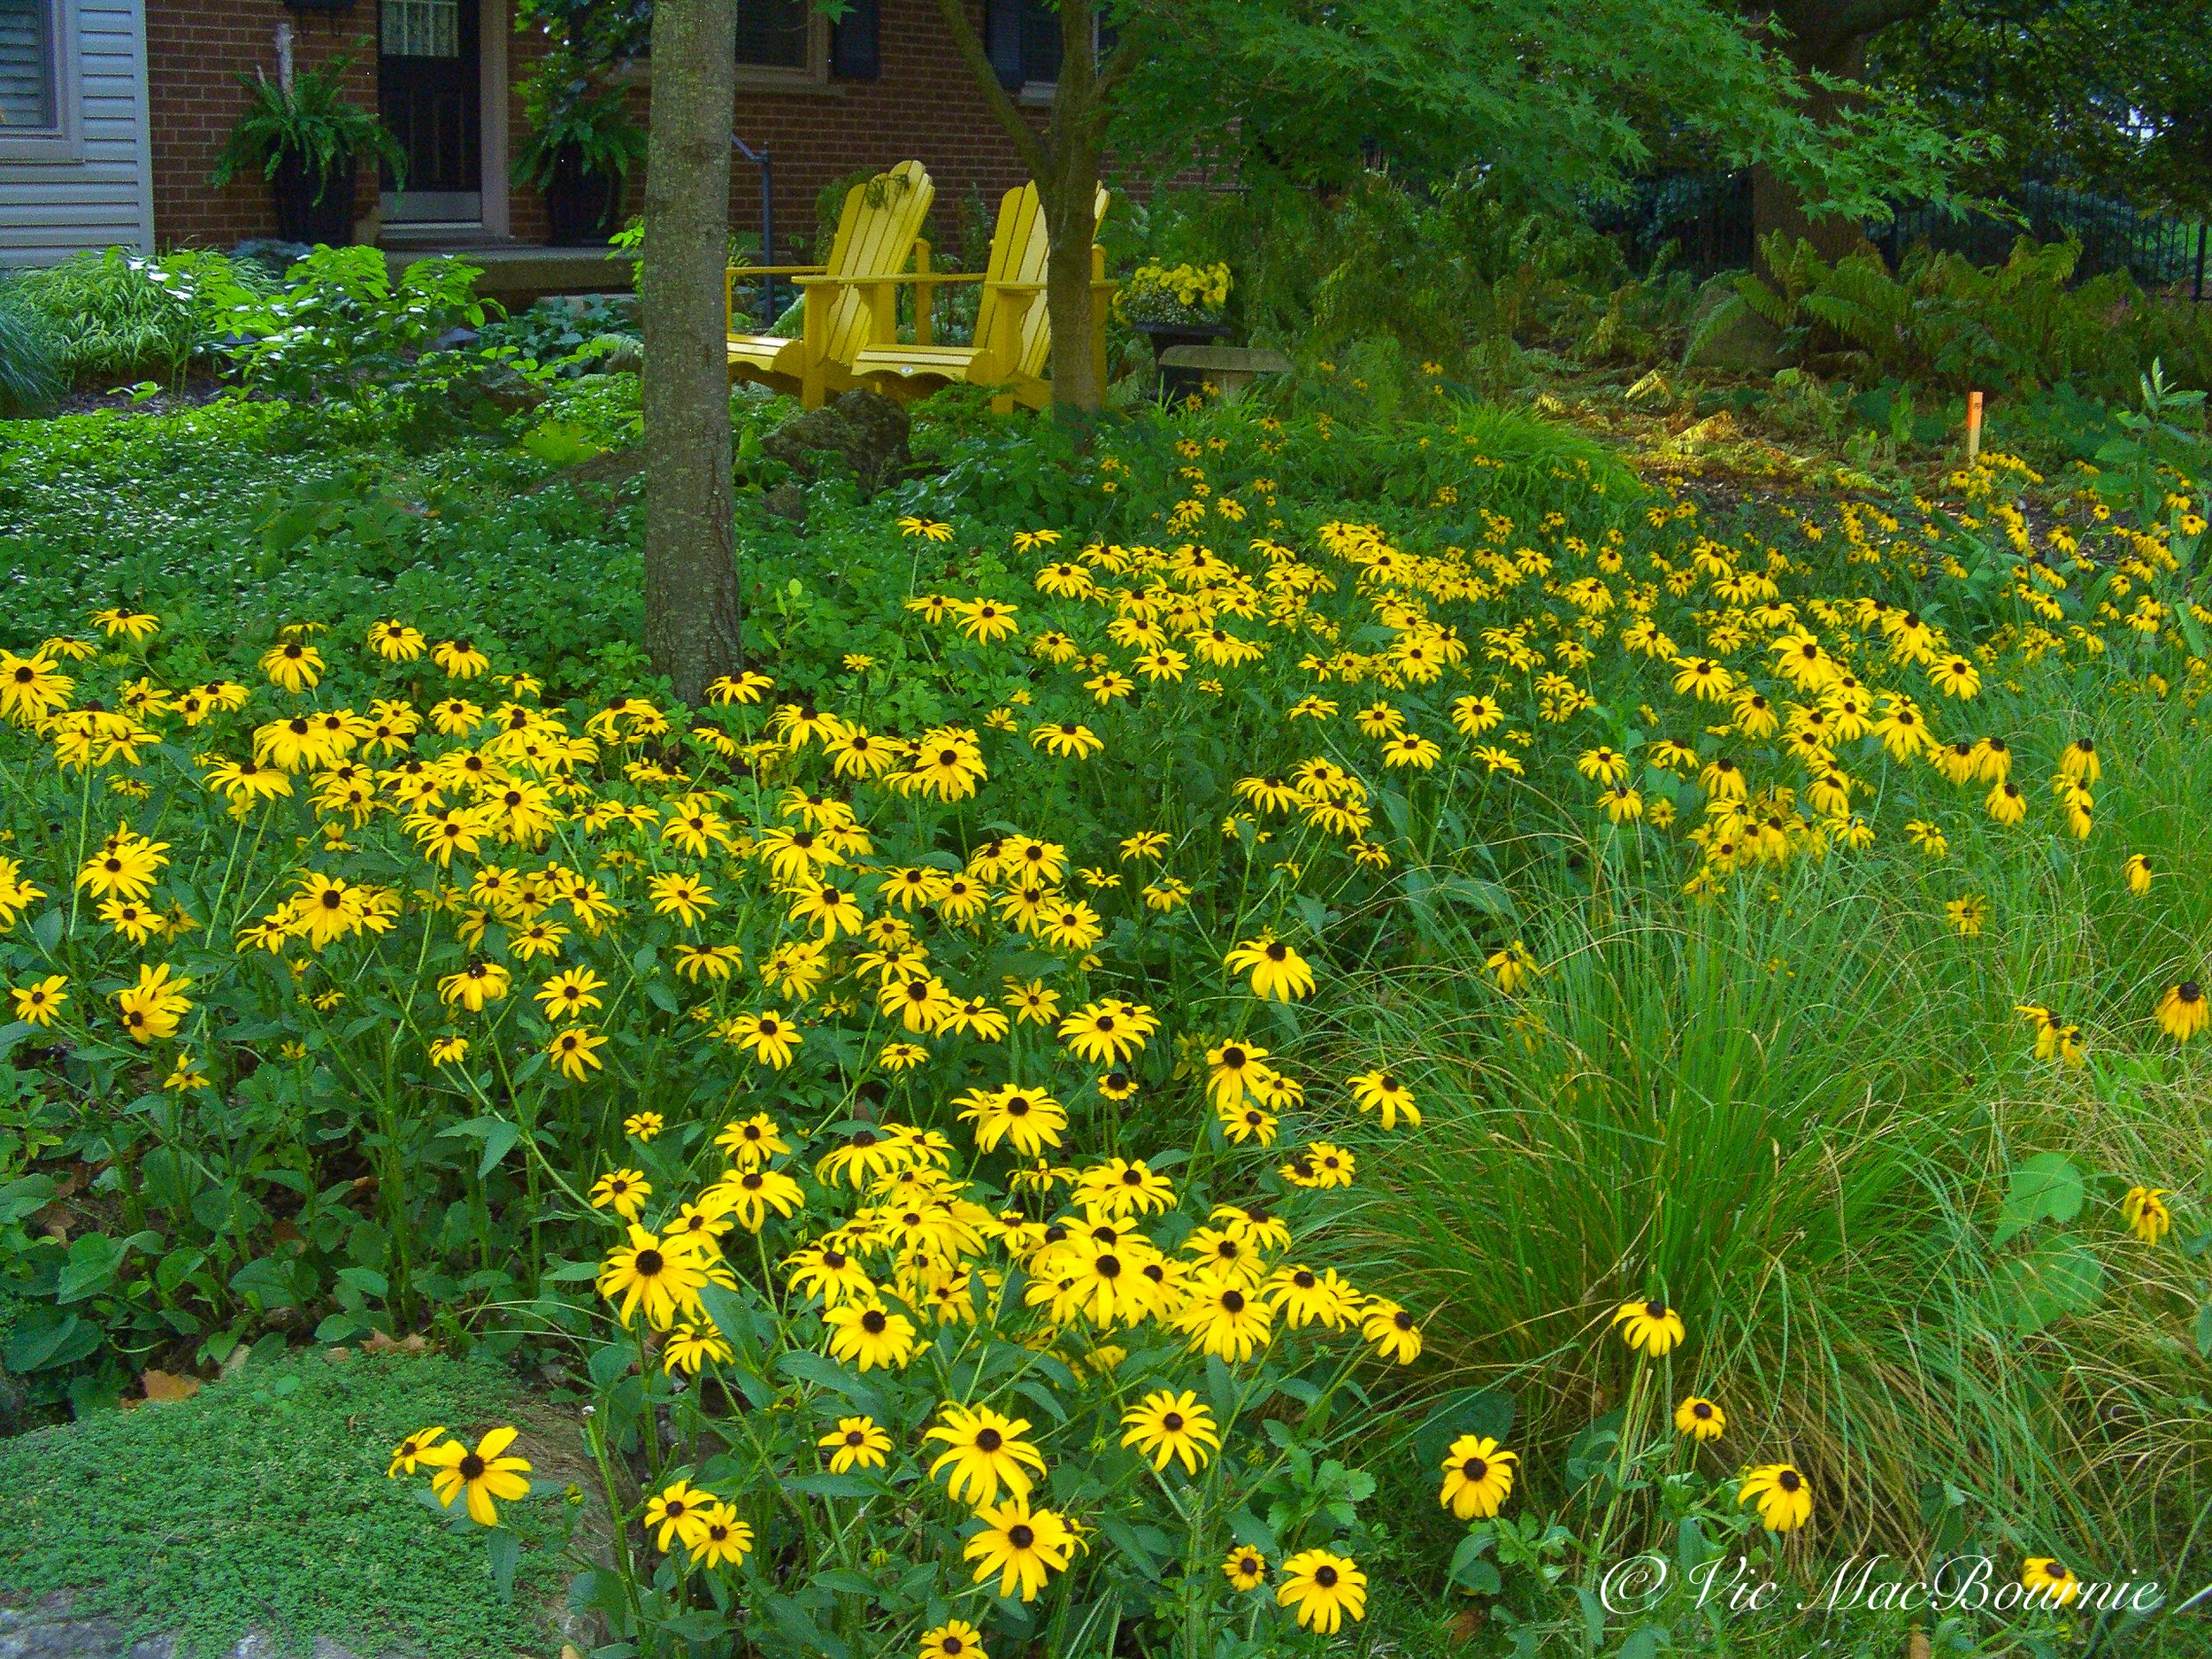
The front garden captured nicely here by the Casio showing the drift of Black-eyed-susans and fine texture of the grasses.
Not bad for a compact camera now pushing almost 20 years old. My battery is still going strong and the camera takes a regular SD card.
One look at the photos above show that the camera can still perform. Colours are good, not great, but totally acceptable for quick hits to social media and the odd print at maybe 11X14 inches. Post processing with Lightroom, Photoshop and a host of denoising programs such as ????????, can make a significant difference when it comes to using these older cameras.
Although the Casio is approaching old age (I notice a few of the pixels have died), it still boasts a host of modes that make getting good shots of difficult scenes just that much easier for photographers who prefer to let the camera do the work. That said, this Casio includes complete manual settings from shutter and aperture priorities to fully manual.

Casio EXILIM Pro EX-P505’s macro feature captured this water hyacinth in the pond.
But let’s take a look at some of the modes this camera offers. Casio calls the modes “BESTSHOT” and incorporates 22 different predefined scenarios plus the capacity for user defined scenarios. There is a flower mode, pet mode, portrait modes, sand, snow, night scenery, fireworks, greenery and fall colour modes just to name a few.
The menus may seem confusing at first, but it didn’t take long to feel comfortable with the camera’s menu system. An EX button on the side of the lens means calling up a quick menu is quick and easy allowing various manual settings to be accessed and set from a single screen. Key functions include ISO, focus modes, exposure compensation… There is also a separate macro button on the lens that puts the camera in macro mode – perfect for flower photography or capturing a butterfly feeding on a flower.
The EX-P505 was, at the time of release, the third camera in the award winning EXILIM PRO range. It incorporated CASIO’s unique ‘EXILIM Engine’, a compact image processing module, that delivered high quality images and high-speed operation, all within extremely compact dimensions.

Looking down on the Casio EXILIM Pro EX-P505 shows the camera’s controls including the pop up flash, and the macro and EX buttons on the side of the lens.
Why did Casio stop making digital cameras?
Since 1995 Casio stopped making digital cameras. Their website explains that they “decided that, after 23 years of developing the visual communication tools which have been highly supported and loved by our users, we will be halting production of our existing compact digital cameras.
The company went on to say: “In the future, Casio will be pursuing product development in entirely new genres, and will leverage the video and image technologies and various unique technologies that we have cultivated over many years. At some later time, we would like to present products that have the potential to become new favorites and the capability to surprise and move our customers.”
Casio points out some of the products it developed that “created a new culture of communication, such as the EX-S1, an ultrathin camera…; the EX-F1, which incorporated a unique, high-speed technology that could capture subjects invisible to the naked eye; and the TR series, which allowed users to enjoy taking beautiful selfies in a variety of free photography styles.”
My Casio EXILIM Pro EX-P505 was not one of their ground breaking releases, but for me anyhow, it continues to make images and movies. I have even used it to create images for this website and although it is not my first choice, it will continue to see service.
A quick look on Ebay and Kijiji shows that the Casio line of cameras continues to bring a smile to the faces of photographers willing to cash in on a brand that is being forgotten in the world of photography. If you are looking for a quality compact camera to have fun in the garden buying a high-end Casio compact camera just might be the ticket. Ebay.com has several pages of Casio cameras available running from under $25 to more than $400 and Kijiji has a great selection at good prices as well.
Grab one and put it to use. You might be surprised how much more fun it is than using your smart phone.

How to capture great sunflower photos: Including ten top tips
Sunflowers are excellent plants to put in your garden. Not only are they visited by pollinators such as bees and butterflies, they eventually provide food for backyard birds. More importantly, they look great while in bloom and make excellent photography subjects in all their phases.

A Lumix DSC-LS50 compact travel camera was used to move in close and capture the vibrant colours of the small sunflower from a low angle that shows off the details of the plant’s fine hairs.
Flower photography with the Lumix DSC-ZS50 /TZ70 compact camera
Everyone need to plant flowers, especially sunflowers in their gardens for the butterflies, bees and birds. But don’t stop there. Sunflowers’ magnificent blooms will bring a smile to your face and brighten any corner of the garden where you choose to grow them. More importantly, however, are the images these flowers offer to creative garden photographers who are willing to spend a little time exploring details and creating memorable images of these great plants.
All flowers, but especially Sunflowers have long been a favourite of photographers, but capturing memorable images can be a challenge.
For more on photographing flowers in your garden, check out my comprehensive post on Flower Photography.
Whether it’s a single bloom in your garden, a small grove of sunflowers in a corner of the yard or a massive field stretching as far as the eye can see, doing these cheery colourful flowers justice involves different approaches, techniques and a creative eye.
This grouping of sunflowers were photographed growing in a small field. The red barn adds a nice touch of colour to the image.
Give your lenses a workout shooting sunflowers
Sunflowers offer the opportunity to give all your lenses a workout, from wide angles to capture an expansive field of flowers, to short telephotos capturing a selective group of flowers. Longer telephotos will bring the flowers in close if you are shooting from a distance, but also compress the field, stacking the flowers so they appear almost on top of themselves. And finally, that macro or close focusing lens will get you in close to capture the interesting colours and details sometimes overlooked by the sheer beauty of the flowers.
Be sure to check out my post on how to grow your own sunflowers in your garden.

This field of sunflowers was taken with a telephoto lens that helped to compress the image.
What’s the best time to photograph Sunflowers?
If you have not planted your own sunflowers, (and you really should) late summer is the best time to look for patches of these growing in private gardens.
Remember that trespassing on private property to get the ultimate selfy is never a good idea. Use your longer lenses to photograph from the road, or ask the landowner if it would be possible to get some images of the flowers while they are in bloom. Possibly, offering to share some of your images with the landowner would open the door to allow you a closer approach.
If you are considering upgrading your camera gear, consider checking out the offerings at KEH Camera Exchange. You can also trade in your older gear for some new gear that better gets the job done.
Depending on where you love and how early the sunflower seeds were sown, expect to start seeing them bloom as early as July, and reaching their peak in mid- to late-August, and ending in September, when you can explore the photographic possibilities of capturing the dying foliage.
Be sure to check out my post Fields of Gold: Sunflowers and Goldfinches.
Once the flower bloom is out in full, you can expect up to about 20 days of bloom from a single large specimen. For the smaller multiple flower varities, the bloom time can be much shorter, so take advantage of them once they begin. One of the benefits of the multi-flowered varieties, is that you will have new flowers coming into bloom at the same time as you have flowers in decline. It’s a great time to attack the plant from multiple angles, filters and creative approaches.
Sunflowers offer endless potential for great photographs
Here are ten tips to inspire you to get out with your camera and capture images of these magnificent blooms

This image taken with a Lumix DSC-ZS50 uses backlighting that makes the flower petals and leaves translucent, and adds drama to the photo.
1) Look for the right light: Just because the subject is exciting and colourful, does not mean you should ignore the basic principals of good photography. Look for dramatic lighting to take your images to another level. Backlighting at sunset or sunrise offers photographers an opportunity to capture the petals with a translucent glow and a beautiful rim light. Don’t forget to also use backlighting to catch the fine hairs that cover the plant.
Sidelighting can also be used to bring out texture in the individual flower heads or even an entire field of sunflowers. A little underexposure will enhance the effect and a polarizing filter will help to make the colours pop by removing any glare on the plants.

Using filters on the Lumix DSC ZS50 adds a little creativity and fun to the photo shoot.
2) Get in close: Don’t be afraid to move in close with your macro or close focusing zoom lens. These flowers are so large that there is no need to move in that close to capture the finer details of the flower petals. Most compact cameras or close-focusing lenses are able to capture interesting images up close. Try including portions of the flower’s inner circle of seeds with several petals for a very graphic effect.
3) Get down low: By shooting up at the plant with a wide angle lens, you will emphasize the sheer size of the plant and make the viewer think the plant is even bigger than it actually is. The view from below is also the one most people (especially children) get when they look at the larger plants. Wait for a clear blue sky and darken it even more by using the polarizing filter for best results. If you have a Cokin Yellow/blue polarizer in your arsenal, this is the time to pull out and get it on your camera. The Blue/Yellow polarizer is an interesting effect filter that works like any polarizer accepts it enhances, depending how it is positioned, the blues and yellows in your image.

A reverse processing filter on the Lumix gives this image some interesting colours, especially in the sky.
4) Look for a blue sky background: A solid blue background isn’t usually an ideal backdrop for most images but it works well for sunflowers, especially when a polarizer makes the yellow flowers pop out against the deep blue sky. Of course, if you are not including the sky in the image, a good overcast sky will give you a soft, even lighting that will work for more intimate images of the flowers, either in small groupings or in close-up mode.

Again, the Lumix filters were used to create this dramatic B&W image.
5) Shoot in B&W: Sunflowers shot in black and white have a timelessness to them that can result in excellent art images that you will want to frame and hang in your home. Most cameras whether they are DSLRs, mirrorless or compact point-and-shoots include black and white settings. Some, like the Fujifilm X10 (Link to my separate article on this popular camera) and other Fujifilm cameras include red, green and yellow filters to enhance tones in B&W images. Use the red filter for dramatic skies and the green filter to lighten the sunflower plant but not the flower itself.
6) Look for interesting angles: Get down low, shoot up. Get high and look down. Shoot the flower from the back, the side, in silhouette. This is your chance to “milk” every angle out of the plant. It’s important to take advantage of the opportunity when you have it.

Moving in close with the Lumix DSC LS50 showing its macro capibilities.
7) Watch for birds, bees or butterflies: Sunflowers are not just flowers with a pretty face. These things attract everything from butterflies to birds and you would be wise to spend some time being ready for garden wildlife to pay a visit to the flower in search of pollen or the prized sunflower seeds. If you know one of your prized sunflowers are coming into seed, pull up a chair, grab a coffee or glass of wine, set up your camera on a tripod and wait it out. You may not be waiting too long before you have a visitor and a memorable image.
8) Photograph them as they emerge: Don’t just wait until the flower has a emerged to begin photography. Consider capturing the flower in all it’s stages to create a little photo essay.

Don’t forget to photograph the flower in all phases of its life.
9) Beautiful in death: Don’t pack up the camera when the flower fades, a dead or dying sunflower can be simply beautiful especially in B&W. Besides the symbolic value of capturing these flowers as they fade away, there is something touching about an image of a sunflwer in severe decline. Maybe it’s a reminder that the end of summer is upon us and the cooler temperatures of Fall are about to begin. Late fall can be especially great for capturing sunflowers. Get up early on a cold morning to capture a coating of frost on the dead flower head, maybe you’ll be lucky to capture a little hoarfrost on one of your flowers.
10) Fun with filters: There is something about a magnificent sunflower that just lends itself a multiple approaches. I’m not a huge fan of the built-in filers available on today’s cameras. Some are just silly, others are overused, but sometimes the situation calls for a full-fledged filter attack on the subject. The flower is not going anywhere, milk it for everything its worth.

The filters in the Lumix offer a huge range of possibilities. This was shot using the “impressive art” filter which creates a dramatic low key image.
Lumix DMC-ZS50 filters exposed
I recently did just that with a multi-flowered sunflower planted in a container in our front yard. My camera of choice was the Panasonic Lumix DMC-ZS50 (ZS70 in Europe). See my earlier post on the Lumix travel camera in the garden.
This full featured 12-megapixel compact travel camera complete with a 30X Leica super zoom lens (24-720 mm on a full-frame 35 mm camera) is packed with built-in filters.
The number of “creative exposure modes” on this camera seem endless: Panorama Shot, Scene (Portrait, Soft Skin, Scenery, Sports, Night Portrait, Night Scenery, Handheld Night Shot, Food, Baby1, Baby2, Pet, Sunset, High Sensitivity, Glass Through, HDR, Starry Sky, High Speed Video, 3D Photo), Creative Control (Expressive, Retro, Old Days, High Key, Low Key, Sepia, Dynamic Monochrome, Impressive Art, High Dynamic, Cross Process, Toy Effect, Miniature Effect, Soft Focus, Star Filter, One Point Color (15 filters).
Above are just a few images of the sunflowers, taken with the filters built into the Lumix DMC-ZS50.
Most compact camera, DSLRs and mirrorless cameras sold over the past 10-15 years including the Canon Powershot elph series of camera’s and Fujifilm series including the X10, offer a host of interesting and creative modes or filters that enable the photographer to experiment with to create memorable images.
Of course, these modes have their place and are probably best left to specific situations where they are appropriate. I consider sunflowers the perfect opportunity to give them a try. These flowers have an air of fun about them, so why not take advantage of it and get creative.
Filters are a convenient way to add a little creativity to your images, but don’t forget to consider your sunflower photography as potential images to create beautiful painterly images using post processing software. Check out the link for a closer look at how I have used Photoshop and Painter to turn many of my photographs into painterly works of art.
Collecting a series of great sunflower images might even create a perfect opportunity to put them all together in your own photography book. Their are many companies the now make that process simple and inexpensive, and the results can be incredible. Rather than printing the images into 4X6 pictures and stuffing them into plastic sleeves, having them printed and put into book form allows you to leave them out as coffee table books or give them to friends as Christmas gifts. Check out my earlier post on creating your own photographic book.
In Conclusion
What may have begun as a gardening project to grow a few sunflowers could very well become an exciting photographic project to document everything from the emergence of the seedlings in early spring, to the rapid growth throughout early summer, and finally leading to the incredible blooms of these magnificent flowers. Then there are the visitors, birds, bees and butterflies that love the flowers and the seeds they offer.
The photographic possibilities are endless and the images themselves can become more than just a collection of digital files to share with friends on your social media accounts.
This may be the year to create a lasting memory of your summer in love with sunflowers with your own photographic book, or a print on your wall that you turned into a painterly masterpiece.
All it takes is a couple of seeds to get going and your imagination.
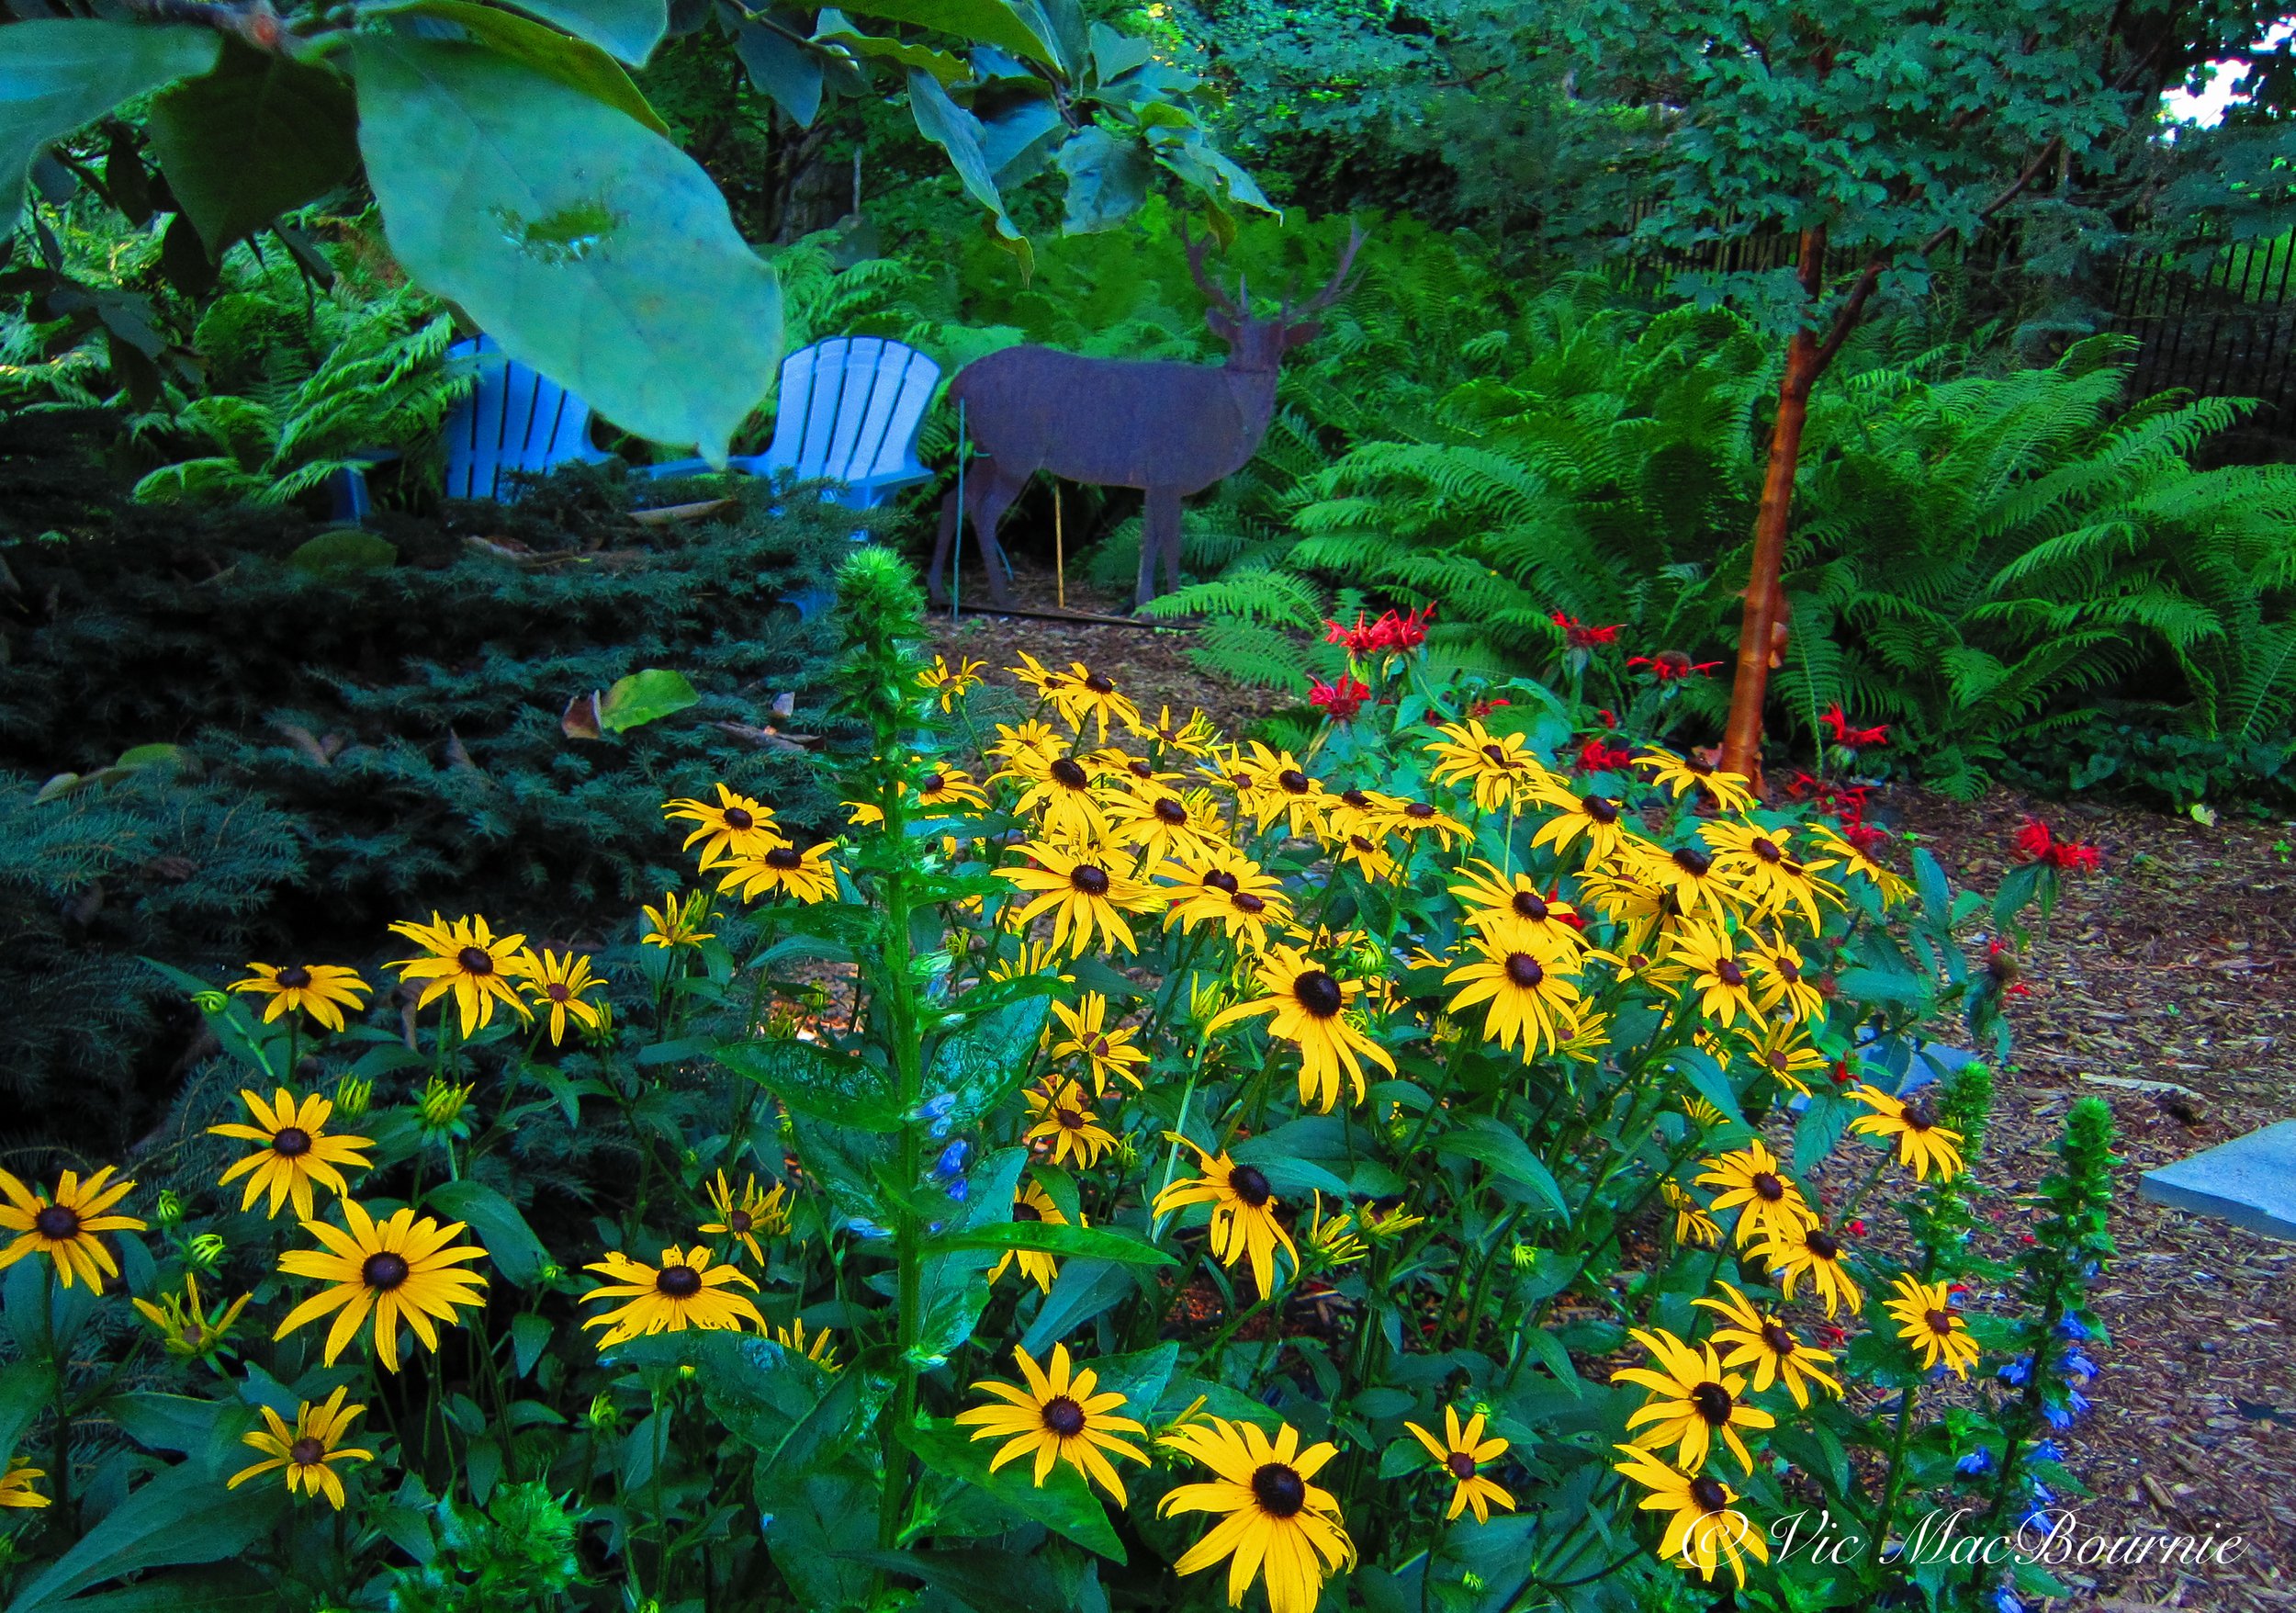
Can Canon’s PowerShot Elph 500 hold its own in the garden with flower photography
Eleven years after its introduction the Canon PowerShot Elph 500 HS continues to shine when it comes to garden photography.
Garden Elph is great for flower photography a decade after introduction
It was 2011 and Canon released its PowerShot Elph 500 HS complete with a modern touch screen to help combat the popularity of the emerging smartphones equipped with some pretty decent built-in cameras. About two years earlier, Apple had unleashed its iphone and it was gaining popularity in the world of point-and-shoot cameras. Something had to be done.
It was also the year of uprisings in Egypt, Libya, Syria, a devastating tsunami in Japan and the death of Osama bin Laden. On a lighter note, The King’s Speech and Toy Story Three were big hits, the St. Louis Cardinals won the World Series and the Bruins won the Stanley Cup.
It was also the year we bought our daughter a Canon PowerShot Elph 500 HS. For the next couple of years, that camera would travel the world with her throughout Europe, the United States and Canada taking thousands and thousands of pictures of her synchronized skating adventures, concerts, vacations and who knows what else.
Be sure to go to the end of this article for links on Canon’s refurbished items as well as cameras that competed with the PowerShot 500 back in its day. Also, at the end of the article are new cameras you might want to consider purchasing if a used camera is not what you want or you cannot locate a good used camera.
It served her well during those first few years but eventually the iphone more or less made it obsolete. The camera wasn’t actually obsolete at all, but it was no longer cool for young people to carry a point-and-shoot camera around when a phone made sharing on social media so much easier.
Be sure to check out my comprehensive post on Getting the Most out of Your Compact Camera.
If you want to see more garden images taken with the Canon Powershot, please check out my Canon Elph 500 Gallery of images.
For more on photographing flowers, check out my post on Flower Photography in your Garden.

The impressive back screen of the Canon PowerShot Elph 500 HS showing its menu.

The Canon Elph with its simple yet elegant front face.

Looking down from above on the Canon Elph’s top plate.
So it was tucked away in a drawer and almost forgotten.
Camera is ideal for flower photography
Fast forward 11 years and this little point-and-shoot that cost my wife and I more than $400 from Costco way back then, is a high performing part of my garden camera arsenal and a stellar performer when it comes to flower photography.

The tiny Canon Powershot Elph 500 HS is more than capable of capturing exquisite images in the garden. It’s extremely wide 24mm equivalent lens is fast and sharp. Eperimenting with the filters including the vivid colours used here can make the images really pop, especially considering the camera is approaching 12 years of age.
Who said an 11-year-old, high quality point and shoot digital camera is no longer usable?
In fact, this little blue-grey and silver beauty with its 12.1 megapixel CMOS sensor and 4.4x optical zoom lens (equivalent of 24-105mm lens) is becoming the perfect companion for me on my morning strolls around the garden. The fact it takes a regular SD card and shoots HD movies means it continues to challenge even the most modern point and shoot cameras.

The Canon Elph’s 24-105mm lens has the pulling power to capture detailed garden vignettes in vivid colour.
Some Key Features in the Canon PowerShot Elph 500 HS
12.1MP CMOS Sensor
4.4x Optical Zoom 24-105mm Lens (35mm Equiv)
Optical Image Stabilizer
Good Low Light/High ISO capability for its age
Full 1080p HD Video complete with stereo sound
Hi-speed burst shooting that can take up to 8.2fps
Slow Motion Movie Mode – at 240fps
Effects Include Toy Camera, Monochrome, vivid, portrait and foliage settings
Smart AUTO Has 32 Scene Modes
Movie Digest Mode that automatically records a short video clip every time you shoot a still image. The camera will then combine the clips into a single video. Perfect for a day of shooting in the garden with your children or grand children.

The lens allows a close approach to fine garden details like this moss growing between stepping stones in the Japanese inspired garden.
Is this little Elph worth buying today?
A quick search on Ebay and used camera outlets puts this little gem of a camera at between $50.00 for a well used model to almost $300 for a new-in-the-box-model. Expect to pay about $100 for a good used one. You may be able to get one much cheaper if you keep your eye on Kijiji and other more local on-line marketplaces.

Capturing more intimate scenes in the garden is easy in the auto mode where you let the camera recognize the scene and provide the best settings to capture it.
That’s a lot of camera for under $100. Its performance in low light makes it great for everything from travel photography to, of course garden photography. Its multiple frame bursts and best-image-capture settings make the camera ideal for parents and grandparents to grab shots of children, pets and vacation images. Set it on auto and it’s good to go but if you want more control it’s there for the taking.
What features does the Canon Elph 500 boast?
The fast f2.0, 24mm lens is more than enough to take in long garden vistas, in early morning light, while the 105mm has enough pull to capture more intimate garden vignettes, and with a little effort some garden wildlife.
It all comes in a package so compact that it slips into my pocket so easily that I forget I have it with me at times.
But what about the pictures?

The Canon PowerShot Elph has the ability to capture garden images in fine detail.
These images should speak for themselves.
The Canon spits out sharp images, with punchy colours and features enough built-in filters to keep the creative juices going year round.
I particularly like the “vivid” setting which gives the images the look of Fuji’s Velvia film on steroids. Add to that, an impressive “foliage” setting that enhances greens and fall foliage colours, a B&W setting, Cyanotype setting (blue cast), sepia setting, colour accent and poster settings just to name a few.
It would be easy to think this camera is nothing more than a simple point and shoot with very little extras to offer.
Afterall, there are no knobs and wheels on the camera’s exterior, and very few buttons outside of the on switch and image review button. The smartphone may have made the camera obsolete in some ways, but it wasn’t because it lacked the latest touch screen technology. Hidden inside the large LCD screen on the back of the camera is a wealth of settings buried in the settings menu.

A foliage setting on the camera is perfect for capturing the subtle colours of green in the garden as well as the pop of fall colours in the woodland.
Once you get into the menus, this camera is loaded with all the settings; Program, AV aperture value, TV time value, a portrait setting, pets and children setting, a total of 32 scene settings… . It even has a smart setting where the camera automatically selects the best shooting settings for optimal quality based on subjects and environmental factors to provide point-and-shoot simplicity.
It also features optical image stabilization, hi-speed burst shooting at up to 8 frames per second and full 1080p HD video with stereo sound.
What’s not to like about the camera?
I like lots of exterior buttons and dials to control the primary functions of a camera. This camera has none of these.
In fact, there are only a total of three buttons on the exterior of the camera: one to turn the carmera on and off; the shutter button to take the picture and an auto switch that allows the user to put the camera in complete automatic mode. If you are happy letting the camera make most of the decisions, put the camera on auto and snap away.

The camera’s functions – and there are a lot of them packed into the camera – are all accessed through menus from the large screen on the back of the camera. If you are comfortable sorting through digital menus to find the settings you need, than this camera is for you. It only took me about a half hour of playing with the camera to get a good feel for where the various modes and features were hiding, but when I needed to find burst mode quickly, I struggled to find it buried in the menus.
Who should own the Canon Powershot 500 Elph?
Anyone looking for a high quality, pocketable point-and-shoot camera and are not put off by sorting through digital menus rather than using old-school dials, will enjoy this camera. If you are looking for a camera that pushes you to be more creative then you will love the camera’s extensive filter capabilities from Black & White images to vivid, toy camera effects, portrait and even a foliage feature that brings out the best in greens and fall colours.
What more could you ask for?

The vivid feature in the camera results in nice punchy colours reminiscent Fuji’s Velvia slide film.
Can’t find a good used Elph, here are some new and used alternatives
If you like what is possible with a good point-and-shoot camera, but can’t find a good used version of the Canon PowerShot Elph 500 HS, here are a few recommendations you might want to consider.
Around the same time as the Elph 500 was released, Canon released the Powershot S100. Almost instantly, the camera took on a cult following and was considered by many to be the pro photographer’s backup Point-and-shoot camera.
This was also released in 2011 and sported a 12.1 megapixel sensor, a slightly longer 5x telephoto lens ranging from 24mm up to 120mm, a better performing sensor similar to the one used in its EOS SLRs including an on-chip noise cancellation system, and microlenses that improve its light-gathering characteristics. At the time, Canon said the improved sensor results in reduced noise and increased dynamic range; improving the the maximum available ISO to 6400.
The camera is elegant wrapped in its black case and it relies much more on a host of buttons and wheels for photographers who like the old-school approach to photography. A lot of these cameras were sold so finding one used should not be that difficult. Expect to pay a premium for this fine photographic tool.
If you are looking for a good deal on a Canon camera, consider checking out the company’s refurbished models on their website.
Here is a complete review of the Canon S100, from dpreview.
Other cameras on the high end include the Fujifilm X10, (link to my earlier review) released around the same time and also sporting a 12 megapixel sensor.
In addition, here are links to earlier Photography articles you may be interested in reading
• Macro Photography in the garden
• Ten tips for great garden photography
New compact point-and-shoot cameras to consider
Fujifilm X100V (Amazon link) (Henry’s link) that looks much like the X10 and handles like a Leica rangefinder.
Olympus Tough TG-6 (Adorama Link)for those who want to take their camera underwater for some real cool shots. Known for its excellent macro capabilities. Amazon Link.
Sony Cyber-shot (Adorama link) DSC-RX100 Vll for those who like the Sony brand Amazon link.
Ricoh GR lllx (Adorama link)for those who like to shoot with a prime lens. Amazon link
Canon Powershot G7 X Mark lll (Adorama link) (Henry’s link)for those looking for a high-end point and shoot that both fits in your pocket but carries a large 1-inch sensor, a fast zoom lens and 4K video at a price under $1000. Amazon link

Macro photography: How to get up close for flower and insect photos
Garden macro photography can open up a whole new world and getting good images have never been easier. Here are some tips on capturing more intimate scenes, from flower closeups to butterflies and other insects that call your garden home.

This image of Aphids on a milkweed plant is a fascinating study in nature. If you look close you can see ants “farming” the aphids while two lady bugs wait in the wings to devour the aphids. These are the fascinating images that macro photography offers photographers.
You don’t need expensive equipment to get great garden and flower close-up shots
Getting up close and personal to flowers and insects in the garden can be an eye opening experience.
Even on the worst of days, when the flowers look spent, the trees are tired and the unbearable heat saps the energy out of any hopes of capturing a beautiful image, there is always macro or closeup photography.
Somewhere out there in the garden – probably very close by – is an insect, a butterfly, a tiny flower, maybe a mushroom just begging to be photographed. And, depending on your expectations, capturing these images is not really difficult. Close-up images are available with almost every camera including more inexpensive compact, point-and-shoot cameras. If you have never used the closeup/macro mode, I encourage you to give it a try.
Closeup photography will open an entire new world to you that maybe you never knew even existed in your garden. The impressive colours in a beetle, the incredible detail of the wings on the butterfly, the daily life-and-death-struggle that largely goes unnoticed in the garden – all open up to us as we move in close.
For more on photographing flowers in your garden, check out my comprehensive post on flower photography in your garden.
For more on garden photography, be sure to check out my Ten tips for Great Garden Photography.
If you are looking to purchase a new or used camera, Check out my article on The Best Camera and Lens for garden photography.
If you are looking to upgrade your equipment, be sure to check out KEH Camera Exchange for excellent prices on used gear. You can also trade in your old gear to help you purchase new gear.
And, if you are wondering how a point-and-shoot digital camera that’s more than 10 years old can perform in the garden, be sure to check out my post on the Canon PowerShot Elph 500 HS.
If most of your garden images are pictorial approaches showing wide vistas of flower beds probably taken with a wide angle lens, or, even more intimate vignettes of groupings of flowers and maybe a birdbath, you owe it to yourself to experiment with macro or closeup photography.
Macro/closeup photography enables you to tell a whole new story in your garden. If you think there are no more images to be taken in the garden, think again.
If you are looking for more information on taking closeup or macro images in the garden, be sure to check out Kelbyone’s many online photography courses.

This native Bumble Bee on salvia was photographed with a manual focus 105mm macro lens on a 20-year-old DSLR camera with a flash equipped with a small, inexpensive flash mini softbox.
The image of aphids and ladybugs on the milkweed is a perfect example of the everyday struggle in our gardens that is easy to overlook. I was on my hands and knees trying to find a monarch caterpillar to photograph when I saw the scene playing out under the leaves of the milkweed. The scene would have gone completely unnoticed if I was not looking for close-up images down low in the garden.
What equipment is needed to shoot garden macro photography
Don’t get confused by the terms macro or closeup photography. Macro technically means getting so close that you photograph your subject at lifesize or 1:1. Closeup photography is simply getting in close enough to your subject to create an image that satisfies you. For example, neither a monarch butterfly, nor a large dahlia, need to be shot at life size for an effective closeup image.
For true macro, a specialized lens or accessories are needed. Most of today’s compact cameras come equipped with a closeup setting that allows you to photograph flowers, butterflies and insects up close.

A macro lens shot wide open probably at f2.8 creates this lovely soft background in this flower photography image. This effect would be difficult to achieve with a compact lens set on close focus.
In the image of the ladybugs and aphids, it certainly helped that I had my macro setup with me that included a DSLR, a manual focus 105mm manual focus macro lens and a flash equipped with a mini-softbox attached to soften the light. Although I consider this setup my more “serious” macro setup, the DSLR is 20 years old, the lens is at least 22 years old and even the flash is an older model. I shoot it all on manual – manual exposure, manual focus. Nothing fancy here.

This is an example of the images that are possible with a high-end point-and-shoot on macro mode. This Bee balm was photographed using the FujiX10 compact camera with a 28mm-110mm (in 35mm terms). Notice the soft background that is made possible by the speed of this outstanding lens.
Garden photographers may not want to invest in a more “serious” macro setup like this. No problem. Chances are you already have a perfectly useable closeup or macro lens on your compact point-and-shoot, travel, or bridge camera. Even your smartphone has the capability of getting up close to most subjects you will want to photograph.
Check out this link for my ten-year-review of the Fujifilm X10 that I used to take the Bee balm image above.
If you are looking to upgrade your camera equipment, be sure to check out the excellent equipment at KEH Camera Exchange. You can also trade in your gear to make the upgrade even less expensive.
The important factor is getting comfortable with using these features on your camera and learning to work with light to capture interesting images. Macro photography is no different than any other types of photography in that light is the key component to capturing interesting images. Harsh, mid-day light may not be the best time to photograph.

This Iris was again shot with a 100mm macro lens to give an extreme closeup. The size of the flower means it could have been photographed with many close focusing compact cameras possibly equipped with a closeup filter accessory.
Digital has changed the world of macro photography
If you are like me and struggled to obtain usable macro images during the film years, you might be surprised how digital has completely changed the approach to macro or closeup photography.
In my film years, I would not have thought of shooting closeup or macro images without the use of a tripod. The combination of wind blowing the subject around and film sporting ISO settings of 25 (Kodachrome), 50 (Velvia), made getting good macro images a real challenge.
Impossible without a tripod.

A monarch feeds on a thistle in late summer. Capturing these images takes time and patience but are beautiful natural snapshots in time.
Today’s modern cameras allow you to pump up the ISO to astronomical levels and still get excellent results without lugging around a tripod.
In fact, if you are shooting with a Fuji camera, you can shoot the digital equivalent of Fuji Velvia at pretty much any ISO you like. Even “Kodachrome”, which Fuji calls classic chrome, can be photographed at pretty much any ISO you like. That’s a far cry from using the ridiculously low ISO settings of ISO 50-64 for the original slide films.
ISO levels of between 1600-3200 would be unthinkable during the Kodachrome and Fujichrome years. Today, these ISO levels can be starting points for many of today’s modern cameras, especially if you use software like On1 NoNoise to reduce the noise in your images.
I like to stay below ISO 1000, but shoot as low as 200 ISO if given the opportunity and when I use flash.
What does all this mean to the garden photographer?
It means you can grab your compact camera, set it on closeup mode and get excellent hand-held images of a butterfly, or a closeup of your favourite flower in full bloom.
With a little more planning, you can set up a tripod beside your favourite flower, move in close and wait for a butterfly or insect to come land on it.

In this macro image you can see the extremely limited depth of field resulting from using the lens wide open (f2.8) with only the eyes being in focus. Today’s modern cameras offer “focus-stacking” which allows the maker to take several images focusing in different areas of the subject and then blending them together to make the entire subject tack sharp.
Modern technology has even made firing the camera from a distance with a wireless remote a whole lot easier. Heck, with some cameras, (a Lumix for example) you can even trigger it with an app on your cell phone while you’re sipping on a glass of wine or your morning coffee 10 feet away from the camera.
Times have certainly changed for today’s photographers wanting to add macro or closeup photography to their arsenal. All we gardeners need to do is take advantage of what today’s modern cameras and lenses offer us.
What accessories are good for garden macro photography?
As noted above, excellent macro images can be taken on anything from a good compact point-and-shoot camera with its built-in lens, to a modern high-end DSLR or mirrorless camera equipped with an expensive macro lens that enables extremely fine detail and close approach.
The quality of the image and your success rate will generally increase in direct proportion to the amount of money you invest in the equipment, but don’t let that stop you from getting the most out of the equipment you already have in your bag.
There are, however, accessories you can add to improve your results significantly no matter what equipment you are using.
• A good off-camera flash, for example, goes a long way to opening up possibilities in the macro world. I’ve added an attachment from Fotodiox that goes over the flash to create a mini soft box. This combination has certainly improved my macro images.
• Small LED lights, like this one from B&H Photo are another example of how technology has changed the world of macro photography. These small, battery powered lights that fit in the palm of your hand, provides a continuous light source that is easily manipulated around the subject even as you are looking through the camera.
• Similar to the LED lights mentioned above, is the Godox RING48 Macro Ring LED Light that fits around most lenses a provides perfect, but controllable light.
• Collapsible reflectors, like these from B&H photo, are available in gold, silver and white, and allow you to reflect light into dark areas of the image.
• Closeup lenses, like this kit made by Lensbaby at B&H Photo that thread on to the front of your lens are an easy way to turn any lens into a close focusing lens. I like to use one of these on the Fujifilm X10 which, although the camera already has an excellent close-focusing capability, only gets better with the Nikon close-up filter.
• Extension tubes can only be used on cameras with interchangeable lenses. Extension tubes like these at Adorama photography have no glass elements inside of them, are inexpensive and do not degrade image quality. Their prime duty is to allow any lens to focus more closely. That makes them a useful addition whether you are using a 50mm or a longer telephoto lens. Using them with a telephoto lens is exceptionally helpful to allow you to get images of small subjects from a distance.
An up close macro image of this native bloodroot provides details that easily go unnoticed by the naked eye.
Just get out in the garden and give macro a try
There was a time when macro was a specialized area of photography. It involved expensive lenses and approaches that required meticulous attention to detail and exposure. That’s no longer the case. Getting great shots of your garden up close has never been easier with today’s modern cameras and accessories.
Take a few mornings to wander through the garden and catch the light skipping across your favourite flowers. Move in on the insect waiting for the sun to raise the temperature enough for it to begin its day.
Focus on what you want to capture up close in your garden and consider adding accessories that make it possible to capture those images. Close-up photography can open up a new world for you and hep you become much more intimate with your garden and the critters who call it home.

McGee & Co. brings indoor style to the garden
McGee & Co. take home and garden decor to new heights in their impressive on-line marketplace. A little elegance, a touch of rustic and some fine house decor add up to year-round inspiration.
Gift, design and accessory ideas for the home and garden
If the name Shea McGee is unfamiliar to you, it may be time to become familiar with this outstanding young designer. Her decor style is comfortable, cosy and yet has a nice touch of modern that easily transitions into today’s most beautiful home decor style whether its indoors or in the garden.
I first discovered her on the company’s YouTube channel, but it wasn’t long before her decorating show was picked up by Netflix. Good news for Netflix subscribers and Shea lovers, the second season of shows were just picked up by Netflix.
Her Southwest roots brings a style to her work that makes the transition from inside the home to the outdoor garden totally seemless.

Shea McGee brings timeless decor design to the home and garden. Now Ferns & Feathers readers can enjoy discounts from Shea’s impressive on-line market.
So, it’s no surprise that McGee and Co. markets an outdoor line of garden decor elements ranging from beautiful garden pots and other accessories, to outdoor rugs and furniture, to incredible exterior lights that bring an elegance to the garden. Her indoor accessories are also beautiful, but we’ll focus on the garden.
Take a moment to browse through her extensive lineup of beautiful outdoor decor and garden items. Her decor elements are meant for the most distinguished and elegant garden rooms and patios, but even if you are not a buyer, we can all be inspired by the exceptional offerings.
The small, handheld garden shovel is a just one example of the exquisite garden tools that, in themselves, worthy of hanging on a wall of the most luxurious she shed.
“With quality and craftsmanship, we bring beauty into everyday spaces. Our collections of furnishings and decor inspire you to live well.”

The McGee & Co website greeting says it all: “With quality and craftsmanship, we bring beauty into everyday spaces. Our collections of furnishings and decor inspire you to live well.”
In my mind, living well begins in the garden and McGee & Co. has that covered. Below are three garden utensils that are exquisitely made and have a made-to-last look and feel to them.
Click on the images below to get information on the items.


Let me introduce you to a few of my favourites. Unfortunately, at this time, McGee & Co. does not ship any large goods outside the United States. They did inform me that they will ship smaller items such as pillows outside the U.S.
We’ll start with some small items and go from there.

These brass garden tags add a sophistication to any container planter while helping forgetful gardeners remember what was planted. They make perfect gifts for gardening friends, but order two sets to make sure you have a set for yourself. This year, for example, I planted a number of natives from Ontario Native Plants and I can’t remember what I planted where. When the flowers come out, I’ll know what’s what, but in the meantime the tags would help and look good in the process.

The striped, handmade Clay Planter is just an example of the many containers available (see below image for more). These containers are a good example of the simple rustic style that is so prominent in Shea McGee’s decor style.
Again, simple elegance takes centre stage in these Striped Clay Planters finished with a coloured glaze to create this rustic look that is perfect, in its inperfection. McGee & Co. say the material is not entirely waterproof and recommend adding a saucer or using an insert to prevent damage. I can see the pieces taking on a mossy look over time if they were simply filled with soil and allowed to age gracefully.
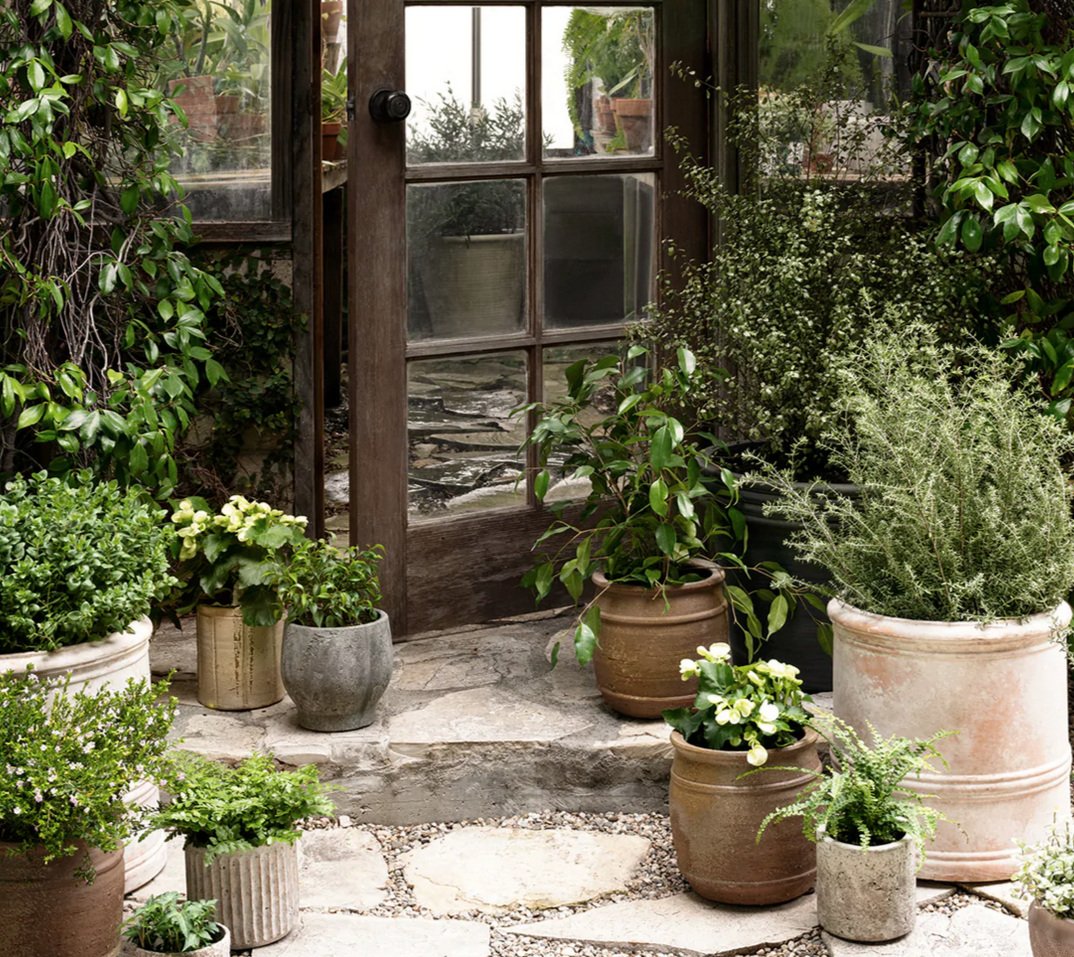
If you are in love with rustic pots be warned. McGee & Co.’s selection of charming, rustic pots are hard to ignore. Imagine a collection like these gracing your patio or front entrance? Spend a few moments on their site exploring various combinations that the on-line store offers.

These Wood-handled-secateurs are another example of combining beauty in an item that looks as good in your hand as it does on the patio table. If you are like me, having these handy for a quick Chelsey chop is important when you just can’t let it go until tomorrow. The secateurs are just an example of the outdoor accessories available on the website store.

The Hamlet Hanging Chair just might be the perfect spot for a morning coffee or evening glass of wine. It’s an example of bringing the indoors outdoors. McGee & Co. describe it as “an intricately woven rattan design, that is crafted from a semi-sanded frame and natural Kubu Core. Providing extra seating from kids rooms to outdoor covered spaces, this unique and eclectic chair envelops you with its rounded form and comfortably soft cushion.
Finally, no backyard is complete without a comfortable spot to settle into with a glass of wine, the birds and a cool breeze rustling through the leaves. McGee & Co. offers a line of outdoor furniture that brings style and elegance into the garden, sun room or patio. Whether you are in the market for outdoor furniture or just looking to add a piece or two, these designs are certainly an inspiration.

Fujifilm X10: Ten years on, can it still compete with modern compact cameras?
The Fujifilm X10 is a 10-year-old high-end compact camera that still has everything a garden photographer needs to capture beautiful garden images.

The Fujifilm X10 captured this model at a glower display at a local public garden. The colours of flowers are lovely as are the skin tones of the model. This hand held shot was taken at ISO 800. 1/110th sec, at f2.8.
Camera review 10 years of use in the street and in the garden: Sample pictures
Back in 2012, I decided to simplify my photographic life and purchase a Fujifilm X10 high-end compact camera.
To this day it continues to be an important part of my photographic arsenal and a camera that is often beside me in the early morning when I’m out in the garden. Fuji’s X10 is really the ultimate street photography camera, portrait and travel camera, but many of the same qualities that make it a great shooter for street photography and portraiture also make it ideal for garden photography.
There is something inherently satisfying about the feel of it in my hand; the smoothness of its mechanical zoom ring and the click of the shutter when I find a subject that piques my interest. But what most Fujifilm fanatics will tell you is that the camera’s multiple film simulations provide the ultimate in creative possibilities. More on Fuji’s brilliant film simulations later in this article.
The small rubber thumb grip and the perfect weight in your hand reminds you that this is no cheap compact camera.
And it wasn’t cheap. In fact, despite its age, it continues to hold much of it’s value on the used market. There is a reason for that and it has to do with the build quality of the camera and the fact it has developed somewhat of a cult following in the world of Fuji lovers.
If you are considering upgrading your camera equipment whether it’s a new camera body or new lenses, consider checking out what KEH Camera Exchange has to offer. Their equipment is all fairly rated so you can rest easy knowing that you are getting exactly what you are paying for in your used cameras and lenses purchases.

An afternoon with this chipmunk and fun setup in the garden resulted in this adorable image. The colours and sharpness of the images is a tribute to Fuji’s fine 28-112mm lens and the 12 megapixel, '2/3" type' CMOS sensor.
Be sure to check out my comprehensive article on Getting the Most out of Your Compact Camera.
For more images from the Fujifilm X10 please check out my Fujifilm X10 gallery.
The 10-year-old Fujifilm X10 is an excellent camera for street photography and just as good for capturing the activity in the garden.
“My goal is to show gardeners what they can expect if they purchase a used, decade-old Fujifilm X10 or even a similar high-end compact camera from that era.”
Who is the market for the Fuji X10?
I think the Fuji marketing team had me in mind when they designed the camera. Back in 2011, Fuji marketers set out to design a camera meant to bridge those of us looking for a digital compact camera that retained the feel and features we enjoyed in our traditional film cameras.
As the highly respected dPreview website wrote back in July of 2012 when the camera was introduced: “Its retro design aesthetic bears the DNA of the company’s X100 and X-Pro1 models with a magnesium alloy body, sleek rangefinder-inspired design and a wealth of external dials and buttons.”

This image was made using the extract colour feature in the Fujifilm. Red was the chosen extracted colour to emphasize the single colour used in the display.

The Velvia setting in the Fujifilm X10 helped to make the colours in this scene pop, to say the least. ISO 200, f2.5, 1/140 sec.
And, if you are wondering how a point-and-shoot digital camera that’s more than 10 years old can perform in the garden, be sure to check out my post on the Canon PowerShot Elph 500 HS.
In fact, one of the features that drew me to this camera in the first place was the quality of the dials. All steel, all with an extremely satisfying click with each turn. The under/over exposure wheel is exquisite. To be honest, the entire camera reminded me of one of my all-time favourite cameras – the renowned Pentax 35mm LX film camera of which I owned many over the years.

Is it possible to capture garden wildlife images with the 28-112mm lens and the FujifilmX10. This sample image helps to answer the question. It was shot from a Tragopan photo blind on my homemade reflection pond. Wildlife images are possible even with a compact camera and a little planning.
Can the Fujifilm X10 be used to capture wildlife images?
Fujifilm’s 28-112mm lens is really not long enough to capture wildlife images, but with a little thought and a little more work, it’s possible to make solid garden wildlife images as the sample image of the chipmunk above illustrates.
You either need to befriend the animals or birds so that they allow a close approach, or use a blind to get in closer than usual.
The good thing about garden photography is that most of the animals in the garden recognize you as a friends rather than a threat and some will allow a close approach. Some effort on your part to befriend backyard wildlife will go a long way. In the above image of the chipmunk, I used a Tragopan photographic blind to help get in very close.
In fact, I was maybe 3 feet from my homemade reflection pond. Add a few peanuts to the scene and there’s a good chance you’ll get opportunities to catch wildlife.
Still, the Fujifilm X10 does not make catching active wildlife easy. Shutter lag and slow auto focus means that the animal is often gone by the time the photo is taken, but it can be done and done well with some practise.
My first move will always be to grab the DSLR and my 300mm F4.5 lens, but I like the challenge of turning a terrific street shooter and garden photography camera into a wildlife camera/lens.
This series of images shows the intelligent digital zoom in action. The above image is taken with the 112mm optical zoom. The image immediately below shows the above image cropped in Lightroom to approximately 233mm image. The final image shows the intelligent zoom at 233mm. All the images are straight out of the camera.

Cropped to 233mm in Lightroom.

Intelligent zoom image at 233mm.
How to turn on the intelligent digital zoom feature
One feature that makes it easier to capture backyard wildlife is the intelligent zoom feature which increases the range of the lens from 112mm to a whopping 233mm. Granted, it’s digital not optical, but whatever “intelligence” Fuji has used to more than double the lens length certainly works.
Turning on the digital zoom feature can be a little tricky. First off, it only works in jpeg mode and single frame mode. The feature is easily assigned to the tiny function button on top of the camera beside the shutter button.
You can assign Intelligent Digital Zoom to the Fn button by holding the button for 2 seconds, and then selecting the feature.
Once it is assigned, you turn it on by pressing and holding the Fn button again briefly for about a half a second. You will know it is turned on when a sliding zoom scale with a magnifying glass icon appears in the upper left of the LCD screen.
This fall scene was captured on the Fuji X10.
More Great Garden Photography posts
If you are looking for more great Garden photography content, take a few minutes to check out some of my other posts including:
Where was the Fuji X10 made?
It should come as no surprise that the Fujifilm X10 was made in Japan. And, in case you might not have noticed, Fuji proudly stamps “Made in Japan” right in the middle of the back panel where it is impossible to miss.
After my initial purchase, I immediately ordered a lens hood that came with a filter thread that allows me to use 52mm filters, including the all important circular polarizer that removes glare from leaves and other reflections including those in water. In addition to the polarizing filter, I have used a Nikon close-up filter that allows me to use the 112mm focal length in a macro capacity, and a series of Cokin filters that bring even more of an old-school feel to the camera. (For more on Cokin filters, go to the end of this post.)

The vivid Fuji colours taken with the Fuji X10 of a wetlands in fall.
All this is great, but can Fujifilm’s X10, with its 12 MP, 2/3-inch type sensor, still compete with today’s modern cameras when it comes to the quality of the photographs and, in particular, when it comes to garden photography? The answer to that question is a resounding yes. However, there are several areas where the camera is showing its age and may not be the ideal choice for every photographer.
In this post, I’ll review the camera ten years after purchasing it brand new. Over the course of one week, I am going to put the camera through its paces in the garden and elsewhere to decide whether it can still hold its own against the competition. Unlike many camera reviews, this is not aimed at photo geeks or pixel peepers. I am including real-life sample images that help provide realistic expectations. My goal is to show gardeners what they can expect if they purchase a used, decade-old Fujifilm X10 or even a similar high-end compact camera from that era. It’ll be a hands on review with lots of example images and still enough geeky camera details to leave you with a solid understanding of the camera and why it’s still being used by thousands of people in the field.

If you ever wondered how sharp the Fujifilm’s X10 lens is capable of being, this critically sharp sample image of a very mobile chipmunk should help answer that question.
Ten years photographing with the X10
After ten years of using the camera – it’s been with me on vacations to Boston, New Orleans, Nova Scotia and two cruises – I have developed an understanding of the camera’s strengths and weaknesses, but I’ve never really explored the full menu of features the camera offers.
It’s just too easy to put the camera on Auto, Program or even Fuji’s unique EXR technology setting and let it do all the work. I’ll admit, setting the camera on auto is what I do most on vacation and I’m not against using these settings in the garden for quick shots. The results are always excellent so why dig deep into the menus on the camera’s 2.8-inch, 460,000 dot LCD screen?
This camera has too much to offer not to dig deep into the menus and maximize the opportunities the camera offers. Too often on auto the camera is set to wide-open aperature, which can give a pleasing background on this outstanding image-stabilized, 28-112mm F2 to 2.8 (35mm equivalent) built-in lens. But, the shallow depth of field can be too easily mistaken for a soft lens if too many of the images are set wide open.
By moving the main control knob to Aperture priority, we can begin to see the real potential of the lens and realize truly sharp images. (see the image of the chipmunk with the peanut in its mouth to appreciate the sharpness of the lens.)

“Okay great,” you say. “What about the images?”
Expect warm vibrant images. Beautifully toned B&W photography, gorgeous soft portrait’s and, most importantly, vibrant flower, garden and nature images. How the heck does Fuji do it?
Fuji X10’s digital film simulations are brilliant
For photographers who still remember the film and transparancy days, Fuji has developed in-camera settings that are digital simulations of their former films – Provia for everyday use, the softness of Astia for portraits and the vibrant colour so many of us nature photographers remember of Velvia for nature. For lovers of B&W photography, Fuji not only gave us a B&W setting, they also gave us Yellow, Green and Red built-in filters to provide dramatic skies, softer skin tones and more contrasty foliage.
All this to say that using these historical films is just too much fun not to go into the menu and dial them in.
Sample images from the Fuji X10
Below is a series of sample images taken in the garden and around my home.

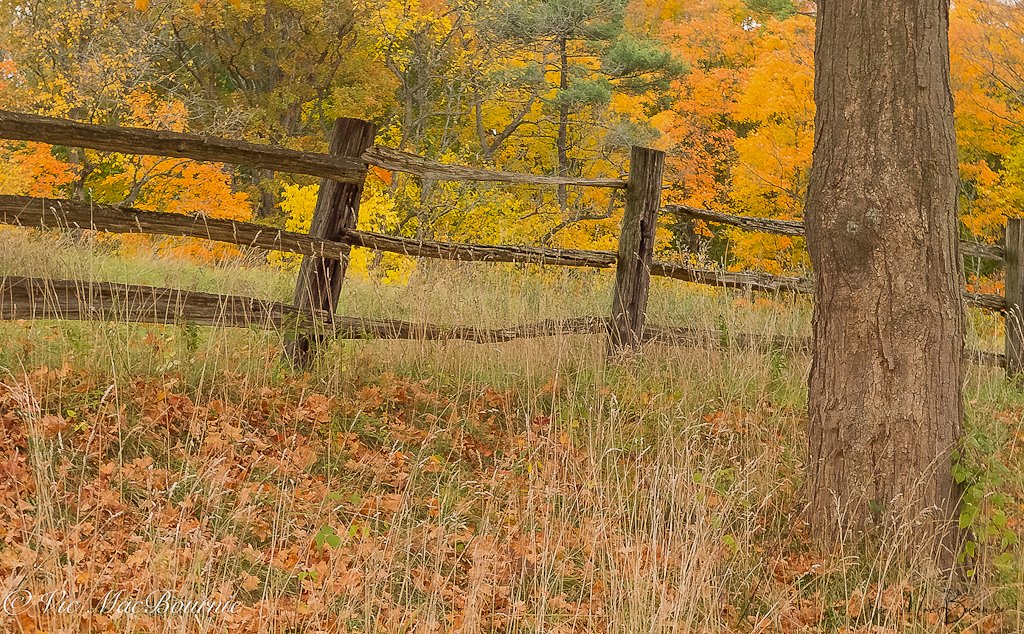


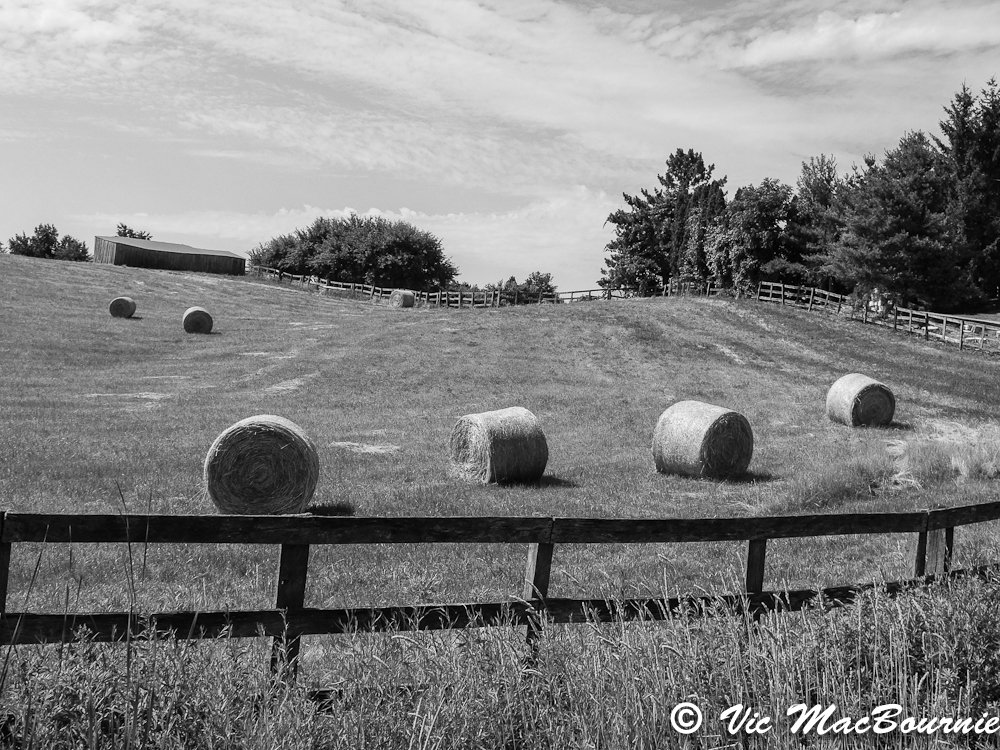
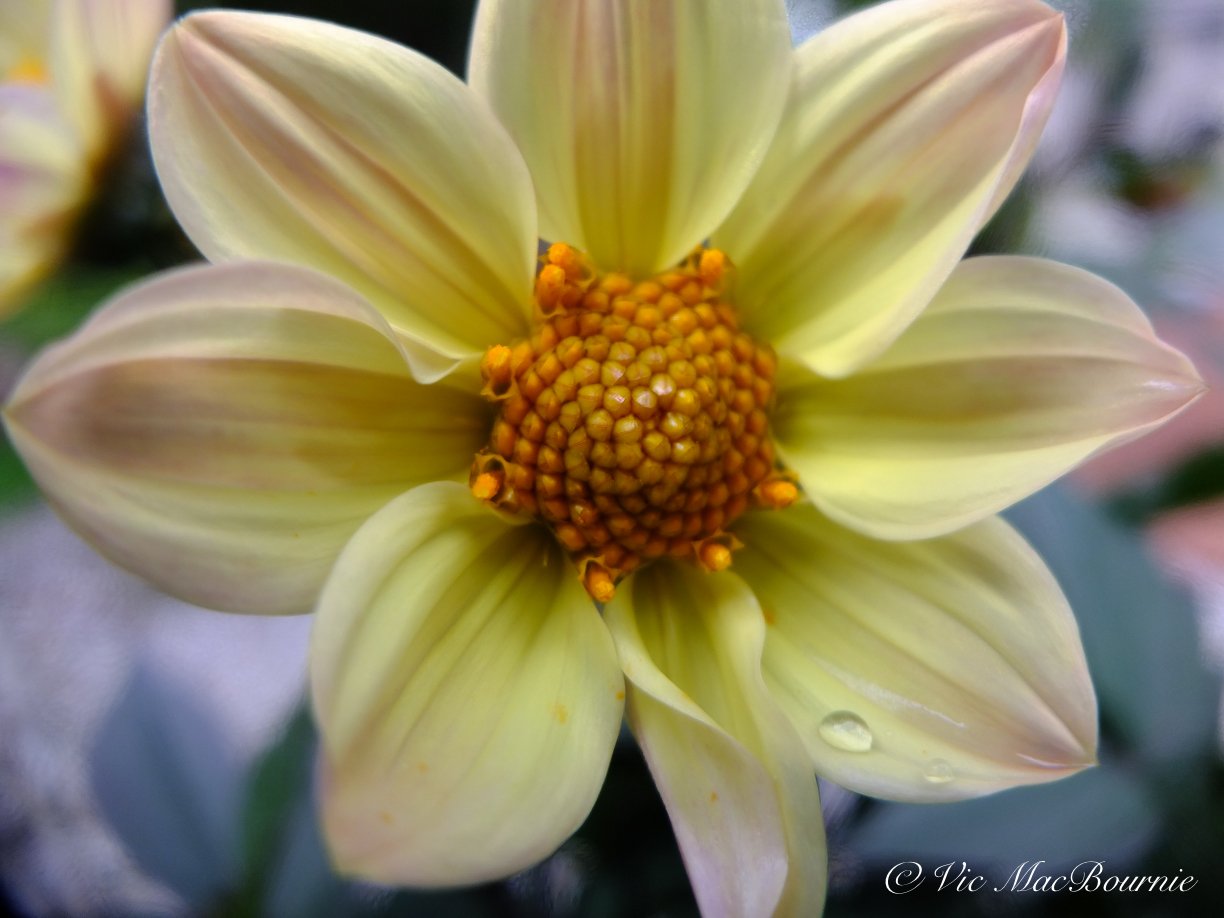


There are also two macro features that let you get absurdly close to let’s say flowers or insects on flowers, multiple drive modes to capture fleeting subjects, “best picture” mode that takes a series of images and helps the photographer pick the best one. There’s a handy feature that takes an image with flash and without flash so that you can compare which is best. In addition, dig into the menu to find the feature that takes a series of images (very quickly) in and out of focus to create a blurred background (bokeh) in an image that never had one.
To get a little more specific, the CMOS sensor means the camera can shoot up to 7 frames-per-second at full resolution, and 10fps at 6MP. The sensor also enables 1080p 30-frames/sec movie shooting. There’s also a panorama mode to capture the entire sweep of your garden.
Can the Fuji X10 shoot RAW?
Add to the list the fact the camera shoots RAW and can process it in camera, and you are left with, even in today’s exacting standards, a camera that is capable of delivering seriously great results in the woodland, on vacation and especially on the street if that is what you enjoy shooting when you’re not photographing your garden.
All this seems just too good in a 10-11-year-old camera.

This sample image of a Monarda flower shows the intense colour that can be achieved by the Fujifilm X10 on the Velvia setting.
Fuji X10 28-112mm lens is all a garden photographer needs
A garden photographer really needs a camera/lens to excel in three different areas: wide angle with the ability to capture large vistas, medium telephoto with the ability to move in close to a group or a single flower, shrub, butterfly or even a small mammal or bird, and Macro to move in close or very close to a flower, butterfly or insect in the garden.
The Fujifilm X10 excels in all these categories. The image above of the scarlet Monarda is an example of the camera’s macro features combined with the Velvia film setting to maintain the flower’s vivid colour.
With the macro setting, and a Nikon closeup filter, I was able to capture the chipmunk and roses.
The 28mm (35mm equivalent) at the wide-angle end of the Fuji lens is more than enough to capture wide vistas of a garden bed or interesting section of the garden. It’s also wide enough to accentuate a foreground element, such as a bird bath or colourful grouping of flowers, in the foreground while still including a wide expanse of the garden.
Is the FujiX10 good for portraits?
The moderate telephoto is great for moving in closer to a grouping of flowers, but it really takes its place at the head of the table when it comes to garden portraiture.
Let’s face it, our gardens are the ideal place to capture family members – children, grandchildren and pets – in a natural setting, and a fast 112mm lens is the perfect tool to capture garden portraits.
Fuji obviously recognized this and added additional features to the camera to make portraiture a focus of the camera, the most important being the built-in feature that enables a soft background in images. The camera takes a series of photos and then merges them together to reveal a sharp main image with a lovely soft background. This is important for nice portrait effects, but more difficult to achieve with smaller sensor cameras like the Fuji X10 and other compact or point-and-shoot cameras. The built-in software, handles this issue beautifully in-camera.
The ability to easily dial in the portrait film Astia, which creates beautifully soft skin tones, and excellent bokeh makes the camera a real asset to portrait photographers.
Would I like to go beyond the 112mm magnification? Absolutely. As a wildlife photographer, I am always looking to get more telephoto capacity to get in closer but that’s just me. If you are more of a traditional garden photographer, extreme telephotos are not likely a critical need. In addition, a longer lens would have forced Fuji to make an entirely different camera losing much that has made the Fujifilm X10 the prized camera it has become.
So, is this enough to crown the X10 a gardener’s camera extraordinaire? I think so. But there is more.
More features in the Fujifilm X10
A tiny, built-in flash that actually kicks out enough flash to fill in harsh, mid-day shadows or light up a patch of the garden when the sun is setting.
A hotshoe that allows the photographer to use a mounted or external flash.
A shutter button that can be fired with an old-fashioned cable release.
A panoramic feature for the ultimate in wide angle views of your garden.
A real and useable optical viewfinder for those who hate using the screen on the back of the camera.
The ability to shoot 7 frames-per-second at full resolution, and 10fps at 6MP.
The ability to use 1080p movie shooting.
A solid tripod socket on the camera to assist in getting a sharp image on the camera.
Fujifilm’s X10 in the garden, in the woodlands on the street and at the party
Is the 10-year-old Fuji X10 the perfect camera on the market for garden photography?
Of course not.
Its sensor is small in comparison to many of today’s compact high-end cameras. Its lens, though exceptionally good, lacks the telephoto pull to being able to easily capture small wildlife and fast-moving birds and butterflies in the garden. Its focus is on the slow side and its ability to take a full range of filters can be a little challenging.
But will you wake up in the morning grab a coffee and head out into the garden with the camera in hand ready to capture everything your garden has to offer?
You bet you will.
Not only will you have it with you, you’ll be fondling the dials and zoom ring like you would the interior of a fine Italian sportscar. And the results will both satisfy you and inspire your photographic aspirations to the point where the pocketable camera will be the only one you take when you go on vacations, out for a day of street photography, on day outings or parties and special occasions.
It’s a camera for gardeners looking to capture their creative vision; for street photographers looking to discreetly capture the spirit of their favourite inner-city; and it’s a camera for parents/grandparents looking to capture the beauty of children and other family members in exquisite portraits.
In other words, the Fujifilm X10 is a camera that will inspire you to be the best you can be, and it’ll do it in style.
New compact point-and-shoot cameras to consider
Fujifilm X100V (Amazon link) (Henry’s link) that looks much like the X10 and handles like a Leica rangefinder.
Olympus Tough TG-6 (Adorama Link)for those who want to take their camera underwater for some real cool shots. Known for its excellent macro capabilities. Amazon Link.
Sony Cyber-shot (Adorama link) DSC-RX100 Vll for those who like the Sony brand Amazon link.
Ricoh GR lllx (Adorama link)for those who like to shoot with a prime lens. Amazon link
Canon Powershot G7 X Mark lll (Adorama link) (Henry’s link)for those looking for a high-end point and shoot that both fits in your pocket but carries a large 1-inch sensor, a fast zoom lens and 4K video at a price under $1000. Amazon link
Cameras that compete with the Fujifilm X10 with 12 megapixel sensors
(Below are B&H Camera links to cameras that are no longer available)
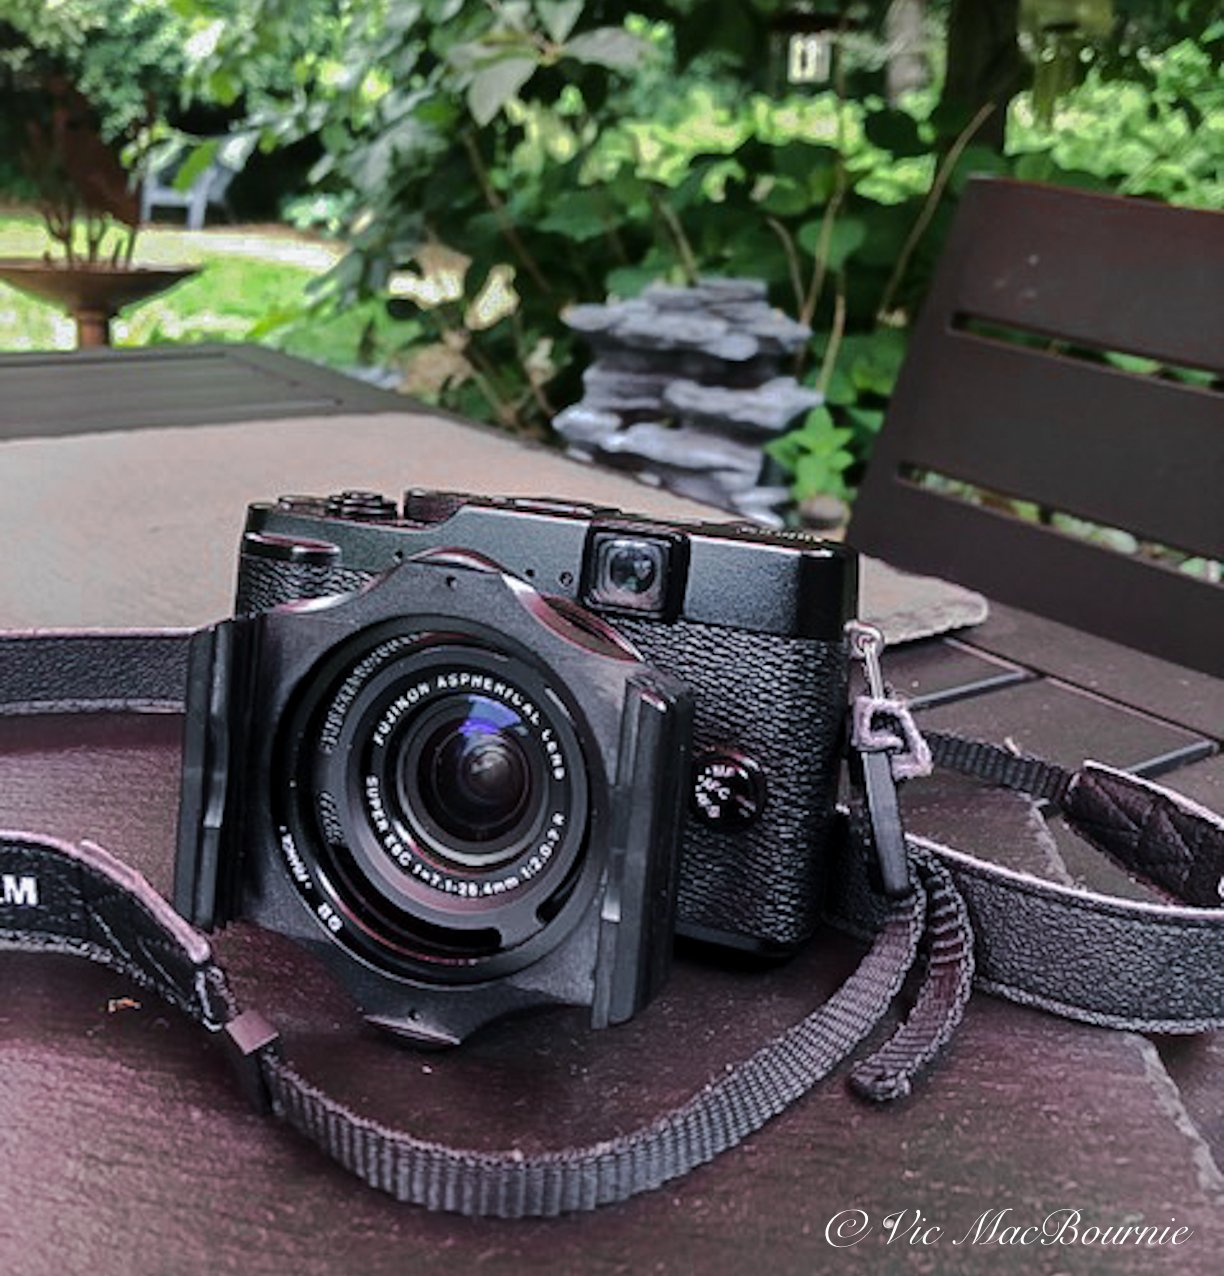
Fujifilm X10 fitted with the Cokin system filter holder.
Cokin filters help bring back the fun factor in photography
In a number of the images in the mini slideshow above, you may have noticed images with a strong yellow/blue cast. These images are the result of using a Cokin Yellow/blue polarizer on the camera. The filter is one of many in the Cokin line of filters that can be effective even in this age of digital manipulation.
Polarizing filters can be critical to getting saturated colours in almost any image, but especially garden images when the sun is reflecting off of leaves. They are also extremely effective when trying to take the glare off of water.
Graduated filters, soft focus filters and other fun filters, if used effectively and sparingly in your photography can add a little fun and an old-school/retro look to your images. Also, although many of the filter effects can now be done digitally with Lightroom or Photoshop, it can take a certain expertise in these programs to make the result look natural. Creating the effects in-camera can be more effective at times and add a fun factor back to your photography.
The Cokin system allows photographers to purchase one filter that can be used on multiple cameras with different filter sizes by simply purchasing an inexpensive step-up ring for your lens. For those cameras that have no ability to add filters, the Cokin system allows the photographer to simply hold the square filter up to the lens to create the effects.
I continue to use Cokin filters in my photography as well as traditional screw-on polarizing filters, and urge readers to consider adding a set to your photographic arsenal.