

Pentax *ist-D: A CCD sensor with DSLR punch
CCD-sensor cameras have developed a bit of a cult following now that working copies are getting harder and harder to find. The Pentax *ist-D is an example of an excellent CCD camera that continues to deliver in its old age.
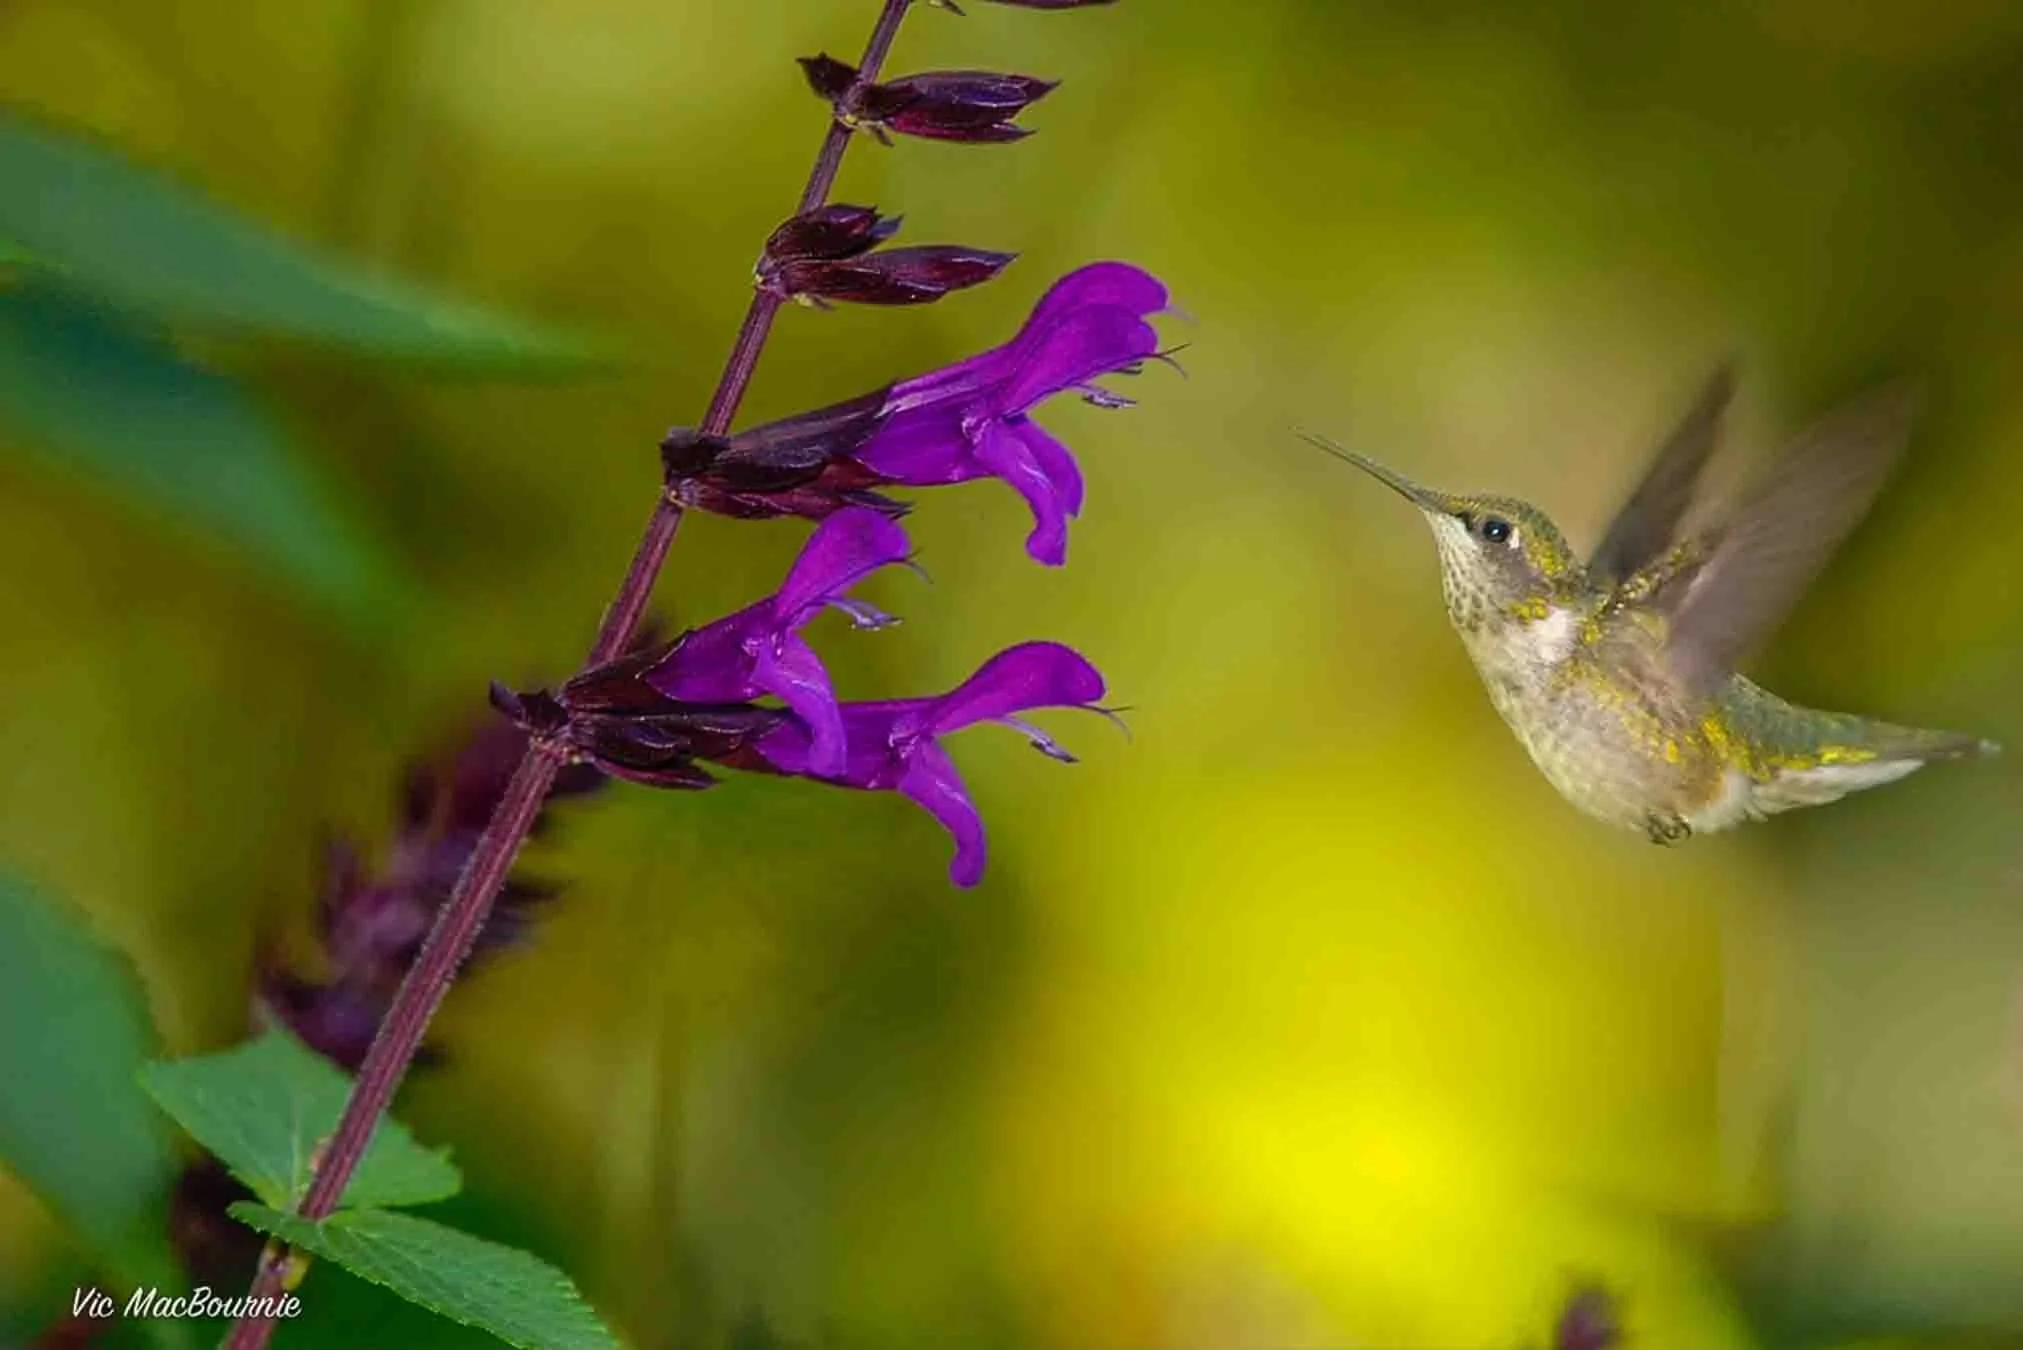
A hummingbird works the salvia in the garden. Photographed with the istD and 300mm F*4.5 lens.
CCD-sensor cameras prized by photographers looking for film-like images
It’s hard to believe that a 20-plus-year-old digital SLR not only still works, but continues to create outstanding images.
Is the answer its outstanding CCD sensor, its build quality, ease of use or all three? I’m going with the all-three conclusion, but that CCD sensor in the original Pentax *istD, which actually was the premiere digital camera for that camera maker, certainly makes this camera a keeper for any photographer looking for those intrinsic qualities that only CCD sensors provide.
Its low price on the used market makes it a camera you might want to grab while you can, especially if you have some fine Pentax glass to complement this highly competent digital SLR. Other notable DSLRs sporting CCD sensors include the Nikon D100, D70, and the Canon EOS-1D as well as the Minolta Maxxum 5D.
There are no doubt other CCD-bssed cameras available, but this post is about the Pentax *ist-D. I know, the name Pentax chose for the camera is completely weird, but Pentax marketing has never reached the heights of its cameras. The marketing department may well be big part of the reason that the camera maker is slowly disappearing from the market. It is certainly not because of the quality of the cameras.
At the time of this writing KEH Camera exchange actually has a Pentax *ist-D listed for just $54, or the price of an inexpensive dinner out with a friend.


Whether you believe in the CCD-sensor hype or not, I find its superior film-like images hard to argue with when it comes to the quality of the images.
And I should know. I’ve owned the 6-megapixel camera since it were first released in February of 2003 and used it for years as my first and only digital SLR. I still use it today as a backup to my CMOS censored Pentax K5.
Defining the positive qualities of the ist-D CCD sensor is difficult, but needless to say time after time when I go through my tens of thousands of images on Lightroom, it’s the images taken on the CCD sensor that catch my eye and please me most.
Photographing in the garden
In the garden, the *ist-D is often my camera of choice to capture the incredible colours of flowers, birds, insects and butterflies that the CCD sensor seems to bring to life more so than the CMOS-based cameras.
The image below of the Ladybugs attacking aphids on a milkweed plant is a good illustration of the colours the CCD sensor can bring out in your images. It is also an interesting example of nature at work in the garden and how important natural predators are in our gardens.

Lady bugs gathering aphids on milkweed. Photographed with the Pentax istD with it’s very capable TTL flash and a 100mm Macro lens.
CCD sensors and the film look
For those who have never given much thought to the sensor in their digital camera, think of it as how analogue photographers used different films to give them very different results. The muted but natural colours of Kodachrome, for example, vs the punchy, vivid colours that Fujichrome delivers. Both deliver fine results, but often very different ones.

And, yes, if you dabble in Lightroom or Photoshop, you can achieve similar results with good post processing if you want to learn the intricacies of the digital darkroom. But, maybe it’s just easier and a whole lot more fun to just use a camera with a CCD sensor to begin with and push it to the max to capture pleasing images.
Check out my other featured posts on Pentax cameras and lenses:
Either way, there is no denying that Pentax’s original DSLR, for me at least, proved to be an excellent purchase – even if it was outrageously expensive coming in at a suggested retail price of US $1,600.
Defining the positive qualities of the ist-D CCD sensor is difficult, but needless to say time after time when I go through my tens of thousands of images on Lightroom, it’s the images taken on the CCD sensor that catch my eye and please me most.
The camera itself with the separate motor drive is a nice, high-quality piece of kit that seems to be able to take anything thrown at it over the years.


Decent autofocus, the fact it takes four AA batteries to power it and its multitude of buttons to prevent the user from having to dig too deep into the menus, makes it simple to use.
However, its back LCD display, use of CF cards and slow writing capabilities, takes away at least some of the joys of using it. It’s not perfect, but no cameras from that era were perfect and most delivered inferior results or were not built with the same quality that earlier film-based cameras offered from Pentax and other camera makers.

I’m not going to go into a full review of this camera here; that’s available elsewhere on the web. But unlike many of those technical reviews, I can offer readers 20 years of images shot with the Pentax *ist-D together with the F*300 f4.5, 28-100 power zoom Pentax lens, 100mm F4 macro lens and the Kiron f2.5, 105 macro just to name a few.
What others say about the Pentax *ist-D
All of these comments are taken from the Pentax Forums - an excellent resource for all things Pentax. Also, the charts below are courtesy of Pentax Forums.
• “I bougth my copy in 2013. It looked like it had taken a beating, and it had! I bought it to use in very harsh environments such as dry, sandy deserts, beaches and wetlands. It did its job and never skipped a beat. AA batteries made it much easier to manage power supply.”
• “I purchased my first *istD used to begin taking real estate photos. I have since shot over 50,000 photos with the same camera. It has never ever missed a beat. It is absolutely top rated for reliability in my situation. I leave this camera in a Pelican case in a truck with a sunroof in the super hot Mississippi summer heat and it doesn't seem to mind.”
• “That *ist D was my main camera for almost 8 years. Here's what I liked and disliked about it:
Likes:
- Small size and weight. There has still never been a DSLR with better specifications that is smaller and lighter, by a long shot. For years I waited for a real D replacement, but it never appeared. Now Pentax doesn't even offer an entry-level model that small. If you want something this small today, you have to go to an entry-level Nikon or Canon. Have fun with that.
- Pentax lenses. Yes others have greater quantity, but narrowing it down to the lenses I might actually buy, Pentax's selection, both old and new, was more interesting.
- Compatible with TTL flash. It was the only Pentax DSLR compatible with TTL flash, and I used an old AF500FTZ for years. On all other models, the 500 is manual-only (no Auto Thyristor mode).
- Ability to set three completely separate sets of settings. Weird that the K-7 doesn't offer that. It was the one part of going to the K-7 that was an uncomfortable downgrade.
- Everything else was good enough. Though N/C are better at some things, there was no deal-breaker for my needs with the *ist D. It was a small, light camera that did everything I wanted and took the lenses I liked.
Dislikes:
- Slow write times! Even with the fastest cards (Lexar with "Write Assist" technology), RAW write times were about 6 - 6.5 seconds. For cards without the Lexar "Write Assist" technology, make that 7 seconds. And the buffer was only 5 RAW files. So very often I'd fill the buffer and have to wait 6 seconds for each shot thereafter. This was by far my biggest dislike, bigger than all the others combined. My understanding is that it was the last DSLR to do writes in software; just months later the D70 appeared with much faster writes, doing it in hardware. Then the DS, and all other Pentax DSLRs, have had much faster writes.
- That grip. It was not great to hold. The battery grip made it better but at the cost of increased size. All other Pentax DSLRs have been MUCH better to hold.
- Batteries. For best results you want to use CR-V3 batteries (NIMH rechargeables make the AF slower with lower voltage; Alkaline rechargeables could fry it with higher voltage). But they are expensive. Finally I found that I could find large lots of them in unusual brands on eBay, pretty cheaply. That was an improvement but still annoying. Yes it's nice that if you run out of battery you can find alkaline AAs just about anywhere. But in real life the only time I ever needed that was at a beach, far away from any place where I could get AAs.
- Can't control ISO with wheel. I mostly use aperture priority, so one of the two wheels usually goes unused. When the K-10D came out with the ability to control ISO on one of the wheels in aperture-priority mode, I wished they'd do a firmware update that allowed that on the *ist D. But no such luck.
- Control wheel. Hard to hit it right, and to hit it hard enough for it to respond. Not a good design. But I don't like the K-7 solution much better.
- Small, low resolution LCD. Much better on the K-7.
- Can't write both RAW and Jpeg. I don't have a lot of time for PP, but my wife uses my shots for scrapbooking. Converting all those shots to Jpeg was often an issue. When the K-10D came out with the ability to write both, I wished they'd do a firmware update that allowed that on the *ist D. But no such luck.”
The charts below are provided by the Pentax forums website at www.pentaxforums.com


In conclusion
Your first DSLR is like your first girl or boyfriend, there’s always a soft spot and a little love for them left over even if others have since taken their place.
For me, there have been many other digital cameras that followed the *ist-D, but she still holds a place in my heart. I am lucky enough to still own a very good working copy of Pentax’s first DSLR and plan to continue to use it until that mirror slaps against the camera internals for the last time.
This summer, I plan to give it a good workout and will report on how well it holds up. It continues to provide high quality images out of its 6 megapixels and the joy it continues to give me makes it an important part of my growing arsenal of cameras.
Stay tuned.
Please take a few moments to check out my gallery of images here.


River cruises offer incredible garden experiences
Nothing says spring quite like tulips, daffodils and a range of colourful spring bulbs. There are lots of ways to experience tulip festivals from local events to European river cruises to Amsterdam, the motherland of tulips.
Visit spectacular spring tulip displays, private and public gardens all in luxury


All of the above images were provided by the Tulip Festival of Amsterdam
Imagine waking up to a sea of tulips as far as the eye can see. Sheets of red, yellow and orange stretching out before you only broken up by a windmill or workers harvesting the flowers for markets around the world.
And then, imagine your biggest decision of the day is whether to order the Coq au Vin (chicken in wine) or the Boeuf Bourguignon (beef stew) at your dinner table overlooking the Rhine River as you cruise from Amsterdam to Basel Switzerland.
It’s just another day in the life of a European river cruise.
These are the experiences of a typical European river cruiser visiting The Netherlands and Belgium in spring. Every year thousands of Americans, Canadians, Asians and Europeans board Avalon, Viking, Scenic and other river boats to experience this spring phenomenon along the Rhine River.
Of course, experiencing spring in The Netherlands is just the beginning of an incredible week of touring historical and iconic French and German cities along the Rhine River.
Even outside of the spring touring season and the incredible tulip displays, gardens and floral displays are front and centre along the river cruise routes, with breathtaking container plantings and window boxes. In many towns along the routes, window boxes, hanging baskets and impressive container plantings greet visitors adding incredible beauty to already magical towns.
Tours of the Black Forest in the state of Baden-Württemberg in southwestern Germany, close to the borders with France and Switzerland offers visitors an opportunity to experience a natural woodland in the heart of Europe. The forest earned its name from the Ancient Romans who found it so thick, dark and impenetratable that they named it the Black Forest.
Today, locals and tourists visit the area for its hiking opportunities, as well as a wealth of museums, small towns and villages that are known for their abundance of cuckoo clocks.

Window boxes line many of the smaller canals and gardeners can get plenty of great ideas with the spectacular container plantings along the cobblestone streets and pathways in the quaint commercial areas.
When it comes to gardening on a small scale, it’s tough to beat the artistic touch and attention to detail European gardeners bring to the table.
My wife, daughter and I have booked a river cruise along the Rhine for September. I’d love to experience the spring tulips, but circumstances led us to a September cruise. My research, however, go me thinking how readers of this website might appreciate learning a little more about what garden experiences can be found on a river cruise. During these let’s say difficult times, cruising Europe just might be the perfect escape from the pressures facing Americans and Canadians at home.

One of the highlights of any trip to The Netherlands in spring is the Keukenhof gardens considered to be one of the best garden of The Netherlands. Seven million tulip bulbs on eight acres of incredible beauty from about the middle of March through to the middle of May. For more on seeing the best tulip displays check out this post from Jessica Lynn writes.
Of course, you don’t have to go on a river cruise to experience spectacular spring blooming tulips. In Ottawa Canada, the tulip festival runs from May 9th to the 19th at Commissioners Park. The festival features massive tulip displays, family-friendly activities, and celebrates the flower's beauty and its historic ties to Canada's capital. Click here for more information on the Ottawa tulip festival.

Make it stand out
Whatever it is, the way you tell your story online can make all the difference.
Closer to where I live, The Hamilton/Burlington Royal Botanical Gardens offers incredible spring displays in its sunken rock garden. Many of the images in this post are from the RBG rock garden display. More on the Royal Botanical Gardens, with a focus on their woodland gardens, here.
Many public gardens have incredible spring bulb displays of tulips, daffodils and Hyacinths. They are a great way to welcome spring and get ideas on the best way to use bulbs in our gardens.

In our woodland garden, tulips are almost impossible to grow because of the deer, but we do have a few daffodils in our front garden. Naturalized plantings of tulips and daffodils can work perfectly in a woodland garden setting. Distribute the bulbs in a more natural way, maybe among ferns, to maintain a naturalized look.
You might consider leaving the more formal plantings of your favourite bulbs in the front of your property.
Whether you are planning a river cruise or just a visit to a local public garden, now is the time to begin planning. I suspect most of the cruises will be already sold out for this season, but you may be able to get a deal on a package if you check out one of the many cruise lines.
In any case, experiencing spring bulb displays are an excellent way to welcome spring.

Pentax PZ1-p: The forgotten flagship
The Pentax PZ1-p was the flagship of the lineup in the 1990s when autofocus swept the market and technology began to influence the design of all cameras. Today, these cameras are some of the most inexpensive film cameras on the market, yet they are among the most modern technological masterpieces available.

Pentax’s impressive, one-time flagship is still an outstanding camera and can be purchased for pennies on the dollar making it one of the best deals on the used-camera market along with other autofocus film cameras of the same vintage.
Film enthusiasts missing out on ‘90s era gems
Film is back and it’s growing with a new found energy that is surprising even the most die-hard film enthusiasts.
The analogue film market is following the analogue audio renaissance by capturing the hearts and interest of a younger generation who never experienced the thrill of having to wait to see the result of their latest photo shoot.
And with its return, comes the re-emergence of decades-old film cameras. Sure, there are a smattering of new film cameras from companies like Pentax, Rollei, Leica and Lomography, but the real action is in used DSLRs, point-and-shoots and rangefinders. (Check out my recent review on the Konica C35 rangefinder).
“The film market Peaked in 2003 with 960 million rolls of film sold. It makes sense that in the decade or so leading up to that, a lot of really nice cameras were being made.”

The PZ1-P captured this tricky winter scene beautifully despite the difficult metering situation with all the pure white snow.
The new analogue shooters are looking for the full experience so they are gravitating toward the classic cameras – Leica, Nikon, Rollei, Canon and Pentax manual focus vintage cameras that have stood the test of time and continue to deliver.
Unfortunately, almost entirely forgotten are the incredibly good, extremely capable 1990s autofocus gems that helped to lead the way for the modern digital cameras.
Unlike their more vintage counterparts, these plastic fantastic cameras can be picked up on the on-line marketplace for a fraction of the cost of their all-manual-focus, all-metal cousins. Cameras that once cost upwards of $800- $1000 in 1990s prices can now be purchased for mere pennies on the dollar.
“Today, the PZ series of cameras remain one of the most cost effective purchases around and one of the best all-round film cameras available.”
These largely still-undiscovered cameras, loaded with features and capable of stunning results, are the bargains of today. Cameras like the Canon EOS 1N, released in 1994 as a 35mm SLR that became one of the last film cameras released prior to the digital revolution. The EOS 1N body style continues to resemble the body style of some of the latest Canon digital cameras.
There was the Nikon F50D or N50D, which added date/time-imprinting and a panoramic mode.

Another difficult scene that the PZ1-P handled nicely.
The incredible cameras of the 1990s
In fact, the 1990s is the perfect window into the transition from print film into digital cameras. It saw the release of some of the most advanced film cameras ever made as well as the first hints of mass market digital cameras.
From Emulsive website: “Film cameras through the ages provide us with insights into how the minds of designers and artists clustered in different parts of the world interpreted solutions to the challenges of universal interface and ergonomics – it’s fascinating. What intrigues me the most is how that simple-ish challenge of running a strip of film through a camera has been addressed in so many different ways.”
The Emulsive website went on to list what the author felt were some of the best cameras of the 1990s: including the Contax AX with its unique in-camera autofocus for manual focus lenses. The Konica AiBORG – a poorly designed and truly weird looking camera that did not compare at all to the well-designed, retro-look light meters on the top plates of the Nikon28Ti and 35Ti, which continue to sell at a premium price on the used market.
It was also the decade of the high-end compact point-and-shoots with the iconic Contax T2, Ricoh GR1 and Olympus MJU.
SLRs were still king, however, led by cameras like the Nikon F100 launched in 1999.
Pentax’s PZ-1P: A forgotten jewel in a fine line of pro DSLRs
Largely forgotten, however, except for a dedicated group of Pentax enthusiast, was the offering Pentax made to the 1990s SLRs, most notably the PZ series of cameras led by the Pentax PZ-1p. Released in 1994 as the new flagship for the venerable Japanese camera maker, the Pentax PZ-1 and its various iterations remained in production until 2000, when the new third generation auto focus MZ/ZX series of cameras were released.
Today, the PZ series of cameras remain one of the most cost effective purchases around and one of the best all-round film cameras available.
In July 1996, the highly respected photography magazine PHOTOgraphic hi-lighted the Pentax camera system and it’s flagship PZ cameras in an 8-page feature that called the PZ-1p, the flagship model in the Pentax AF-SLR line, a camera “loaded with features for everyone from the serious shooter to novice, who hopes to be a serious shooter some day. …
“For more serious users, there are a full range of exposure and focusing options, three metering patterns (eight -segment multi, center-weighted, and spot) to handle just about any lighting situation, +/- 4 stops of exposure compensation, and three-frame automatic exposure bracketing (both settable in 1/2-EV increments) and much more. Shutter speeds range from 30 seconds to 1/8000 sec. (maximum flash-sync speed is 1/250th) plus bulb mode for longer exposures (and the LCD panel indicates the time the shutter has been open in bulb mode – great when you don’t have a watch.)”

The PZ-20 is a less-featured offering than the PZ1-p but still a great option for photographers looking for a “full-frame” print camera with autofocus, multi-metering and other more modern features.
The article went on to praise many of the features in the camera concluding: “The idea behind the PZ1-p is to provide maximum interaction between the camera’s automation and the photographer’s creativity.”
Much of that statement was attributed to the unique approach Pentax took to creating a camera that offered the photographer a simple, intuitive approach to obtaining the proper exposure and adjusting the camera’s settings on the fly while maintaining proper exposure.
“Thus the camera offers Hyper program and hyper manual modes, which lets the photographer enter the automated process whenever desired. Hyper Program is essentially a shiftable program AE mode with a safety shift – the camera will automatically select both shutter speed and lens aperture for correct exposure, and if the shutter speed or aperture you select will cause the other control to go out of range, the camera will choose a setting that will retain proper exposure…”
The magazine went on with effusive praise of the Pentax flagship model pointing out the long list of lenses the camera can use from the modern, high-end autofocus marvels like the 250-600mm f/5.6 ED (IF) SMCP-FA* to the vintage and exquisite manual focus M and A lenses.

The PZ1-p is a highly capable camera, able to handle everything from sports and action photography to landscape scenes such as the one above.
Why these cameras have been left out of the analogue revival
So why has this exceptional, pro-level flagship camera been almost forgotten during the recent analogue revival?
Let me explain.
Back in the 1990s I owned a PZ1-P. Coming off of a Pentax LX (three to be exact) and an unforgettable Pentax MX, the PZ1-P was a monster of a camera and a technological marvel that pretty much left me scratching my head over how to operate this thing.
Fast forward about 30 years and countless digital cameras, and the PZ1-P isn’t so daunting. In fact, it seems quite simple to use – should I say almost elegant.

The PZ1-P is a very capable camera that can handle everything from wildlife, to sports
Compared to the multiple menu windows on the back of most – if not all – digital cameras, the PZ1-p’s well-placed LCD panel on the camera’s top plate seems almost too simple. The focus is strong, almost too strong. The built-in winder lets you know it means business and the Hyper program and hyper manual modes are brilliantly executed.
There’s TTL flash, flash compensation, mirror lockup using a 2-second delay exposure, double exposure, built-in intervalometer, full manual, and even snap-in focus firing with manual-focus lenses. There are more lenses both manual and autofocus than you could ever hope for and a build quality that is as good as it gets for cameras of this vintage.
What more could one ask for?
Oh, and did I mention that people can’t seem to give these cameras away and they can be had in some cases for the price of a couple rolls of film.
The Pentax PZ line of cameras offer more and better features than any of the older manual cameras, including the magnificent LX and MX fully manual cameras.
The problem, however, is most photographers returning to film are looking for a truly retro experience. They want to feel the heavy, cold steel of the vintage cameras in their hands. They want to cock the shutter rather than have it done for them electronically.
In other words, they are not looking for a film camera that feels and operates like a digital camera.

This image of a vintage car was captured beautifully on print film, scanned with an Epson flatbed to convert it to digital and then pre-processed in Lightroom.
Today’s analogue camera users want to experience all the pops, scratches and skipping that their vinyl counterparts experience listening to their favourite albums on vintage vinyl.
I get it, I truly do. If that’s your vibe, pick up a K1000, LX or MX. They were great cameras and still are today. But you will pay for that privilege.
If you are looking for a more modern, vintage vibe with stunning results that allow you to use all those older manual focus lenses on a “full-frame” autofocus film camera, there is no better option than the PZ line of Pentax cameras, or a similar vintage camera from one of the main brands such as Nikon, Canon, Minolta…
The Pentax PZ line of cameras offer more and better features than any of the older manual cameras, including the magnificent LX and MX fully manual cameras. The problem, however, is most photographers returning to film are looking for a truly retro experience. They want to feel the heavy, cold steel of the vintage cameras in their hands. They want to cock the shutter rather than have it done for them electronically.

A Sandhill Crane captured with the PZ1-p and the Pentax 300mm f4.5* lens. The lineup of lenses for the PZ1-p stretches from the earlier all-manual lenses to more modern, high quality autofocus prime and zoom lenses.
Initial impressions in my return to the PZ1-p
Like I said, I owned this camera years ago and never really appreciated all its bells and whistles. This time around it is completely different.
It’s time to embrace these bells and whistles to ensure that expensive film I’m shooting is exposed properly and the images are razor sharp. (My eyes are not what they used to be and manual lenses are not my go-to option any longer)
Luckily, I kept a number of my film-era lenses and am having a terrific time trying them out again and experiencing their original focal lengths rather than the sensor-cropped focal lengths.
There is the white 300mm F4.5 * lens, Tokina 20-35mm, 28-105mm autofocus lenses and manual focus 40mm f2.8, 50mm 2.8 macro, 100mm F4 macro and my 105 Kiron f2.5 macro just to name a few.

Closed for the season. The long list of lenses available to photographers with th PZ1-p makes it a great choice for those who already own some of the high quality
The results… so far
To date, I’ve shot only three rolls of film with the camera during these winter months but the results (see images above and in my Pentax PZ photogallery) have been impressive.
More importantly is the performance and feel of the camera. It’s comforting to know that you have a professional-build camera in your hands that can deliver even in difficult situations.
I have been using the PZ1-P alongside digital cameras for comparison, often using the exact same lens on both the Pentax K5 digital and PZ1-P.
I choose to do my own scanning with an Epson 500 scanner and then process the images in Lightroom and Photoshop.
KEH Cameras description of the PZ1-p
KEH cameras give a very thorough description of the camera in its listings. KEH is an excellent camera reseller if you are interested in obtaining one of these outstanding cameras. Here is their description of the former flagship camera.
A high performance, multi-featured 35mm autofocus SLR for the advanced amateur and professional photographer. Intelligent Power Zoom Lens System with 'Zoom Effect', 'Image Size Tracking, and Zoom Clip Modes'. Panorama image format mode can be used in mid-roll for eye-catching compositions Fifteen Pentax Function settings allow the photographer to customize factory settings to his or her preferences. Six comprehensive exposure modes which include Shutter Priority, Aperture Priority, Multi-Programmed AE TTL Program Flash Mode and two innovative interactive modes, Hyper Program and Hyper Manual The PZ-1P features a choice of eight segment metering system, spot metering or center weighted metering on demand A high speed motor drive which advances at four frames per second, and the option to choose from eight different drive modes: 3 self-timer options, intervalometer, multiple exposure and auto bracketing Interchangeable focusing screens, built-in TTL RTF flash with red-eye reduction and manual depth-of-field preview

Barn in snowstorm.
What others are saying about the PZ camera line.
I could go on and on about why film users are missing out if they are not considering the PZ line of cameras, but I think I’ll let the Pentax users group forum have their say about the PZ cameras.
Here are just a few choice quotes from users about the camera:
All in all, a fantastic camera for the price I paid. I find this more comfortable and enjoyable to take out and shoot these days than my MX, which is sacrilege and I hate myself, but there you go.
And it *is* a good camera - it feels good in the hand, is robust and well weighted, and AF and the built-in flash are surprisingly good …. It has just about every feature under the sun (for its age), meaning it's a very practical professional tool for the advanced photographer willing to learn its quirks. Sadly you *will* have to learn its quirks …
By many accounts, I'd say this is the most fully featured, advanced film camera Pentax ever made. Aside from the single point AF, the camera is arguably better than its successor, the MZ-S. The two-dial system, combined with Hyper Program and well laid out buttons means that all of your aperture/shutter settings, metering and metering modes, focus, exposure compensation, and memory lock can be adjusted without moving your eye from the viewfinder. Brilliant. Not sure if they ever went back to this setup but they really really should.
Overall, it's a gem: Every bit as good or better than anything from Canon or Nikon early/mid 90s at a fraction of the price because Photog hypebeats haven't picked up on it yet. Buy one if you can.
The Z-1P has all shooting modes and the Hyper Program is my favourite. By turning the aperture or shutter speed wheels, I can instantly get into Av or Tv mode and pressing the IF button returns the camera to the Program mode. Great idea! The test roll turned out perfect. It appears that the camera works properly and the metering is accurate.
Read more forum comments here.
In Conclusion
This comment from a Pentax forum user looking for a more traditional feel shooting film is a good example of how film shooters are feeling these days. The comment both praises the PZ line of cameras while explaining why it may not be the choice of new film users.
“ My only problem - and it isn't a criticism - is that I don't really want a digital camera experience when I'm using film. I would rather be using my ME F or my Electro. But if some law was passed that I could only own one film camera it might well be this one.”
I think this comment is an important reason for the PZ line of cameras as well as other cameras of this vintage, not gaining in popularity among the modern analogue shooters. I believe, however, that it is only a matter of time before cameras like the PZ series are rediscovered by photographers for the incredible features they offer and the ridiculous low prices you can get them for today.
For someone whose eyes are not as good as they once were, the autofocus is almost a must these days. Hyper program makes these cameras a joy to use and their operation being so close to today’s modern digital SLRs makes them the perfect choice for photographers willing to forfeit the truly vintage vibe for accurately focused, properly exposed film.
Pentax PZ1-p specifications
Format 24x36mm and panorama 13x36mm
Lens Mount: KAF2
Focus: SAFOX II AF with sensitivity from -1 to 18 EV
Meter: SPD photocell with average, evaluative and spot modes
Exposure Modes: HyM, M, P
K and M Lenses: spot
A, F, and FA Lenses: 6-segment in P mode, spot: in M and HyM modes.Exposure compensation: +/-4 EV in 1/2 or 1/3 step
Metering range: 0 to 21 EV
Film speed: Auto DX; 6 to 6400 ASA
Shutter: Electronic; shutter speeds from 30s to 1/8000, B
2s mirror prefire avialable
Remote control E and F
Motorized film advance, up to 4fps
Multiple exposures
Viewfinder: 0.80 x [92%], with shutter and aperture LED
Interchangeable screens
Flash: Built-In; GN: 14
Flash Synch: 1/250
Power: 1x 6V 2CR5 battery
Self Timer: 12 seconds
Dimensions: 152 x 95.5 x 74 mm
Weight: 650 g
Accessories
Fitting Case(s) soft case: Fd(s), soft case: Fd(m),soft case: Fd(l)
FTP grip-strap.
From Wikipedia: The Z-1p (aka PZ-1p) is a high-end 35mm SLR with autofocus introduced by Pentax in 1995. It was the flagship camera for Pentax until the introduction of the MZ-S in 2001. It is a well laid-out camera, with 2 wheels which can be used to select most functions. The Z1-p extended the KAF2 mont by adding power-zoom support; while maintaining compatibility with lenses with earlier versions of the K-mount:
KAF lenses support almost all features of the camera except powered zoom and related functions.
KA lenses can be mounted with the 'AF Adapter 1.7X' and will then support autofocus, provided they are f/2.8 or wider. Without the adapter they do not support autofocus, but the Focus Indicator (FI) feature can still be used (with lenses of f/5.6 or wider). Shutter-priority AE and programmed AE modes can all be used.
Manual-aperture K mount lenses can be mounted with AF Adapter K, or use the FI feature as above. They do not support shutter-priority AE or the programmed AE modes, but can be used for aperture-priority AE and in manual exposure.
42mm screw-mount lenses can be mounted using 'Mount Adapter K'. The FI feature can be used if the lens aperture is wide enough. Aperture-priority AE and manual exposure are possible.

A winter of wildlife in the woodland
Winter can be the perfect time to watch for wildlife in our gardens. Besides the regular cast of characters, watch for more elusive wildlife that may visit your garden in winter, when they are much easier to spot in the barren, snow-covered landscape.

A young raccoon walks on top of a thick snow cover in search of food during our harsh winter. Be sure to check out my Winter of wildlife photo gallery in the link below and at the end of this post.
Owls, coyotes and turkeys, it’s been quite the winter
Winter is always a difficult time for gardeners.
It’s often too cold or dreary to be outside, and, although there are wintery days that our gardens are covered in snow and take on an almost fairy-tale look, most days are filled with imagining what could be once spring arrives.
But winter can be a wonderful time for wildlife. The trees are bare, the landscape is barren for the most part and we have better views of the birds and mammals that visit the garden.
Birds are obviously the prime winter visitors to our gardens, but if you are lucky enough to live in an area where wildlife is abundant, you may have attracted new visitors to your woodland or natural garden.
In our garden, a reliable source of water in the form of a heated bird bath, attracted a variety of birds and squirrels all winter. Our bird feeder brought in many of our familiar winter visitors – cardinals, blue jays, nuthatches, chickadees, Tufted Titmouse, wrens and a variety of woodpeckers.
For a full gallery of images, please click here.

The regular cast of characters from this Tufted Titmouse to cardinals and woodpeckers are regulars at the bird feeders. Be sure to check out my Winter of wildlife photo gallery in the link at the end of this post.
The bird feeders also brought in deer, especially as the snow covered more and more of the ground and made finding food more difficult. Our trail camera caught skunks, racoons, rabbits and an opossum also feeding below the bird feeding station.
A fox visits from time to time, no doubt cleaning up the mice that feed at the base of the bird feeding station.
For the most part, the garden hosted a familiar group of birds and mammals similar to past years.
With one big exception.
This winter was the year of the wild turkeys in our garden.
Last year, it was the winter of the screech owl. This year the owl did not return but was replaced by much larger avian visitors.
They first appeared in late fall under the bird feeders and decided that the conditions in our garden were enough to their liking that they pretty much stayed all winter.
This is not the first time wild turkeys have visited our yard, but it is the only time they have stayed for a prolonged period of time.

New this year is our resident wild turkeys who have decided that the woodland garden is a good place to spend the winter. Be sure to check out my Winter of wildlife photo gallery in the link at the end of this post.
Of course, the regular supply of food from the bird feeders played an important role, but the supply of natural seed from our Northern Sea Oat grasses also became a favourite food source for our two male wild turkeys. (It started out as three male turkeys but early on the less dominant turkey of the group disappeared and has never been seen since.)
It’s been a wonderful winter watching our turkeys grow from fine young males into more mature Toms. A day rarely goes by that they don’t greet me when I go out to fill up the feeders. We have long conversations on almost a daily basis about whatever is on our minds.
They’ve come to trust me but are quick to move away if I get too close to them on my way to the feeders.
They are relatively safe here. Our dog, Holly, passed away in the fall and although there are dogs behind us, a hill across the back of our property provides some cover and a fence keeps the dogs at bay even if they spot the wild turkeys, rabbits, etc.
I expect the time will come soon when the Toms wander off into the woods to find mates. I’m sure they will bring their families around at some point in the summer. Last year, I counted 17 turkeys (mostly babies) in the back yard at one time.
I have spend the winter capturing images of these birds, never knowing when they will move back into the shelter of the larger woodlands.
Give a hoot about owls
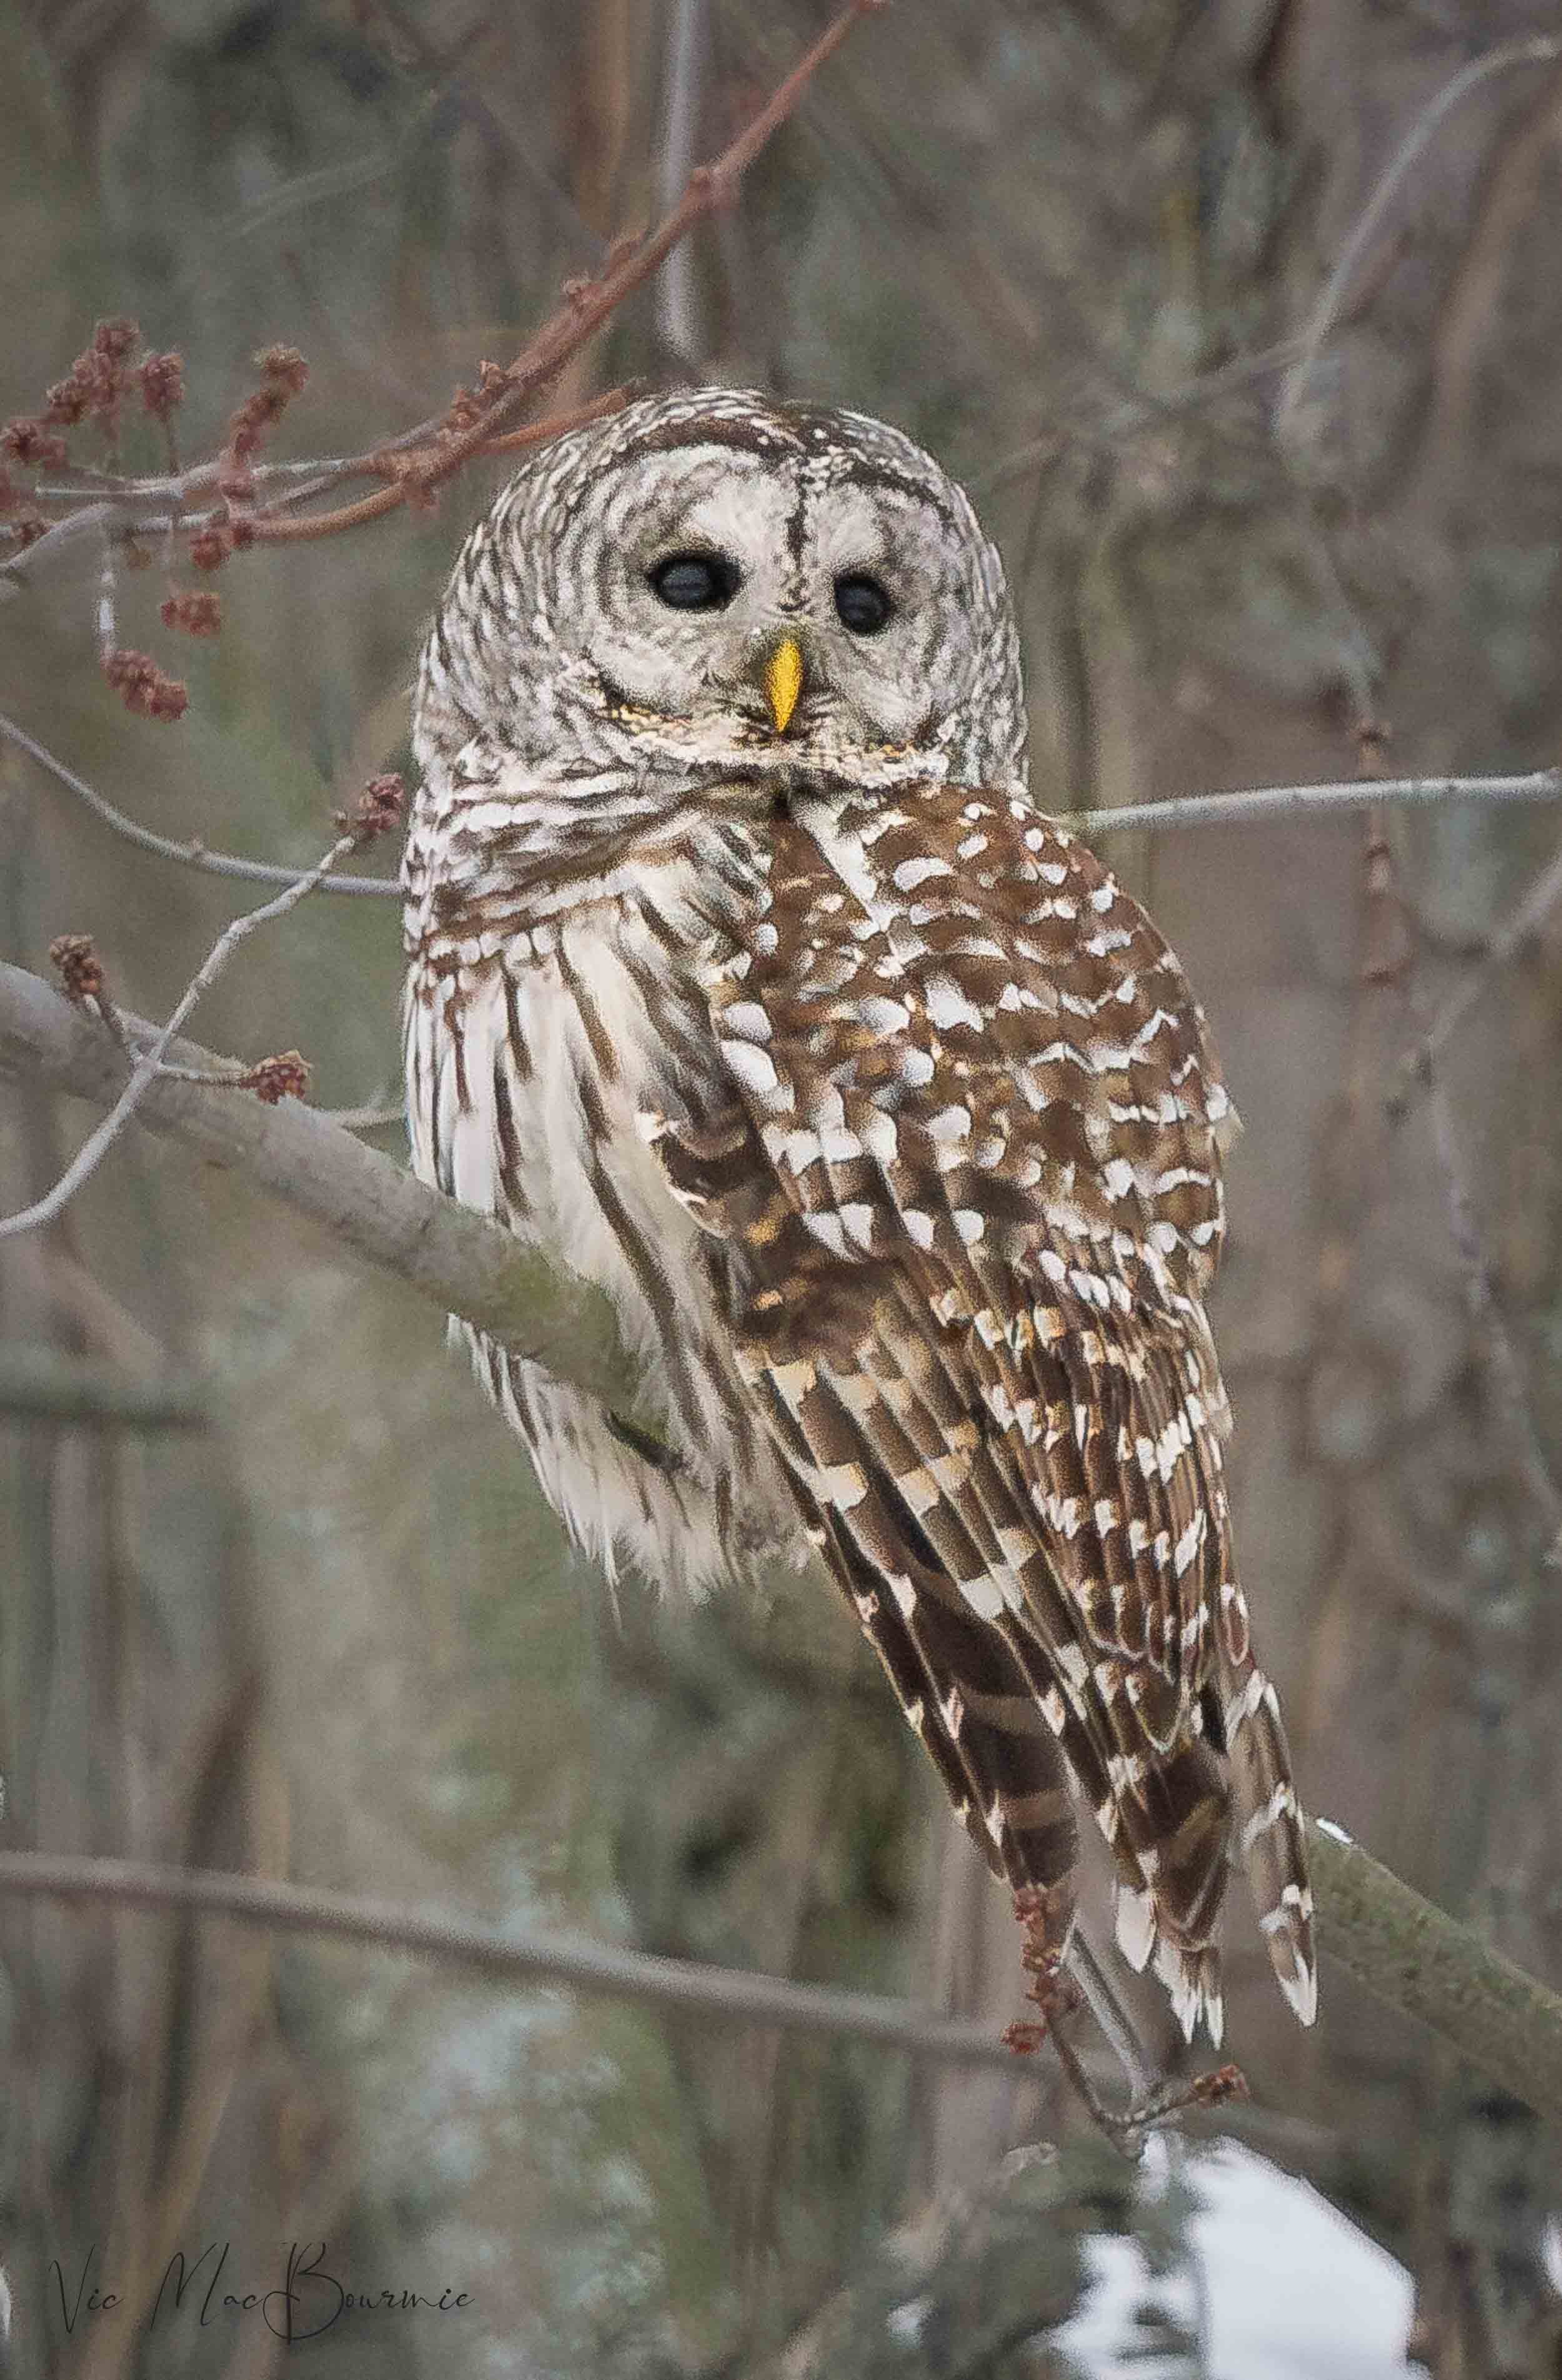
I was able to capture an image of this lovely Barred owl in the woodlands near our home. It’s important not to use any poisons in your garden to control mice, the main prey of these lovely birds.
Be sure to check out my Winter of wildlife photo gallery in the link at the end of this post.
Getting out to capture a greater variety of wildlife
While our garden provides endless joy and photographic opportunities even in winter, I like to get out and experience wildlife in the nearby woodland or even farther afield.
As a wannabe wildlife photographer, getting out of the garden affords me the opportunity to photograph wildlife that is not present in our garden.
This year, I was intent on capturing images of a few more elusive birds and mammals that are not regular visitors to our yard.
Struck out on the Snowy Owl but got another instead
First on my list was the snowy owl, which have yet to photograph, despite driving all over Ontario in search of these migratory overwintering birds. There is still hope, but my chances are fading fast.
That’s not to say my attempts were in vain. One evening, while I was out looking for Snowys, I came across a lovely Barred owl in the woodland near my home and captured successful images of this beautiful owl.

After weeks of trying to capture a good image of a coyote, I was fortunate enough to meet up with this beautiful coyote in a nearby woodlot. Be sure to go to the link below to read about the memorable ten seconds of time we spent together face-to-face on a woodland path. Be sure to check out my Winter of wildlife photo gallery in the link at the end of this post.
It’s an important lesson for photographers and nature lovers to just get out and experience the world around us because you never know what you are going to stumble upon.
In search of coyote images
Second on my list of winter wildlife images I hoped to capture this winter was a coyote. Weeks of searching for them in freezing conditions paid off with a wonderful, up-close encounter with a lovely coyote and resulting images. For the complete story of my coyote encounter click here.

A little further afield, I visited the winter home of hundreds of Sandhill cranes and came away with a few memorable images. Be sure to check out my Winter of wildlife photo gallery in the link at the end of this post.
Sandhill Cranes: A morning of great promise
A few weeks later, after many failed attempts to photograph coyotes and snowy owls, I decided it was time to visit the winter migratory home of Sandhill Cranes that gather by the hundreds in a lakeside town about 1.5 hours from where I live.
Going to an area where you know there is a very good chance of capturing wildlife images is always a good idea, especially after weeks of failure out in the field.
A morning with the Sandhill Cranes resulted in hundreds of usable images, but only a handful of good images that I can be proud to show here and on other social media sites.

It’s been a long winter for many of our backyard wildlife friends. Our chippy popped up out of the deep snow to enjoy a little of the warmer weather and was even seen wandering on top of the snow looking for a late-winter food food source.
Surviving a brutal winter
As our brutal winter loosens its grip on our gardens and natural areas, I have noticed more wildlife leaving the comfort of their dens in search of food. Last week, while searching for snowy owls, I came across a young raccoon that was out walking about on top of three feet of snow no doubt looking for food.
Earlier this week, I watched one of our many chipmunks leave the safety of its underground burrow to enjoy a little sun and go out in search of food.
It’s been a difficult winter for wildlife. Heavy snowfall has its benefits for some wildlife that benefit from its cover and its insulation value. However, it creates serious hardship for many others that find obtaining food difficult when the snow cover is so deep.
The diminutive screech owl, for example, is apparently having difficulty capturing enough mice to survive the winter in this area. Wildlife rehabilitators, for example, are apparently reporting an increase in malnourished owls being brought to their facilities.
We can do our part to help wildlife in our gardens by providing the necessities of life – water, food and good, safe cover.
Consider using this winter as an inspiration to ensure the wildlife in our gardens not only survive in but prosper when winter returns next year and in the years to come.
I am sure that if you are kind to our wildlife, you will reap the rewards every day in your wildlife garden for years to come.
For a full gallery of images, please click here.

A fallen tree transforms the woodland garden
A fallen tree has transformed the woodland garden encouraging a greater variety of fauna – from wild turkeys to owls.

A warbler stops to take a drink from the bird bath beside the fallen tree that has played a part in rewilding that corner of the yard.
New habitat attracts greater variety of wildlife
“With every death, comes new life. Embrace the void, become something greater.”
It’s been almost two years since the Hawthorn tree tucked in a corner of our yard fell to the ground and began transforming the area – rewilding it and bringing new life to a corner of the woodland.
We were lucky. The downed tree poses no risk in the garden and is in a wilder area of the yard where we can leave it be rather than try to remove all the branches and “clean up” the area.
Leaving it alone over the past few years has transformed that part of the garden creating habitat that was not present prior to the tree falling to the ground.

Fallen tree creates new habitat
A mature Hawthorn tree that fell in the garden has played an important role in the rewilding of the area.
The mid-sized Washington Hawthorn tree opened a hole in the canopy, shaded new areas of the woodland floor and, most importantly, provided shelter for birds, squirrels, mice and a variety of insects, reptiles and amphibians that call the woodland garden home.
Click here for more on building a brush or wood pile to attract wildlife.
Birds and mammals grew accustomed to the tangled thorny branches and used the downed tree as a refuge, safe from hawks and other predators.
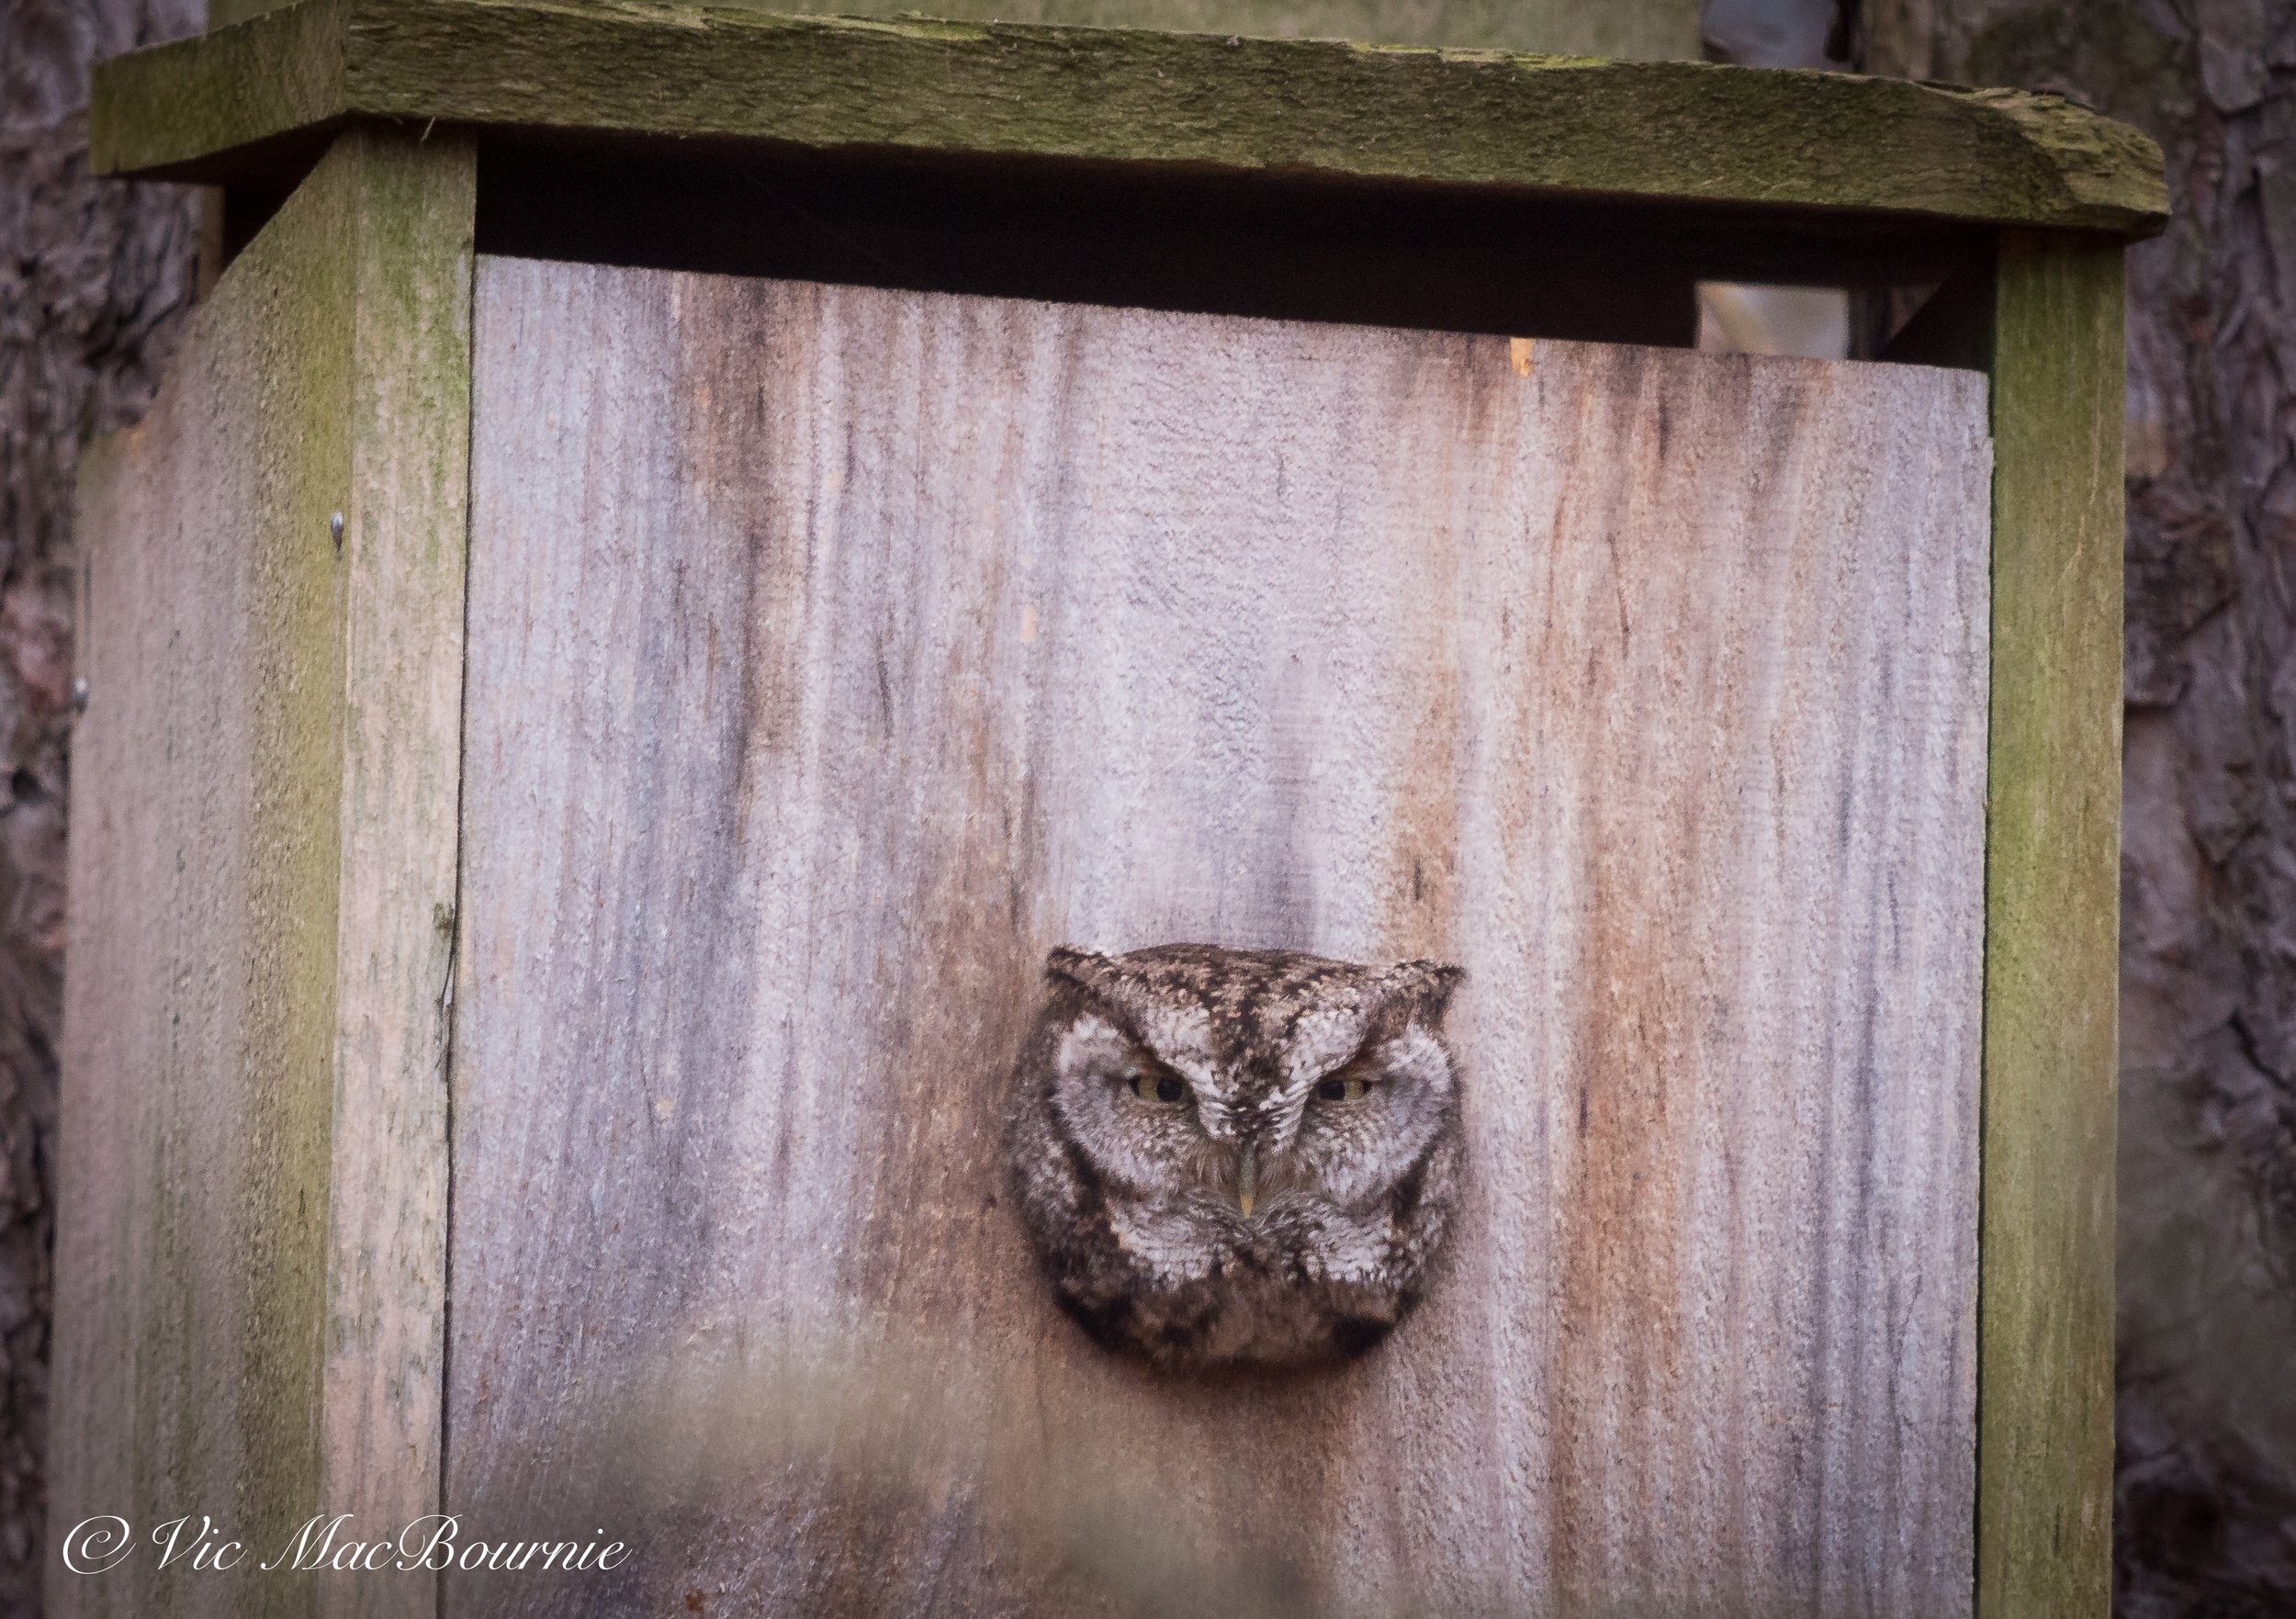
Our little screech owl took up residence in the owl box after the Hawthorn tree fell in the woodland floor creating a new habitat in the corner of the garden.
Screech owl appears in rewilded area
Then, the screech owl appeared and took up residence in the owl box I had put up in the pine tree a year earlier. The fallen Hawthorn tree’s branches rise up near the owl box providing cover for the little predator. For my post on the screech owl click here.
For months, our screech owl watched over the garden from the security of the many thorny Hawthorn branches that rise up from the forest floor.
It provided hours of entertainment in the evening looking out into the garden from its home, before flying off to hunt for the evening.
The red squirrels didn’t seem to mind “screechy” being so close to them and often would climb up to sneak a peek into the owl’s home before going on with their business.
We’ve always had a variety of wildlife either living in or visiting the garden. But the fallen tree seemed to entice more birds.

Yellow warbler looking for insects.
A weekend of warblers
Last spring, for the first time ever, the yard seemed filled with warblers. For a week or two, they regularly visited the part of the yard where the tree had fallen, drinking and bathing from the bird bath and feeding on the insects. For my complete post on a weekend of warblers, click here.
All the while, they offered up opportunities to photograph them while they filled the corner of our yard with songs.
In spring, momma deer appeared in the yard visiting the bird feeders before returning to the cover of the fallen Hawthorn.
Just days after first noticing her, the doe had her fawn in the yard and hid it among the ground covers on one side of the backyard while she stayed on the opposite side hidden among the ferns and Hawthorn branches watching over her fawn from a distance.

Fawn in the spring garden among the Forget-me-nots.
More recently, it’s wild turkeys. Two young male turkeys to be exact.
They are living in the tangled branches of the fallen Hawthorn where they literally disappear into everyday after getting their share of bird seed.
Click here for my post on living with wild turkeys.
Even in the middle of winter, where snow is covering the ground and tree branches are bare, the turkeys manage to disappear once they enter the tangles branches. Sometimes, they’ll fly up on top of the branches to enjoy some sunshine.

Turkeys find a new home
Two young male wild turkeys are comfortable among the branches of the fallen tree.
In the middle of winter, as I look out over the fallen tree, I can’t help but see a massive wood pile not dissimilar to the much smaller one I built in another area of the garden.
These are important areas for all types of wildlife.
They provide perches for birds and small mammals, are a resource for food from insects to mice, and an important safe habitat and roosting area for an assortment of wildlife big and small.
Over time, the branches will break off and fall to the ground adding nutrients to the woodland soil. Mosses and lichens will move in and begin to break down the tree branches. Beetles will begin attacking the tree’s larger branches and trunk breaking down the wood while at the same time providing a food source for birds, toads and snakes.
There are already plenty of woodpeckers in the garden, but the rotting tree trunk will attract even more as the beetles and other insects move in. Millipedes, wood bugs and a host of other insects will help to increase the variety of fauna available in the garden.
The result will be a greater variety of flora and fauna finding a home in the garden and creating a healthier, more diverse environment.

Konica C35 Automatic: Simplicity with impressive results
The Konica C35 Automatic is a brilliant little rangefinder camera that sets the shutter and exposure automatically while leaving the photographer to set the ASA and focus.
The Konica C35 automatic. A study in simplicity and elegance wrapped up in a beautiful rangefinder camera from the late 1960s.
Late 1960s film camera combines auto features with a manual vibe
They say good things come in small packages. The Konica C35 Automatic film camera is a perfect example of this.
Simplicity and elegance are combined with a sophisticated look creating an enjoyable user experience that is reflected in the finished results.
There is something inspirational about using a late ‘60s-era rangefinder that asks the user to only set the ASA and focus on their subject, nothing more.

Designed for travel
A top view of this elegant rangefinder film camera with its exquisite rope strap and simple design. For more images, be sure to check out my photogallery of images taken with the Konica C35.
Be sure to check out the Konica C35 photo gallery here.
Although the Konica C35 is primarily an automatic camera, it has a very real manual feel to it. Lomography afficianados will love its vintage charm.
It’s easily pocketable and is more than capable of documenting your garden both in a wider landscape view as well as a closer approach to individual plants, or environmental portraits.

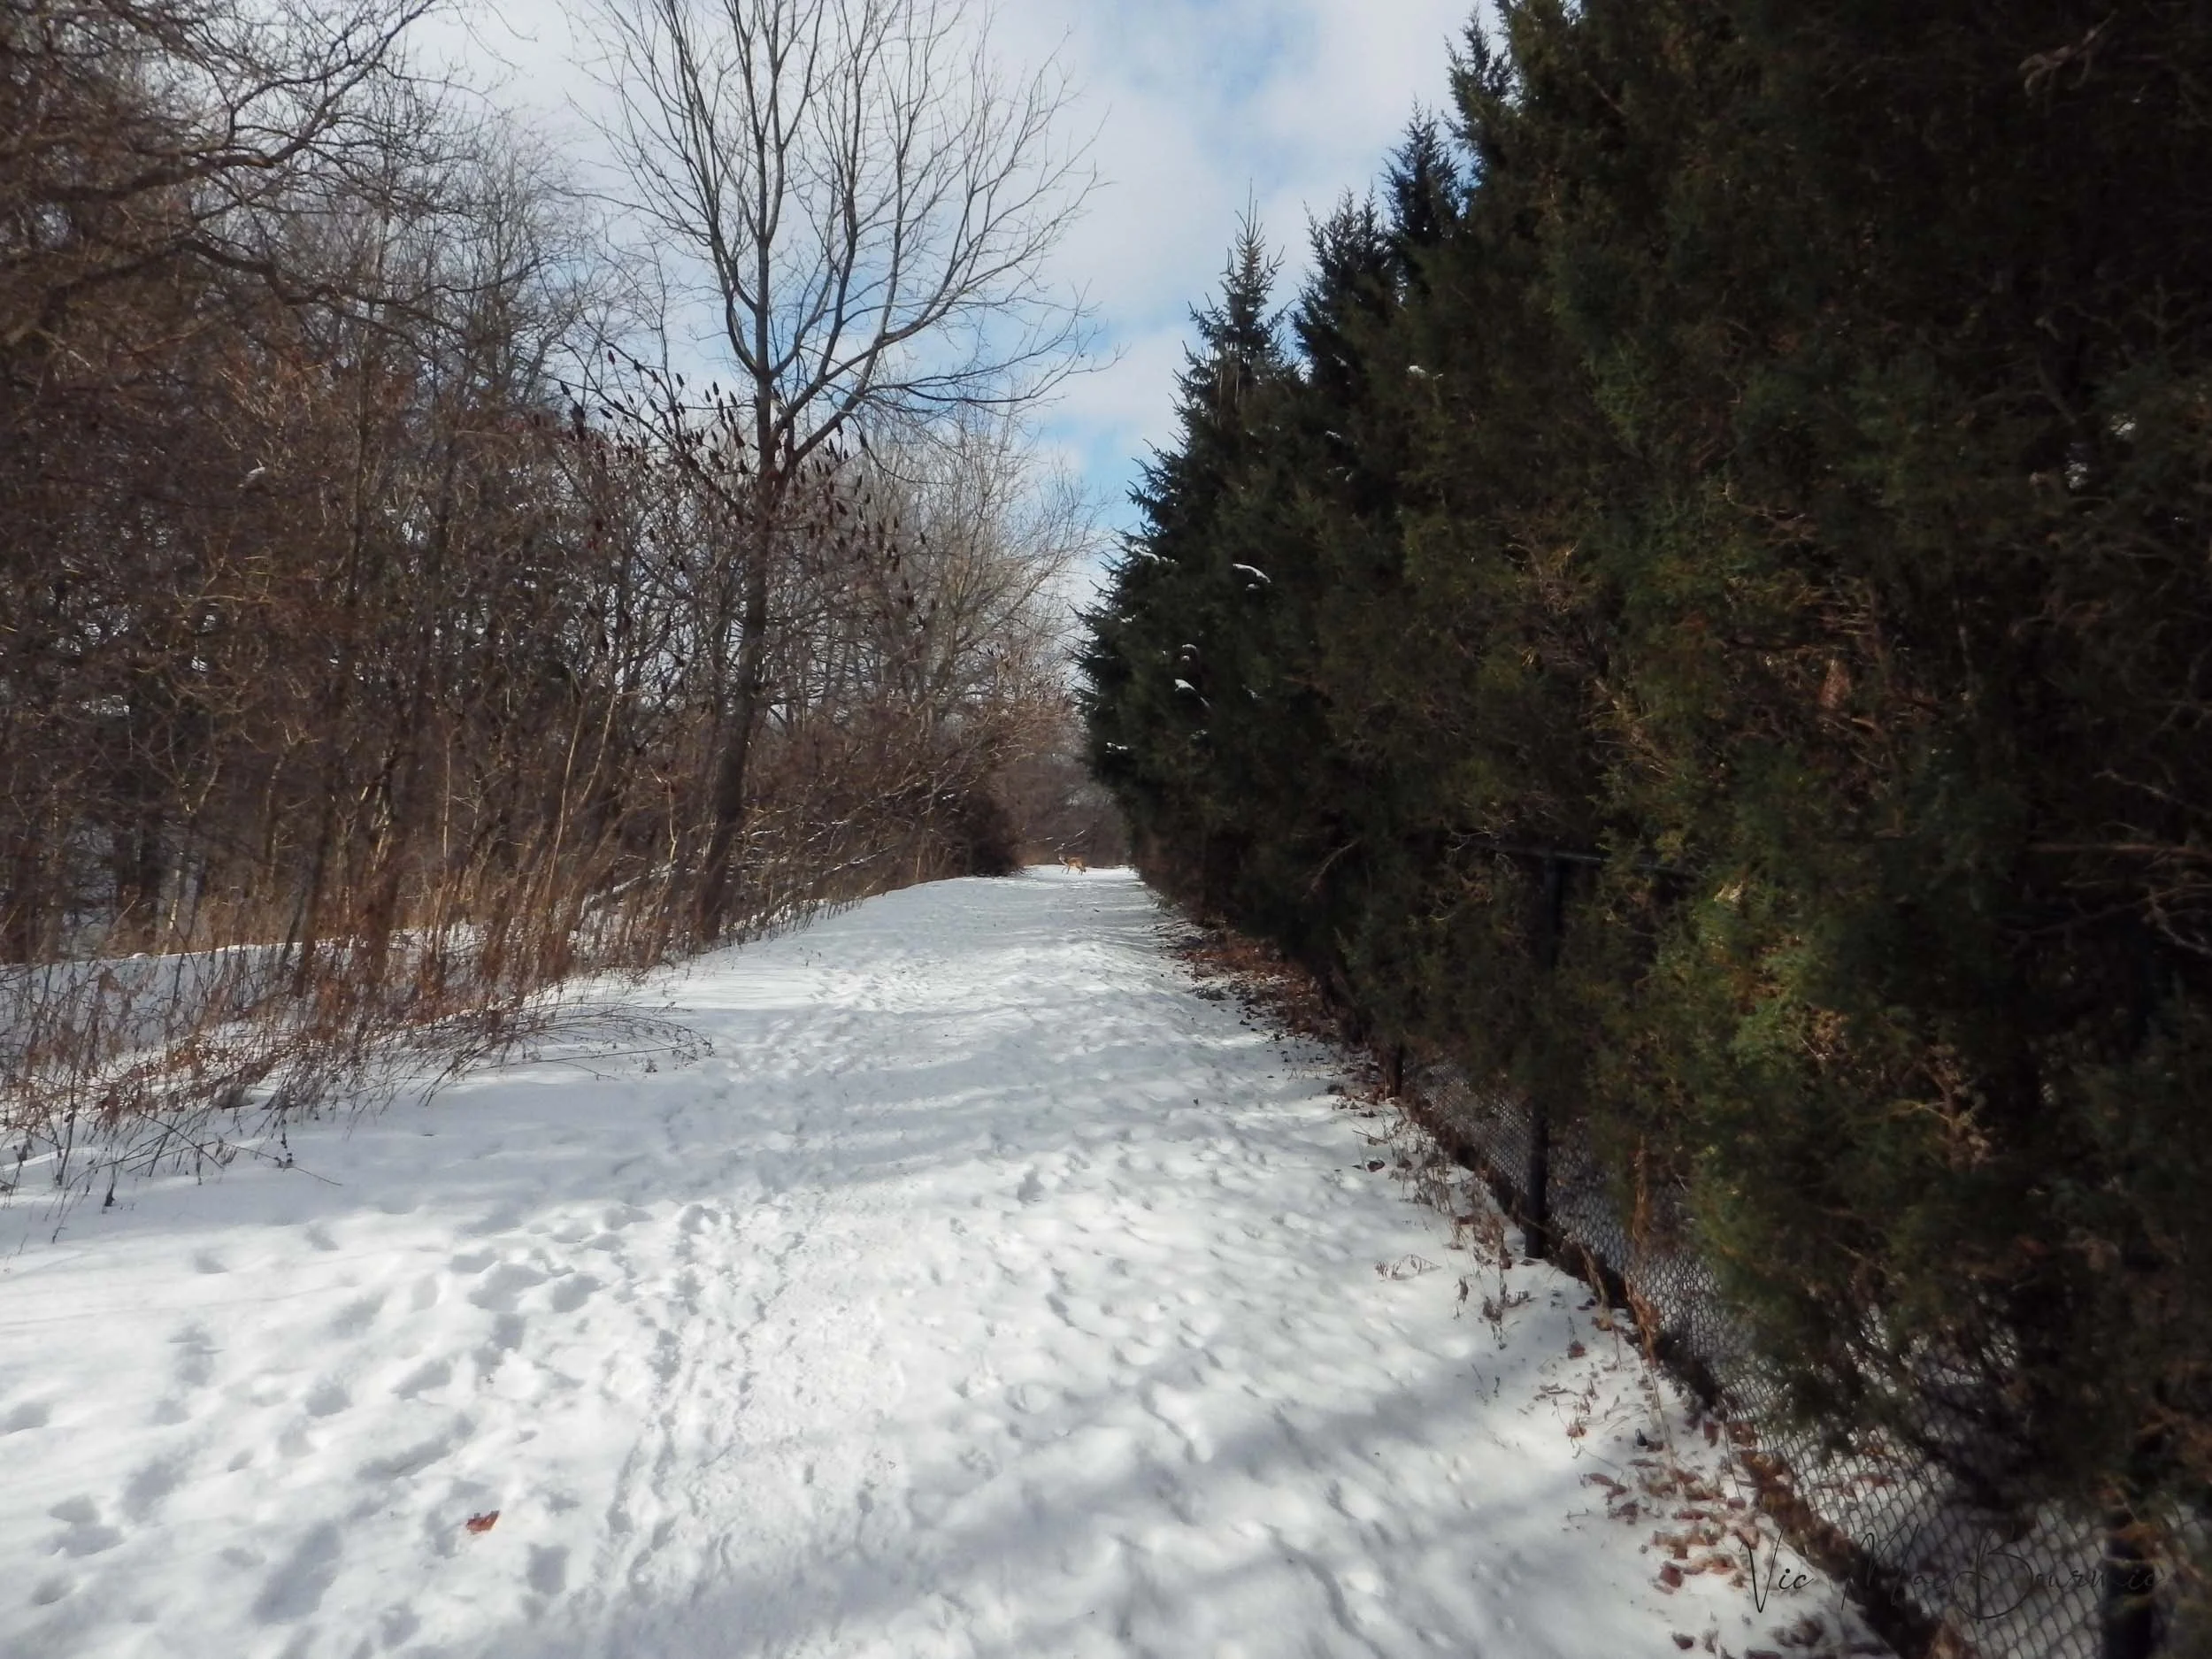
Wintery woodland scene
The Konica C35’s meter and impressive 38mm lens was able to deal with the very bright conditions of this forest scene during a snowstorm. Be sure to check out my Konica C35 gallery for a stunning BW image of this scene.
Meeting the travel-camera market
The Konica C35 Automatic was Konica’s answer to creating a small travel friendly camera to compete with the Olympus Trip cameras that enjoy an almost cult following as film cameras enjoy a modern-day renaissance.
Konica made 4 models in the C35 lineup. In 1971 Konica updated the original camera and came out with the C35V that eliminated the rangefinder focusing system. That was followed shortly after by the C35 Automatic and finally the Konica Auto S3 in 1973. The final version added the ability to continue operating even if the battery dies. The Auto S3 also came with a faster lens – f1.8 rather than the previous f2.8.
The Konica C35 is primarily an all-metal, programmed automatic range finder camera that sets its own shutter speed and f-stop while requiring the user to set the ASA (ISO in digital camera terms) and the focus. Focus is on a lovely smooth ring on the camera lens and the ASA setting is brilliantly set on an inner ring around the lens with a window showing the ASA. It can be set from ASA 36 up to about 800.
It sports a fixed 38mm f2.8 lens. Shutter goes from 30th of a second to 650 and it focusses from about one meter to infinity.

This minimalist image taken during a snowstorm captures the simplicity of the scene.
The meter is clearly evident on the right side of the viewfinder and gives the photographer a good idea of where the exposure is falling. If the needle goes into the red at either end, you know you are out of the camera’s range. You can still take the picture, but caution would be needed and the results will be difficult to predict.
This vintage camera includes the ability to use a traditional cable release if, for instance, you have the camera mounted on a tripod for longer exposures. It also has the ability to add a flash.
Although the Konica C35 is primarily an automatic camera, it has a very real manual feel to it. In other words, it has a point-and-shoot vibe, but with the added ability to focus on what you want to be sharp.
One point that is worth emphasizing is that the shutter on this camera was made by Copal, an historically highly regarded company that made some of the best shutters of their time. A quality shutter is important both for the accuracy it provides and its ability to stand up to continued use over a long period of time. This, in part, accounts for the longevity of these cameras in today’s marketplace.
The fact that you can set your own ASA and focus means this is a giant step up from many vintage and modern point-and-shoots.
Even the new, quite expensive Pentax 17 half-frame camera does not enable the user to “focus” on a specific subject. Instead, it uses a zone focus system that works but is not ideal.

The vibrant colours of this ice cream shop captured after a snowfall stand out nicely. The sharpness of the 38mm lens is able to stand up to even a little cropping in this image.
Konica managed to combine the best of both worlds, that of a point-and-shoot camera with the focus control and ASA setting often found in higher-end rangefinders and SLRs.
A built-in light meter takes the guesswork out of capturing images and the 38mm f2.8 Hexanon lens provides the perfect walk-around street shooter and travel camera. The meter is built into the lens, enabling it to recognize if filters are being used and compensate for them.
A lens cap should be left on the camera to ensure the meter is not operating at all times, which would eventually drain the battery
The camera originally took mercury-based MR44 (1.35V) batteries which are no longer available or even legal to use, but operates perfectly fine on today’s common LR44 (1.55V) batteries. Some suggest overexposing the film to account for the voltage difference, but I shot according to the recommended ASA and the results were right on target.

The Konica C35 is small enough to carry in your pocket for when that special scene presents itself.
But enough about the specs of the camera. What about the results?
Impressive results from a 50-plus-year-old camera
After using the camera, I was actually shocked with how good the images turned out. Considering the quality of the lens, maybe I should not have been surprised. Even in difficult lighting conditions, the camera performed remarkably well despite the fact that exposure is set automatically with a 50-plus year old meter.
Check out this link for savings up to 60 per cent from Alixpress who specialize in hard-to-find photo products.
In good lighting conditions, it performed exceptionally well considering the age and the fact that the camera was in control of both the aperture and shutter speeds.
These images were scanned with an Epson 500 flatbed film scanner and processed using Lightroom.
Most of the images required limited post processing. I do, however, enjoy working with digital images so some of the photographs received their share of tweaking including some images that required cropping. Despite some heavy cropping, the images held up well.

The details on the stone facade of this historic building can be easily seen as a result of the excellent lens on this rangefinder camera.
Conclusion: Konica C35 simply gets the job done
There is something about using an elegant rangefinder camera that is simple to use and gives great results.
Just ask Leica camera users why they love their cameras so much.
The Konica C35 may not be up to Leica standards, but then again they can be purchased for a “whole lot less,” and provide much of the same feeling that a Leica provides.

On my camera I used a step-up ring so that I can use 49mm filters, including a polarizing filter. With the light meter sensor on the lens, the camera is able to nail exposure.
Focussing the double image through the bright viewfinder is both elegant and extremely easy. These cameras make a great street shooter, travel camera and will hold their own in a garden setting.
Obviously, like any rangefinder, macro or even close-up photography is not ideal. However, if you are looking for a film camera to capture overall garden images, take on vacation or use in the streets, this is a good choice.
They may be available for under $100 dollars on camera resellers like KEH Cameras, EBAY and other on-line sites.
Take a moment to check out more images from the Konical C35 on my photo gallery pages.

Buy native, buy local and help your favourite Canadian garden centres grow
Growing threats from American president are resulting in Canadians looking to buy Canadian products rather than shop in the United States. Here are suggestions for Canadian gardeners.

Continued threats from the American president, his followers and a cowardly Republican party is forcing Canadians to take action any way they can to support Canadian businesses from tariffs and other American threats. That action includes a massive “buy Canadian” movement aimed at crippling the U.S. economy and sending our neighbours to the south a serious message. The following is a list of Canadian garden products, services and companies to support during these threatening times.
American threats to Canada: A growing concern
I have steered away from taking a political stand on this website, but the recent decisions of the American president, his followers and members of the Republican Party have forced me, as a Canadian, to take a stand and take steps to combat these threats from the United States.
I’m sure that the majority of American readers to this website will understand my stance and perhaps sympathize with Canadians who have done nothing to bring on this action from our neighbours.
As a result of Trump’s threats and insulting suggestions to annex Canada and turn it into the 51st state, Canadians have been banding together to “buy only Canadian” products.

Canadian Tire is a good starting point for many of your gardening needs from tools to plant material.
Although this website promotes a lot of American-based products to its American readers, this post is aimed at Canadian woodland gardeners looking to promote and buy Canadian Garden products and from Canadian distributors etc.
This is by no means a complete list (I will add to it as I become aware of more outlets etc.) but it is a good starting point for Canadians to make a strong statement and begin spending their money in this country.
Reader Heather Latto adds: I found many suggestions on a simple Google search: “Canadian owned garden centres in Ontario”. Here are a few:
Garden Centres Canada website: https://www.gardencentrescanada.ca/ is a place to start looking for a local garden centre; may still require further enquiries as to whether or not the garden centre is Canadian owned.
Crawford’s Garden Centre, Milton, ON: https://www.crawfords.ca/
Northland Nursery, Millgrove, ON: https://www.northlandnursery.com/
Buy native plants locally
To begin, whether you live in Canada, the United States, Great Britain …, it’s always important to buy local.
In the case of native plants, it is even more important to buy plants, shrubs, trees and seeds locally. So, always look for seeds, plants trees and shrubs that are not only sold through a local nursery, but grown as close to home as possible. This will help to ensure that the plants are adapted to your growing conditions from the lighting conditions and soil, to local temperature fluctuations.
Buying locally could mean purchasing from a favourite nursery that grows its own plants from locally sourced seed.
In my region in southern Ontario, I urge readers to consider a number of smaller growers including Ontario Native Plants, Connon’s Nursery in the Burlington Ontario area, Struyk Farms and Holland Park, Terra Garden Centres and Greenhouses also in the Hamilton-Toronto corridor.
In addition, field2home informs me that they are a Canadian on-line garden centre that ship trees, shrubs and perrennials to the Toronto and Niagara regions of Ontario.
A reader recommends Natural Themes native plant nursery in Frankford, Vesey’s Seeds, Burley Gardens in Ontario’s north, Richter’s Herbs, Terra Ebibles Heirloom Seeds to name just a few.
Lee Valley Tools is a great Canadian tradition
Toronto Star columnist extraordinaire Lorraine Sommerfeld reminded me that Lee Valley tools is a Canadian based company that carries high-end gardening products including tools, bird houses etc. They are also a mail order firm and will ship across Canada for those who are not close to a retail outlet.
In addition to being an outstanding Canadian company, they are incredible employers. Lee Valley President and COO Jason Tasse, talking tariffs’ impact on Canadian retail and manufacturing on CBC recently announced “We will forego profits for the next 1-2 yrs to ensure employees are stable."
If you have never checked out Lee Valley, be sure to visit a local store or check out their on-line store at Lee Valley.
A Western Canada reader says www.selectroses.ca is great for rose selections, although these may be best for the beautiful climates in Canada’s West. Explorer roses are a popular choice for colder climates in Southern and Northern Ontario as well as the prairie provinces.
Don’t overlook Canadian Tire as an excellent source of garden tools, planters, trellises and other garden accoutrements including BBQ’s, garden chairs, fire pits etc. Last year, I also picked up several plants and trees from my local Canadian Tire outlet. Some Canadian Tire franchises also sell native plants as a fund raiser for Naturalist’s Society.
Rona is another large Canadian-based retailer to keep in mind. They have a large nursery attached to most of their stores.
Home Hardware is a Kitchener Ontario based chain of independently owned stores to also consider. Use this link for savings of up to 25 per cent on seasonal tools and other goods.
If you have other suggestions, please feel free to add them to the comments section here and I will try to include them asap.
For our American readers, please understand that although we Canadians can be a mild-mannered and kind group, there is only so far we can be pushed before we take action. That line was crossed by your president, his followers and your weak, cowardly Republican politicians who are refusing to stand up to this president, Elon Musk and others.
Canadians also know what many of you are having to deal with as this man systematically dismantles everything you believe in and have stood proud of in the past. If you support your neighbours, I urge you to take action. Write your politicians, protest -either through actions or by standing up and screaming from your rooftop.
Not only is this president attacking your allies, he is also attacking the environment by cutting environmental protections.
Action is needed.
Support local journalism
Canadian and Americans also need to support local journalism to provide a check on politicians trying to ramrod their views through without sufficient opposition from the public, opposing parties and unbiased journalism from companies like FOX and others.
Canadians need to beware of Canadian media owned by American companies. Post Media newspapers, including The National Post and most western-based media, are owned by Americans and are working hard to promote pro-American politicians both nationally and locally.
I spent almost all of my journalism career working within the Toronto Star network of newspapers. This media chain may not be perfect, but it is the best and least biased Canada has to offer at this time.
If you want to stay in touch with the latest news, consider subscribing to The Star, in paper form or via the web. American readers might like to hear the other side of the story written by some of the finest journalists Canada can offer.

Coyote in the woodland: Capturing its essence
Days in the making, a fraction of a second in the taking. Capturing the elusive coyote in a winter woodland.

For two weeks I tramped through snow and ice in freezing conditions to capture an image of the elusive coyote. Then, like a ghost, it appeared. Seconds later it was gone.
When mere seconds make all the difference
About five seconds. That’s all this beautiful coyote gave me.
Then, it wandered off into the woods leaving me alone in a wintery woodland to contemplate what had just happened.
I’m sure many readers have experienced a similar encounter either with a coyote, fox or maybe just a favourite bird. They are often unforgettable moments – slivers of time that enable us to step into their world, if even for just a few fleeting seconds.
Having an unexpected wildlife encounter – while exciting and memorable –is quite different than going out with the prime purpose of capturing a successful image of an elusive animal.
This is the story of how I was able to capture, in a fleeting few seconds, a handful of images that I had been chasing for weeks.
Anyone who accepts the challenge of wildlife photography knows that it is often hours, even days, of boredom interspersed with just a few seconds of action. That certainly holds true with my recent coyote encounter.
Animals operate on their own schedules and, although we can sometimes predict their routines, we can never be sure of their specific movements on any given day.
For days I had been visiting an area in a nearby city where a group of coyotes were regularly seen travelling along a bike/walking path. They were quite habituated to seeing humans, so getting photographs of the elusive critters should have been easy. (I mean, everyone in the neighbourhood along the walking path told me they see the coyotes regularly.)
Unfortunately, days of walking the trails in freezing temperatures and sitting quietly into the evening waiting for them to appear proved fruitless.
Having an unexpected wildlife encounter – while exciting and memorable –is quite different than going out with the prime purpose of capturing a successful image of an elusive animal.

I spoke in a quiet, reassuring voice to catch her attention and convey that I meant no harm. She stared back as if to say, “I know you mean me no harm, but I will stay cautious and move on.”

Get more information about the urban coyote.
If you are interested in finding out more about the coyotes that live among us in urban environments, be sure to check out the book: Coyotes Among Us, Secrets of the City’s Top Predators.
Coyotes, foxes and other apex predators are on their own schedules and they rarely line up with ours. Seeing them in our yards at night, is not the same as getting useable images of them.
Wildlife, especially dominant predators, survive on instinct and that instinct warns them to stay away from human interaction as much as possible. As a result, they are not often out in the middle of the day. They thrive in the early morning light of dawn and the fading light of dusk when most humans are either in bed or at home having dinner or watching television.
Of course, these are the best times to pursue images of these elusive animals. However, low light makes this the most difficult time to capture good images of foxes, coyotes, owls and other predators that hunt mostly at night or during the fading hours at dawn and dusk.
February is the time coyotes begin to den up in preparation for puppy season. The timing is such that the puppies are often born in early spring when food is more plentiful. In the middle of winter going into spring, foxes and coyotes are more often seen hunting during daylight hours. Fewer people are out and the difficulty of finding food forces them to stay out longer.
This, of course, explains why there are more sightings during these times. It’s not that the animals are sick, (often misinterpreted) it is simply a matter of survival.
Keep your dogs leashed in coyote country
It’s extremely important to give coyotes their space. It’s even more important to keep your dogs on leash for their own protection and, even more importantly, so that they do not chase coyotes.
During these critical times, wildlife cannot afford to use energy trying to evade aggressive dogs whose owners are not acting responsibly and allow their dogs to chase and or harass wildlife, whether it is deer, foxes or coyotes.
And, when it comes to coyotes, these owners just might get more than what they bargained for.
Photographing these magnificent animals
Back to my quest of capturing useable coyote images.
After a week of chasing coyote images along the footpath in a city about a half hour from my home, a neighbour told me that a group of coyotes were living in a large woodlot not more than five to ten minutes away from our home. The location is surrounded by homes on one side and a fenced off highway on the other.
Sounded like it had potential. I first opened Google maps to check out the area and see if I could find easy access into the woodland. It is the middle of winter so the snow is high in the woodlot and getting around would not be easy.
It turned out that, much like my first location, this area also featured a paved walking path that allowed easy access into the area and gave the coyotes a corridor to move about. But, unlike the first area, this path was much more remote and I rarely encountered people along the pathway.
It proved to be a much more pleasant experience and one that offered a much better opportunity to get images in a more natural environment.
Scouting the location and scoring early
So off I went at around 2:30 in the afternoon on a cold winter’s day for my initial scout of the area.
I brought along two cameras. One was my trusty Pentax K5 digital SLR and my favourite wildlife lens, a 300mm, f4.5 prime telephoto mounted to a monopod. (Full post on this lens here.) On the K5 camera, (see full post here) with its smaller APS-C sensor, the 300mm lens becomes the equivalent of a relatively fast 420mm lens. Add a 1.4 converter and it jumps to close to a 600mm lens.
I also carried a more compact bridge camera, the Pentax X-5: a versatile, all-in-one superzoom camera with a 26x optical zoom, resulting in a rather impressive 22-580mm equivalent focal range. Although bridge cameras, which are available from most camera manufacturers, look like the perfect cameras on paper, they can be slow to use and, when it comes to wildlife, often result in a missed opportunity.
(For more on bridge cameras check out my earlier post here.)
And that’s exactly how my day started out.
Not 15 minutes at the new location and I came across something odd.
Too slow to zoom in
The bridge camera took too long to start up and zoom in to capture a good shot of the coyote way down at the end of the trail, barely visible.
Looking down the trail, I noticed something a little unusual, but not having been to the area before, I was not sure what I was seeing. It could have been an oddly shapd tree trunk or even a deer looking into the side yard of a home. A few seconds later and I realized it was actually the back end of a coyote looking through a cedar hedge.

Opportunity missed
I needed just a second or two more to zoom the bridge camera in to capture what would have been a nice image. Here is a cropped image of the photograph above to see what could have been. Unfortunately, when it comes to wildlife, a second or two might be too much time.
It stepped out, saw me, stared at me for a few seconds and disappeared into the woods. It was only enough time to turn on my bridge camera, wait for it to power up, grab a shot at the wide angle setting and begin zooming in only to miss the shot entirely.
Okay, a missed shot, but at least I knew there were coyotes in these woods and a very nice looking one from what I could tell. I was at least happy that my initial scouting visit paid off with a glimpse of a coyote.
Little did I know what would happen next.
So having seen the coyote in the area, I decided to set up at what appeared to be a crossroad of coyote tracks. By snuggling into the cedars against the fence, I could fade into the hedge while at the same time see the surrounding forest and watch for a coyote using the trail.
One side of the trail was more or less blinded by the tall cedar hedge and that’s exactly where the coyote came from, catching me totally off guard.
The coyote appeared, not more than 10-15 yards (9 meters) in front of me, on a slow trot.
The camera was not really ready for this sudden action and although I had pre-set it for the proper conditions, I needed to stop the coyote for a few seconds to catch a shot.

Although similar to other images, keen observers will notice that its one ear is actually bent over here.
“Well, hello their beautiful,” I softly spoke. That stopped her in her tracks and got her to look at me. My heart stopped, my breathing slowed as I brought the camera to my eye.
Put the focus on her eye as she stared at the camera and gently push the shutter down. The sound of the shutter did not seem to frighten the coyote.
I knew my time was short. This was not a tame animal from a game farm or even one that was so used to humans that it was approachable in any way.

While the images shown above have been cropped and cleaned up a little in post processing, the above image is closer to what the camera caught. The coyote actually stopped and posed in a relatively uncluttered area framed by a wild grape vine and a large tree. Branches across its face had to be meticulously removed digitally.
This was a wild, apex predator in its environment and seeing me for the first time.
I pressed the shutter, left it pressed as the motor drive fired off six or seven consecutive shots. I prayed that one – just one – would be in sharp focus and catch the coyote in a natural pose, eyes fixed on me.
It shook its head as If to shake off some snow, looked at me again and sauntered off through the brush to disappear over a hill into the valley below.

A few seconds was it gave me to capture its image before trotting back off into the wintery woodland.
The whole encounter lasted maybe seven to ten seconds, just enough time for me to raise my camera to my eye, fire off 15-20 images and be thankful that this wonderful animal and I were able to share a few wonderful moments in its environment.
It wasn’t until after I returned home and got the opportunity to review the images that I realized that the coyote picked the perfect frame for our encounter. It chose to stop in the centre of a wild grape vine encircling its entire body giving me a clear vision of its perfect self.

Like a ghost, the coyote disappeared as quickly as it appeared, sharing with me a small piece of its life in a handful of images and about ten seconds of its fascinating life story.
I left the area soon after and, although I have returned several times since the encounter, have yet to see or capture more images of the magnificent coyote.
I am sure we will meet again soon, but in the meantime, I have a handful of images to remember that special ten seconds we shared together.

Protecting Coyotes
Coyote watch works with residents to help protect coyotes and foxes in primarily urban environments.
If you are concerned about the future of coyotes, you may want to visit Coyote Watch’s informative website focusing on protecting these magnificent animals. To visit their website, click above or here.

Garden show inspiration combines nature and fantasy
Garden inspiration can be found in many places but I would not have expected to find it in a fantasy garden show at my local botanical garden. But that’s what happened at this incredible garden display.

The combination of colourful flowers, natural moss and a meticulously fashioned tablescape combines to create an incredible fantasy garden room that can be used as inspiration for our own gardens. Imagine incorporating some of these ideas for your next garden party. Even Alice herself is admiring the results.
Injecting a little theatre into your natural garden
I had no great expectations when I stepped into the main doors of our local botanical gardens’ latest flower show entitled “Alice in Bloomland.”
Afterall, I was there to photograph some decent flower images in the middle of a long, cold Canadian winter. After tracking coyotes and owls the previous week, I needed some ready-made subjects that were not hiding out, weary of a photographer, and just plain difficult to find.
“I started out trying to keep the images looking all very natural, but within minutes I realized the beauty of the show was its ability to transform nature into an incredible fantasy stage set that was simply mind blowing.”

Welcome to the show
Here, the use of well-positioned garden art adds colour to an otherwise green-textured ground cover. Imagine adding colourful art pieces like these mushrooms to a quiet area of your garden.
I couldn’t ask for a better situation than flowers out on display, even if they were a little staged. I figured I could work around that and keep it as natural as possible, while maybe even getting a little garden inspiration at the same time.
Boy was I wrong.
I’m convinced Lewis Carroll, author of Alice’s Adventures in Wonderland, would be impressed if he could witness this incredible fantasy garden display.
It’s as fantastical for adults as it is for children, as inspirational for gardeners as it is exciting for photographers. As a gardener with a passion for capturing photographic images, it was almost a dream come true.
I started out trying to keep the images looking all very natural, but within minutes I realized the beauty of the show was its ability to transform nature into an incredible fantasy stage set that was simply mind blowing.
Three take aways from exploring this theatrical show
Use colour boldly through the use of flowers and garden art
Use mirrors to emphasize and reflect already splashes of colour
Incorporate natural materials like moss, ground covers and flowers in theatrical-style installations.

Colourful orchids dominated the display helping to create a truly fantasy world.

The beauty of a single orchid
A single orchid stands out from the thousands that took centre stage in the garden show.
The sheer number of orchids blooming everywhere you looked was inspiration enough, but the extensive use of moss and other natural elements combining with the flowers and Alice in Wonderland garden art, took the display to a whole other level.
Lessons learned from theatrical garden show
But what could a gardener – let alone a woodland gardener – take from all this?
In a word, plenty.

A woodland table setting combining mosses, flowers and the necessary accoutrements.
A massive moss-covered table decorated with an array of flowers softening the accoutrements of a formal table setting provided enough inspiration in itself to dream of what could be done in our own gardens. A similar display on our gardens – toned down a little of course, but not so much to take away the theatrical presence of the display would be a wonderful addition.

A door into the garden
Colourful doors add more excitement to an already incredible theatrical stage set in the garden.
Alice herself even showed up for a few photographs in the garden.
This was garden art taken to extremes. Toned down, a smaller version of the moss-covered table could easily stand in for a boring, old, underused table in the back garden. A glue gun, a variety of mosses, a good helping of annuals, succulents and some well thought out thrift finds could transform a little-used corner of the garden into a favourite sitting spot.
Looking for great gardening products that are made especially for the serious gardener, be sure to check out Gardeners supply? They offer a huge array of garden products.
Either a secret spot in a corner of the garden or, even better, imagine incorporating some of these ideas for your next garden party? Wouldn’t that be fun?

Painting the town red
Using the red extraction filter on the Fujifilm X10 creates the illusion of a youngster painting the town red.
And if a moss-covered table setting is not your “cup of tea” you could always use the naturalized table setting as a place to feed birds, chipmunks and other backyard critters.
Imagine capturing images of your favourite chipmunk sitting down for lunch at your moss-covered table setting with all the trimmings.
Of course, the fantasy table setting was just a small part of the entire display.
In another area of the display, mirrors added depth to the garden, and a vignette focussed on using oversized chess pieces as garden art.
Garden shows, like this one, offer a wealth of ideas for gardeners looking to create a special place in their landscape. The images I collected are too numerous to include in this post, but I have created a gallery of images you should check out to get a more complete picture of what this show and others like them can offer gardeners. To check out my gallery of images click here.

The king and queen sit among an incredible display of roses.
In another area, the queen and king took their positions on stately thrones festooned with an incredible wall of roses. Not far off, children “painted the town red.”
For the Photographers
It’s easy to walk into a display like this and instantly get overwhelmed by colour and the intricate detail captured by the garden designers. Not unlike walking into a forest, it’s always a good idea to walk around and explore the area to get a better feel for the entire display.
If you want to see more images from the Alice in Bloomland garden show, check out my photo gallery here.
I chose to keep my approach simple and stick to my Fujifilm X10 – an enthusiast point-and-shoot camera that was first introduced in 2011. Despite its age, it remains a very capable camera with features that allow it to be the perfect walk-about camera complete with its 28-112mm equivalent lens with close-up capabilities.
For more on the Fujifilm X10 – fast becoming one of the cult cameras in the Fuji lineup, check out my review here and my Photogallery of images taken with the camera here.
It turned out to be all I needed for my first visit and allowed me to capture a comprehensive overview of the display. I returned the next day to capture more detailed images of the show.
Exploring Fujifilm’s extraction filter
The creative approach in the garden inspired me to experiment with Fujifilm’s in-camera filters, and choosing the red extraction filter proved to be an ideal choice to emphasize a garden design feature. (Many camera manufacturers offer colour extraction filters but they are often buried in the camera’s menu systems.)

Taking advantage of a design feature by using an in-camera filter to pull out the reds in this image adds to the fun of shooting in this type of environment.

Time to focus on details
Small details are worth photographing so that you can incorporate many of the ideas in your own garden.
By using the red extraction filter, I was able to simplify a group of mannequins “painting the town red.” The extraction filter, which creates a B&W image that only allows the colour red to show through, helps focus attention on the design by eliminating distractions such as green leaves and other colours in the scene.
If you are looking to purchase a high quality used camera or lens, be sure to check out the offerings at KEH Camera Exchange.
Imagine using the different coloured filters in your garden photography focusing on extracting the colour blue or yellow in your native flowers.
In a show with this much attention to detail, look for garden ideas that might work in your own garden.

Thrifty ideas
Consider using everyday household items as garden art.
One of the details that caught my attention and one that could easily be incorporated in any woodland or natural garden design, is a vintage clock surrounded by a flowering vine.
These little details are features to always keep your eye on while visiting public gardens, but especially when garden designers are brought in to create a fantastical theatrical displays that you are unlikely to see in a typical garden.
Happy shooting.
Capturing images of beautiful gardens and streetscapes is always exciting. European villages offer some of the prettiest streetscapes imaginable, complete with extravagant hanging baskets, window boxes and containers. If you have never considered a river cruise, check out Avalon River Cruises for your next vacation. Click on the link above, or here, for more information.

Native plants: A winter reminder of their importance in our wildlife garden
The importance of growing native plants including wild grasses has been brought home to me on a daily basis by, of all things, a couple of wild male turkeys. Check out the full story here.

A wild turkey eyes what is remaining of our Northern Sea Oat seeds growing in our garden. The two young males visit the Sea oats on a daily basis, stripping the seeds which in themselves are elegant additions to the fall garden. (See image below)
Wild turkeys teach us a lesson or two about native plants and garden cleanup
Every day I’m reminded of the importance of planting native plants in our garden. It’s easy to see the importance in spring, summer and fall when the pollinators are buzzing around the coneflowers and the hummingbirds are working the cardinal flowers on an hourly basis.
But, it’s in the dead of winter that I’m being reminded every day of how much wildlife depends on native plants in our woodland garden. You would be forgiven if you thought the goldfinches feasting on the Black Eyed Susan seeds was the reminder.
But that’s not it.
Every day for the past few months it has been our two male wild turkeys that remind me of the importance of growing native grasses, plants, shrubs and trees.
The two male Wild Turkeys that have taken up residence in our backyard are also the perfect illustration of why we should leave fall garden cleanup until spring – especially when it comes to cutting down native grasses.

You don’t need to plant Northern Sea Oats in your garden to attract wild turkeys or other birds and wildlife. Plant it because it is a beautiful and elegant addition to any garden. Consider the wildlife as just an added bonus.
Turns out that wild turkeys – at least the ones in our yard – are big fans of Northern Sea Oats grasses. Not a day goes by that I don’t see our wild turkeys eating the seeds of the Northern Sea Oats. In fact, the other day one of the gobblers was laying down among the sea oats while his buddy stripped the seeds off the plants.
For more on the importance of native plants, be sure to check out my earlier posts:
Bringing Nature Home, How you can sustain wildlife with Native Plants by Doug Tallamy. This is a review of his outstanding book that has changed the way so many of us garden.
Why we should be using native plants in our gardens. and why they are critical to our future
A Garden Revolution: Ecological gardening is way of the future
I’m convinced that without the sea oat grasses, our friendly wild turkeys would be long gone rather than winter residents in the garden. They spend most of their day hidden up in a more wild corner of the yard, coming out several times a day to snack on the native grass and, of course, take advantage of the feed I spread out for them under the bird feeders.

I looked out one cold day to find the two wild turkeys enjoying themselves in the Northern Sea Oats. One laying down eating the seeds, the other standing so he could reach the higher seed heads. Consider growing this lovely native grass and be sure to leave it standing all winter. You might just be surprised about who is using it.
Of course the wild turkeys are not the only wildlife either living in or regularly visiting the garden and the native plants in it.
Earlier today I watched as two Juncos fed on more native wildflower seeds in a corner of the yard.
There are so many examples of wildlife using native plants in our garden. The images below are just a small sampling of the birds, animals and insects that depend on native plants in the garden.

Hummingbird feeding on one of our native cardinal flowers.
Juncos, several species of woodpeckers, cardinals, jays, chickadees and nuthatches join rabbits, fox, deer, raccoons, possums and a host of insects, amphibians and reptiles that call our garden home. While not all depend directly on the native plants in the garden, it’s probably safe to say that they all benefit in some way from the native plants in the garden.

Acorns from the oak trees feed the wildlife, along with the berries from the serviceberries and dogwoods on the property. Viburnum, wild grape, Virginia creeper… the list goes on. Without host plants we would not have caterpillars and therefore parent birds would have nothing to feed their young.

Native plants will play a role in attracting some interesting visitors to your yard. Without a consistent amount of food available, this screech owl would not have chosen our yard to roost in. Native plants attract a variety of insects and small mammals that make up this tiny owl’s diet.
It’s a never ending cycle of dependency that we cannot ignore in our gardens. I’m not one to say that every plant in our gardens has to be native, but if we all make an attempt to plant as many native plants as possible in our gardens and ensure that any non-natives are not harmful to our environment, we will be on the road to helping our local wildlife survive today and into the future.

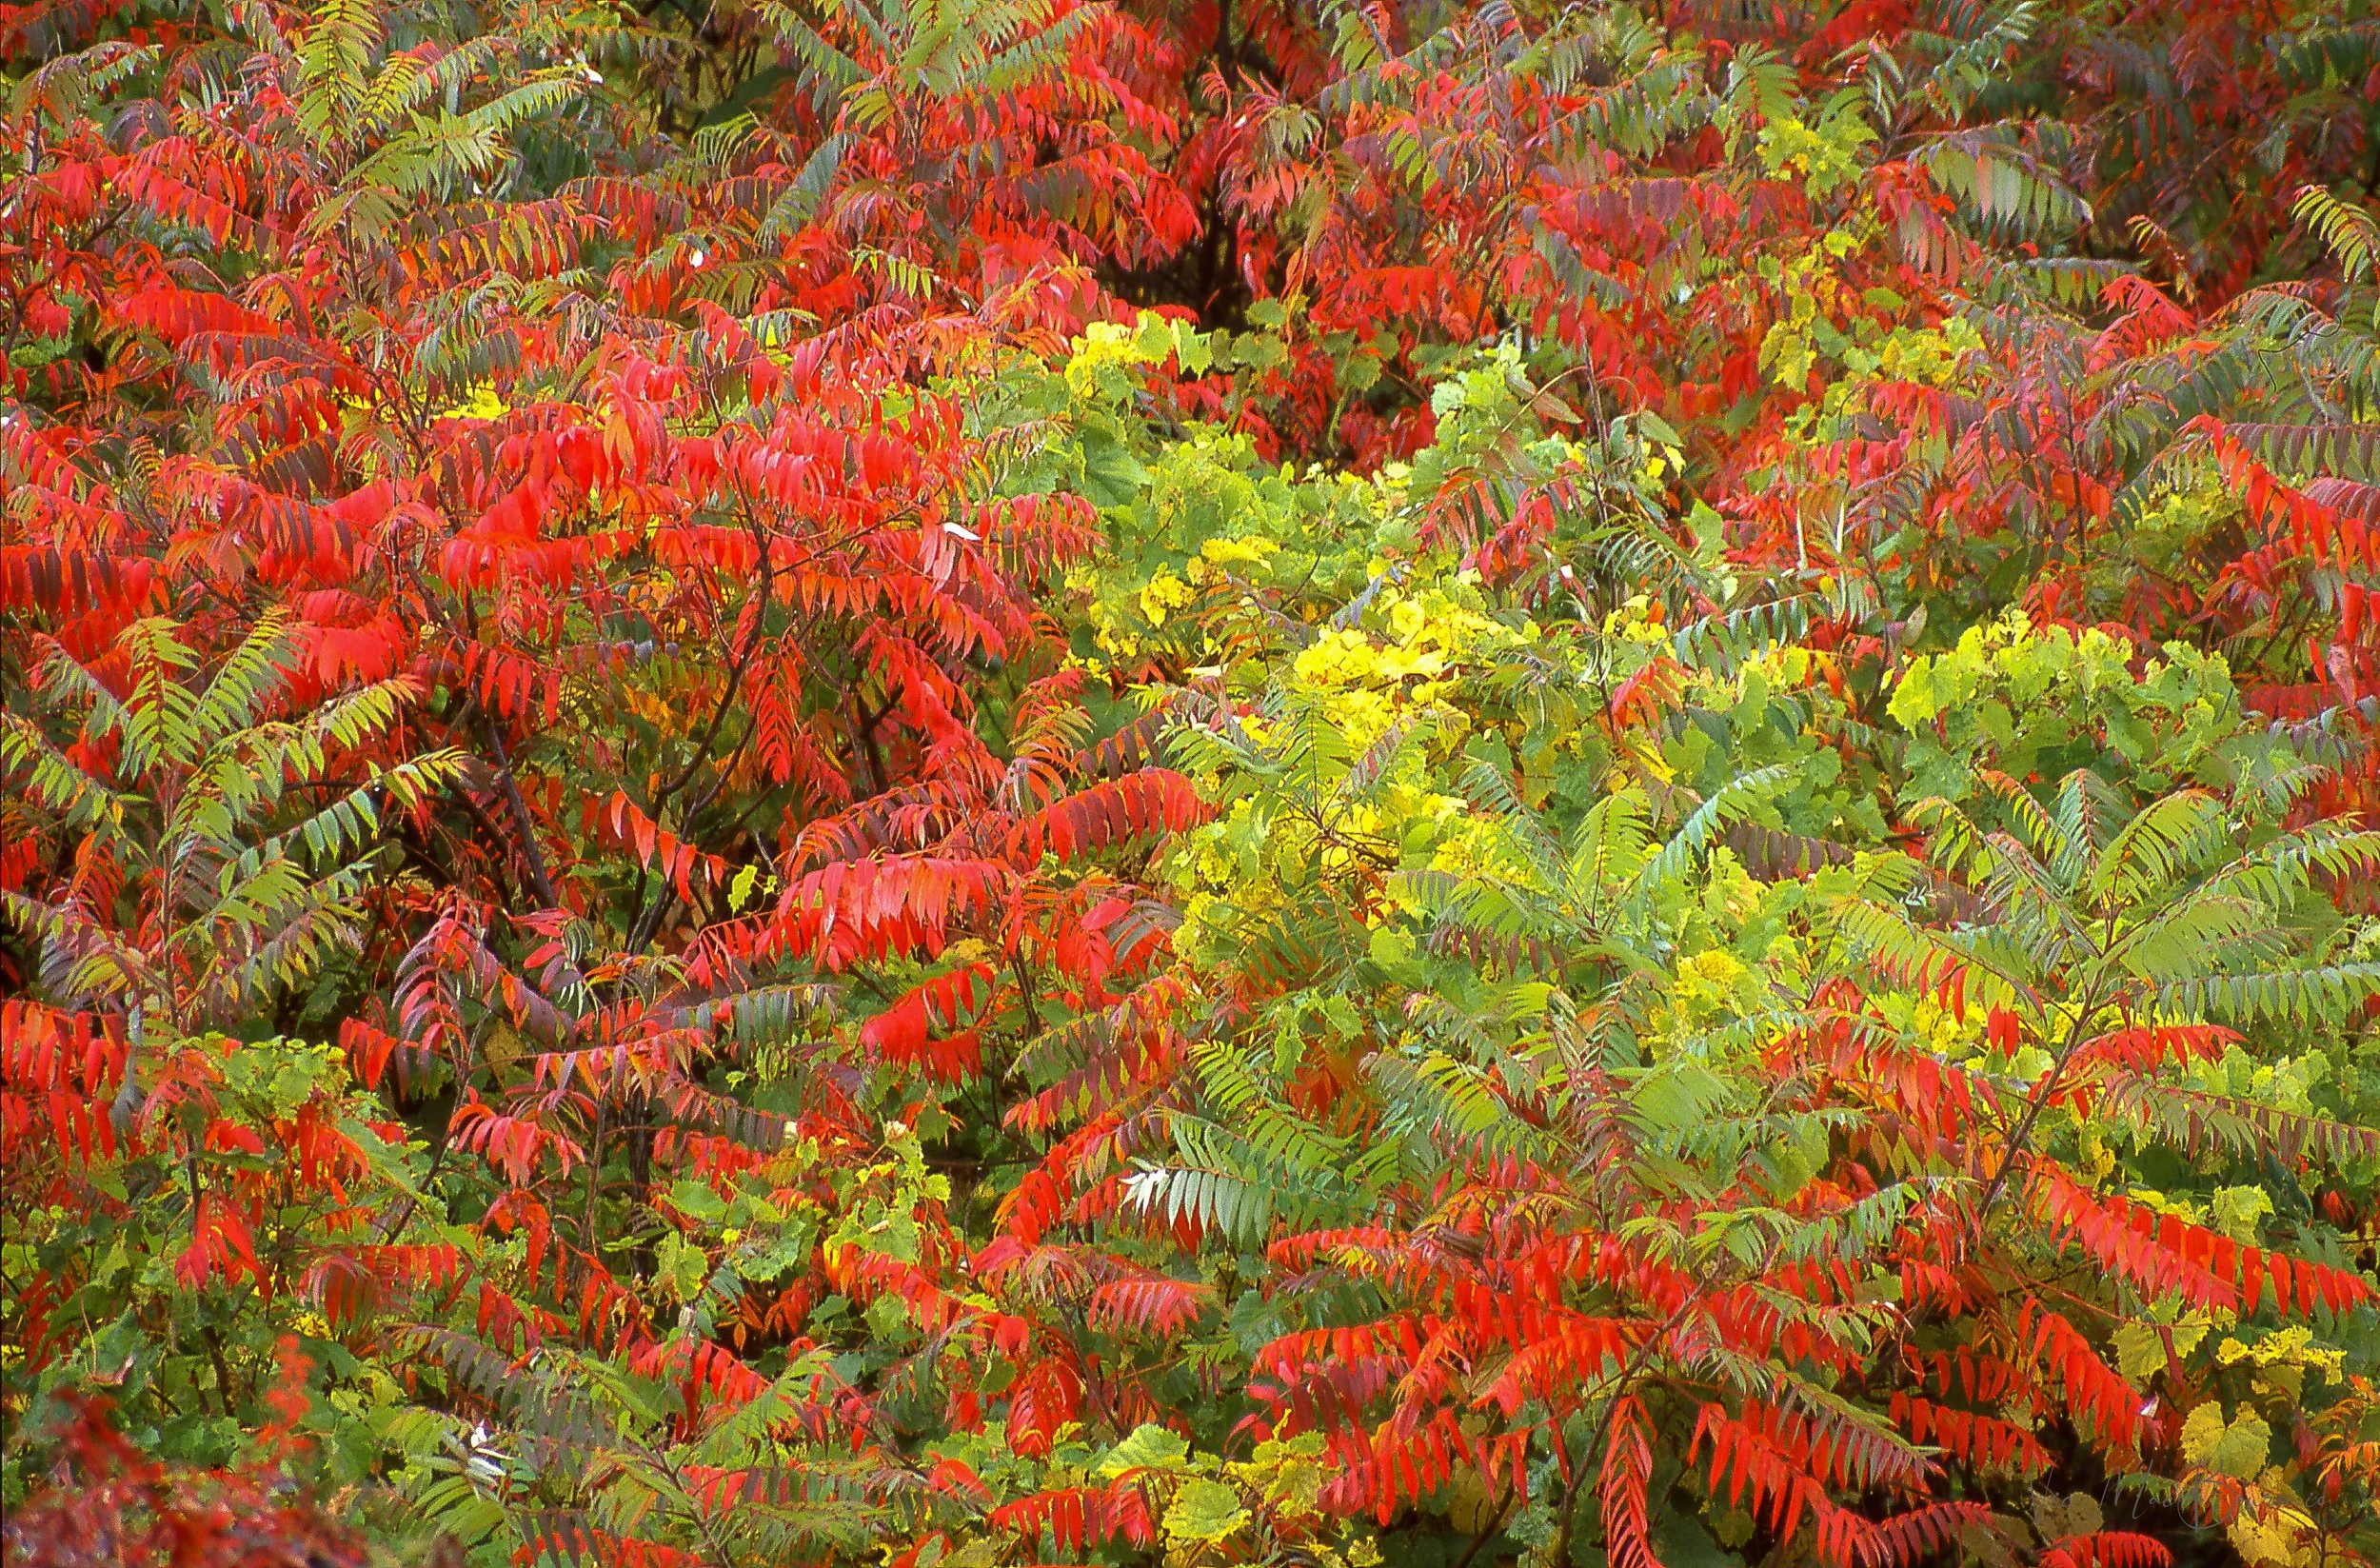


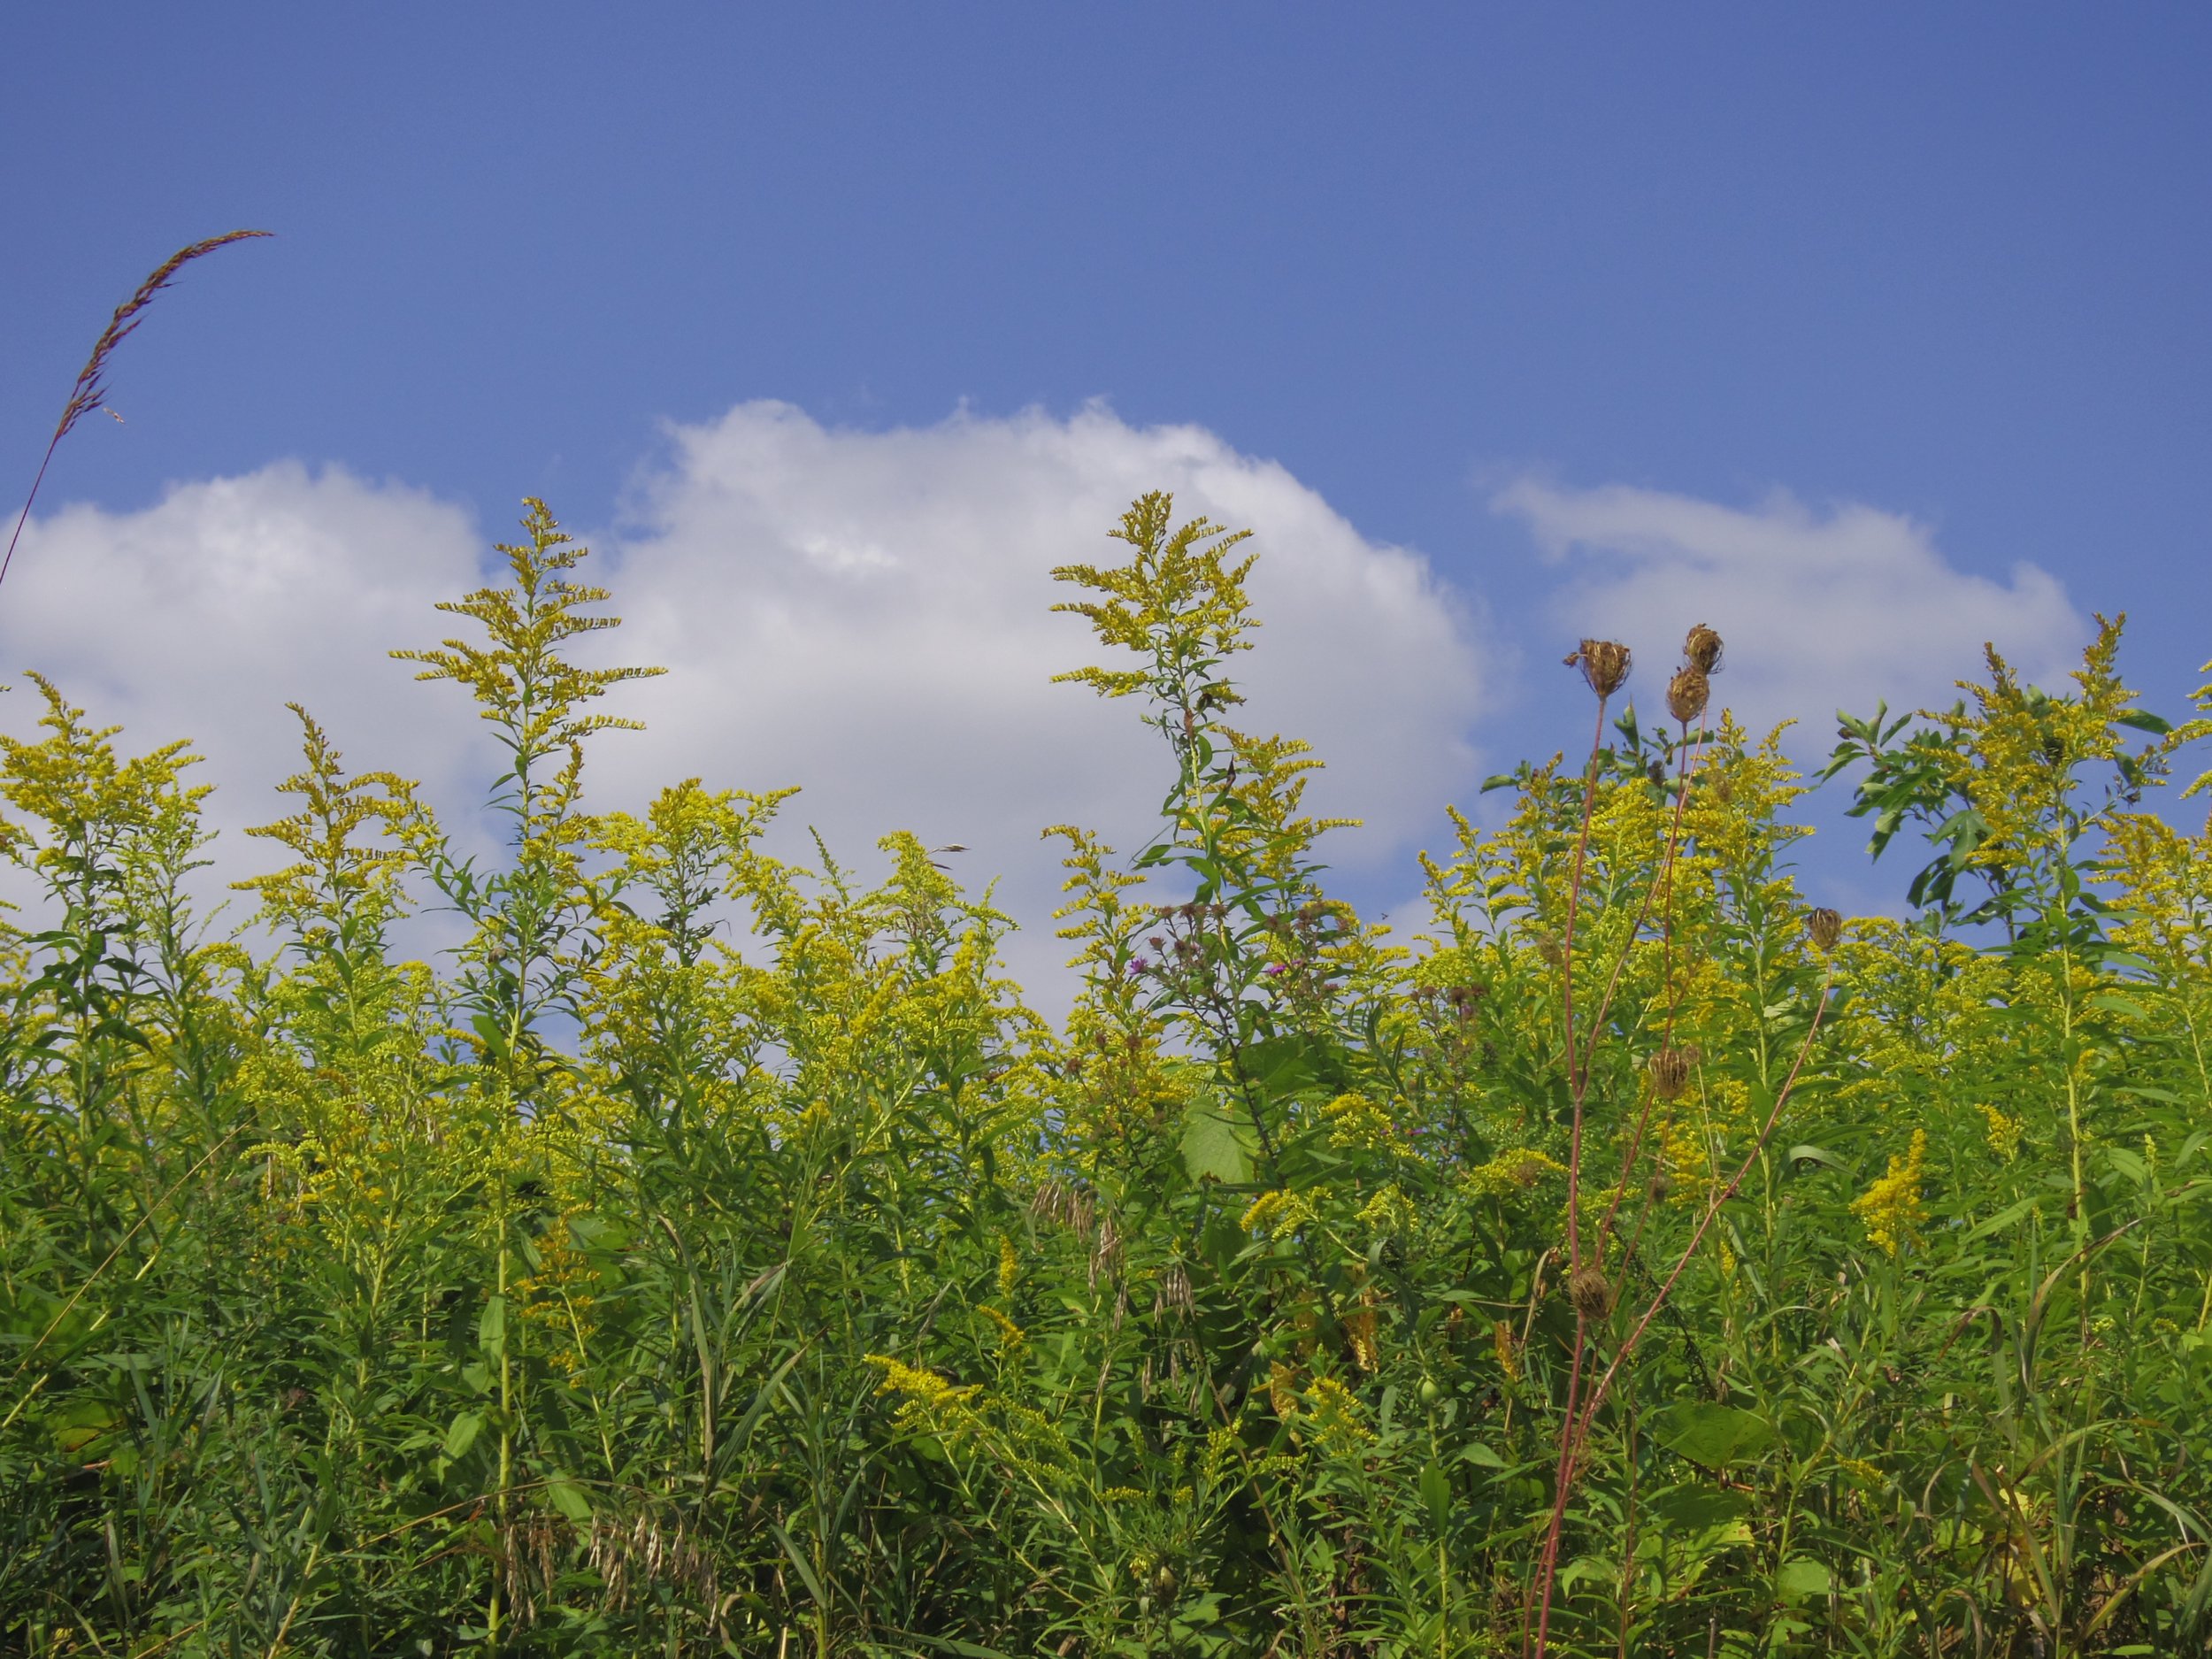


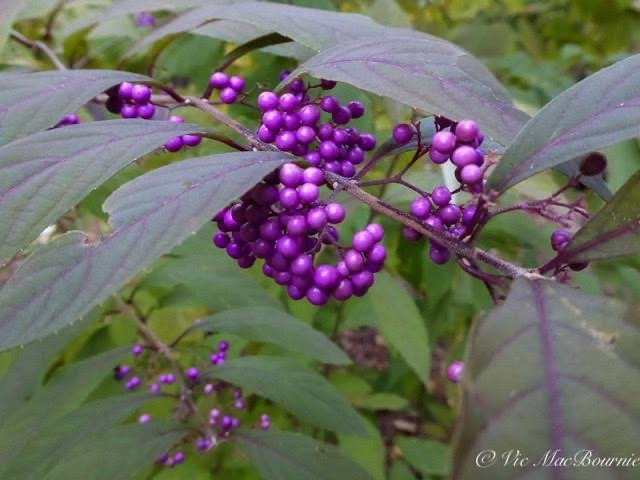

Wild Ginger: Native ground cover for your shade garden
Wild Ginger is a native ground cover that just might make a great replacement for your hosta plants.
Natural replacement for small hostas

This image of Wild Ginger shows off the native plant’s flower beautifully. The small reddish-maroon flower is normally difficult to see because it grows under the leaves and emerges for a short time in spring.
Canada Wild Ginger (Asarum canadense L.) has been described as an ideal replacement for hosta in the native garden, and I couldn’t be happier.
I mean, who isn’t up for a native plant to replace the ubiquitous hostas that have become a mainstay in every suburban garden? I know that I am ready for a change.
Don’t get me wrong, I love a beautiful hosta but so do deer, slugs and a host of other backyard wildlife.
What makes this low-growing ground cover so special is the fact the plants contain a type of acid that ensures deer, rabbits or any other hungry critter that enjoys filling up on our garden plants, have absolutely no desire to sample these plants.
That’s a win-win in my books.
Wild Ginger, also known as “little jug” is a good, low groundcover for eastern woodlands and shaded landscapes. It is considered a new-world native plant and the genus is well distributed around the northern hemisphere.
Before you ask, “Where have you been? Wild Ginger has been around for a long time as a garden plant.” Let me just say that I’ve been a fan of the plant for decades but for some reason have never planted it in the garden.
The above picture, for example, was taken more than thirty years ago in a nearby forest. For whatever reason, I just never got around to planting wild ginger until last season when I picked up three plants at a local horticultural society plant sale.
I’m looking forward to buying more at this year’s sale and spreading what I already have around the garden. The plant is more than capable of spreading all by itself and will quickly colonize an area through underground runners. It can also be easily multiplied through rhizome division in spring or early summer.
Propogation of Wild Ginger is by root division, seeds or even softwood cuttings.
Like most effective ground covers, Wild Ginger is very good at choking out weeds that try to invade its space.
For wildlife gardeners, native wild ginger is attractive to some butterflies but, most important, is a larval host for the Pipeline Swallowtail butterfly.
Like most woodland plants, a mulch of leaves in spring and fall is beneficial and always a wise choice.
A little about our native wild ginger ground cover
First, it’s important to make it clear that this is not a member of the ginger family (Zingiber officiale) that we love to eat. In fact, although wild ginger does have a ginger smell to it, wild ginger can be dangerous to eat. Although it has been used as a medicinal herb in the past, more recent studies suggest that the plant contains carcinogenic properties that makes it better left to simply leave it in the garden rather than use it in any dish.
Wild Ginger grows to about 6-inches tall (15 cm) with a corresponding spread of about 6-inches (15 cm) in diameter making it a great choice for those gardeners who are looking for a low-growing, tidy ground cover. Wild ginger sports two heart- or kidney-shaped leaves that stay on the plant throughout the season.
It is native to Quebec and New Brunswick through to Ontario and Minnesota and south to Florida and Louisiana. It happily grows throughout Eastern North America from zones 3 to 7.
Its range means it can be found throughout the U.S. in AL , AR , CT , DC , DE , GA , IA , IL , IN , KS , KY , LA , MA , MD , ME , MI , MN , MO , MS , NC , ND , NH , NJ , NY , OH , OK , PA , RI , SC , SD , TN , VA , VT , WI , WV). In Canada you’ll find it growing from Manitoba to Quebec and throughout Southwestern Ontario.
A dark reddish-purple flower grows beneath the two leaves that make up a single plant and remains on the plant for a short period of time in spring. You can expect a bloom to appear from April, May and even into June depending on your location.

Wild Ginger is an excellent ground cover for the woodland garden. The above images show how the plants colonize to form an impressive ground cover as well as individual plants showing the maroon-coloured flowers.
These plants can and will self pollinate but are also pollinated by ground-dwelling insects such as beetles, ants and small flying insects.
Once the flower is spent, ants go to work gathering the seeds. They then take the seeds to their underground burrows where they provide food for the colony. In return, the ants provide an efficient form of seed distribution. Don’t be surprised to find plants sprouting up in other areas of the garden thanks to your local ant population.
Wild Ginger is best grown in shade to part shade in moist, acidic soils (pH of between 6-7). These plants do well in morning sun in cooler climates provided they get afternoon shade. It will get baked out if it gets sun all day long.
Botanists argue that there are actually two subspecies of Asarum canadense (wild ginger): Asarum Refexum, and Asarum Acuminatum. The differences can be identified by differences in the length of the calyx lobes of the flower and the amount of fine hairs on the plant’s petioles (stalks). Most, however, are simply lumped together as Asarum Canadense.
There is also an Asian species with a shinier leaf as well as a European species of wild ginger. Canada wild ginger has softer, mid-green coloured leaves that keep its colour all summer long.


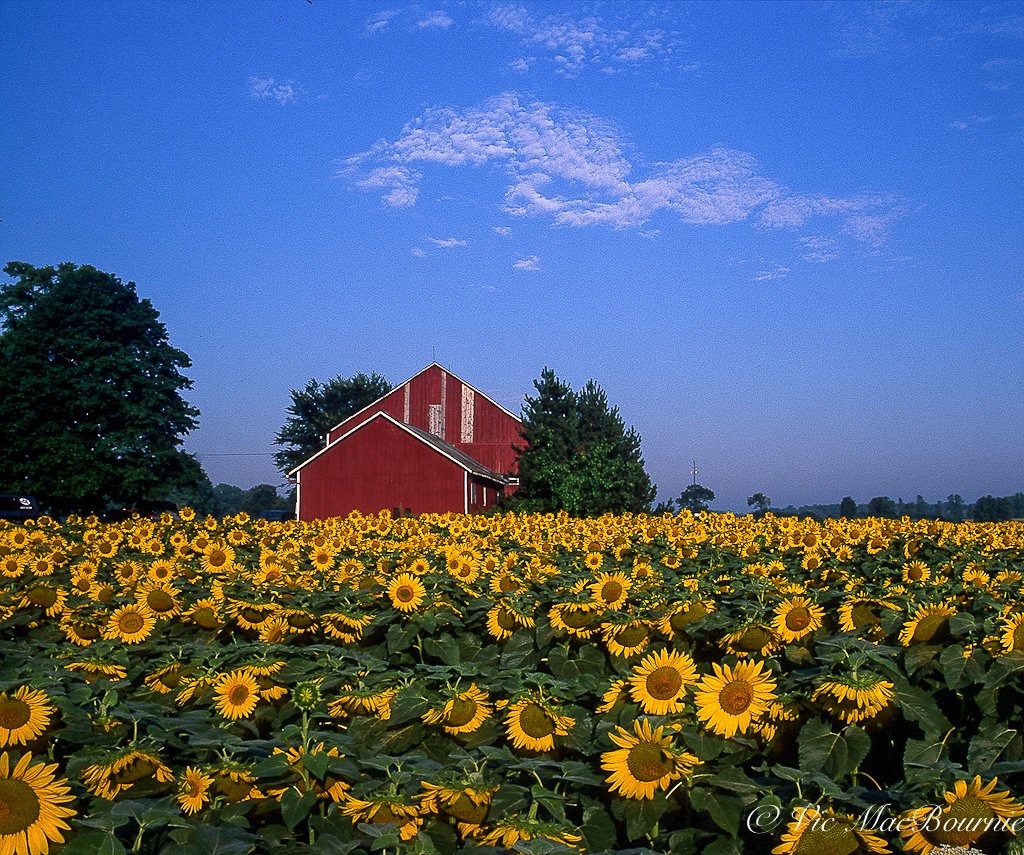


How to grow and care for native Hepatica in your woodland garden
Adding Hepatica to your woodland garden is the perfect way to kick your spring garden into action early.

These woodland flowers are among the first to bloom in spring
Hepatica was always my favourite early-blooming wildflower to photograph in the spring woods around our home.
On most early spring photo excursions it was the only wildflower to grace the woodland floor – certainly the most delicate and the one that had the most potential for a lovely photograph. While other spring wildflowers were still in winter dormancy, these spunky little blue, white, purple and pinkish flowers – actually part of the buttercup family – were already up and blooming providing a source of much needed pollen for native bees and other pollinators.
Even if you’re not interested in photographing Hepaticas, experiencing them in your garden each spring is one of the great joys of woodland gardening.
Unfortunately great images of these small flowers can be difficult to capture in the messy spring woodland.
So, why not plant these native beauties in our own garden so we can better admire them, and maybe grab some nice images of them in the best light?
And, don’t be surprised if your hepaticas begin to reproduce in your garden through self-seeding.
On the University of Wisconsin - Madison website, Susan Mahr writes about where to find Hepatica in the wild and how to create those conditions in our garden: “In the wild, Hepatica is usually found in high-quality, open woodlands with many native trees and herbaceous plants and few or no invasive species such as garlic mustard or buckthorn.”
She writes that this low-maintenance plant is best grown in places where it can remain undisturbed for several years. However, she is quick to explain that: “Hepatica are easily transplanted and plants can be rescued from construction sites.” She adds that they should never be dug from intact woodland settings.
For more on why native plants should not be taken from the wild, please see my earlier post here.
Ms. Mahr writes: “While not typically thought of as a garden plant, Hepatica can be readily grown in rich soils in shady sites. It looks best placed in clumps of two or three or scattered about under trees with other native woodland plants including bleeding hearts (Dicentra spp.), wild geranium (Geranium maculatum), Dutchman’s breeches (Dicentra cucullaria), trilliums, woodland phlox (Phlox divaricata), and many others..”
Secret to their success
The secret to Hepatica’s early arrival is because they are a spring geophyte. All this means is that these plants have underground renewal buds which are ready to sprout immediately after the cold season gives way to spring and enough light makes it to the woodland soil through the still-bare trees. The plants’ leaves remain active throughout the winter months, conducting photosynthesis and gathering energy when it is sunny and safe to do so. The old leaves stick around until the plant starts to bloom and create new leaves to carry on its winter-surviving legacy.

The simple beauty of our native wildflowers
Hepatica growing in a woodland setting. Notice the delicate flowers and fine hairs on the leaves and stems.
When Hepatica blooms?
The Sharp-lobed Hepatica, (Hepatica acutiloba) also known as Liverwort and Liverleaf is a native woodland plant that blooms throughout April to May. The flowers are easy to spot on the woodland floor as their hairy, leafless shoots emerge in colourful clusters that add splashes of white, pink, purple, or bluish colours to the forest floor. There is also a variety called the Round-Lobed Hepatica.
Hepatica flowers actually have no petals. Instead, the colourful petal-like objects are actually sepals that frame the flower and sit on top of three green, pointed-tipped bracts. The leaves of Hepatica are also easy to identify with their mottled green colour and three deep lobes that have pointed tips resembling the shape of a liver, hence the common name Liverwort and Liverleaf.
Where are Hepatica found?
This plant can be found throughout southeastern United States and up through Ontario, Manitoba and into parts of Quebec. They are often found growing in open deciduous woodlands with a good woodland soil.
Being part of the Buttercup family, the plant has mildly toxic leaves saving it from being eaten by animals and insects looking for greenery in winter and early spring. Fine hairs along its stems, bracts, and leaves, add to its unappetizing appearance, especially in spring when they are preparing to bloom and their is little else around for deer and other grazing animals and insects.

An extreme closeup of a Hepatica shows their yellow anthers atop the stamens.
There was a time when hepaticas were difficult to find in local nurseries, but the move toward more native plants has made these spring-blooming herbaceous perennials much easier to track down at better nurseries.
Hepatica grows to about 12-inches high and are hardy in zones 8 through to about zone 4a.
The ½- to 1-inch-wide flowers have a number of oblong white, pink, lavender, purple or bluish sepals (no petals!) surrounding numerous central stamens tipped with yellowish anthers.

Imagine small clumps of these
delicate
flowers in your woodland garden
Clumps of these delicate native wildflowers spread throughout your woodland garden can be a magical experience each spring.
Hepatica can be important early food sources for many pollinators, including butterflies, bees, flies and beetles that visit the flowers during the month-long bloom period.
One important note for photographers who are looking to get an early morning photo session in on these flowers, or for those hoping to catch them in beautiful overcast skies. Chances are you will not be very successful. Hepatica flowers actually close at night as well as on cloudy days. They often don’t open up until later in the morning or early afternoon when the sun in out in full force.
Hepaticas time their bloom during warm sunny periods when pollinators are more likely to be out and about.
Hepatica also have the ability to self-pollinate.
By early summer oblong fruits appear on the plants. These are also covered with silky hairs and are a favorite food source of chipmunks and other rodents.
The seeds, which have a small, fleshy appendage called an elaisome, are dispersed by ants, that take them back to their nests to consume the fat-rich elaisomes and discard the seeds which then germinate far from the mother plant.
Other varieties of Hepatica
Hepatica nobilis occurs in eastern North America, Europe, and Japan. Variety obtusa and var. acuta occur in North America, var. nobilis and pyrenaica in Europe and var. asiatica, var. japonica and var. pubescens in Japan. In addition, several other hepatica species occur in Europe and the Far East.
Sometimes the two North American varieties are considered to be species in their own rite. The synonym for var. obtusa is Hepatica Americana, and for var. acuta is Hepatica acutiloba. They are very similar in appearance except that the lobes on the leaves of var. obtusa are blunt and those on var. acuta come to a point. Hepatica nobilis var. obtusa is often found on more acid soils while var. acuta is most common on calcareous soils.
Hepatica nobilis also occurs in Europe from England across Scandinavia thru the Baltic States, east to Ukraine, and south to Italy and Spain.
Propagation
Propagation Material: Hepatica propagation is by both clump division, and by growing seeds. Seeds, which are commercially available, can be collected from mid to late May in most northern climates and should be planted outside soon after collection.
Seeds can also be hard to collect and require cold treatment, so consider fall division as an alternate propagation plan. Clumps can be slow to increase so ensure that when you are dividing a clump, to leave 2-3 buds in each division.

Putting the Pentax Auto 110 film camera to the test vs the Pentax Q digital camera
Putting Lomography’s colour films to the test with the Pentax 110 against Pentax’s digital Q line of cameras.

The Pentax Auto 110 shown here with some of its exquisite manual focus lenses that can easily be adapted for the much more modern Pentax Q line of cameras.
Lomography color film and Turquoise test roles
It’s almost unfair to put up a 47-year-old (released in 1978) film camera the Pentax Auto 110 up against a more modern (2011) digital camera that’s as good as the diminutive Pentax Q line of mirrorless cameras.
But add a little modern technology in the form of scanners and excellent photo software, and the almost 50-year-old film camera and lenses loaded with Lomography color film stand up well when the original 110 lenses are also used on the Pentax Q cameras. Even the ability to use these tiny lenses on modern digital mirrorless cameras including M4/3 cameras is hard to believe.
I’m sure the original designers of the Auto 110 camera and lenses never dreamed their lenses would be used on a digital camera, but here we are.

Film size vs digital sensor
It’s easy to see that the 110 film of the Auto 110 camera compares in size to the Pentax Q sensor.
It’s important to note that the 110 film size is comparable to the size as the Q’s digital sensor. A frame from 110 film measures 13 mm × 17 mm (0.51 in × 0.67 in), while the digital sensor in the Pentax Q measures (6.17mm x 4.55 mm) 1/2.3 in.
For a look at what the Auto 110 and Pentax Q can do using the Pentax 110 manual lenses with Lomography’s B&W film, check out my earlier post here.
For a comparative look at the Pentax 110 vs the recently unveiled Pentax 17, check out my post here.
“If you are a Pentax 110 owner, you owe it to yourself to purchase a Pentax Q and an inexpensive adapter to use these exquisite lenses in a digital format. And, if you are a Pentax Q owner, you must get your hands on some of these 110 lenses to make magic with these 40-plus-year-old tiny lenses.”
All this being said, the convenience and the autofocus prowess of a Pentax Q teamed with one of the four exquisite autofocus lenses from the Q lineup, is both easier to use and more accurate than using the film camera with its manual focus lenses, especially when your eye sight isn’t quite up to snuff.
I found that images shot on the more modern autofocus Q lenses were considerably sharper than those shot with the 110 lenses. However, many of today’s photographers who are looking to add a more vintage style to their photographs may prefer the look of the older lenses and increased grain that comes with the 110 film.
Lomography’s Tiger color print film passes the test
Let’s first take a look at Lomography’s Tiger colour print film photographed with the Pentax 110 lenses. It’s important to note that I scanned this film manually by hand on two different scanners, both of which are not made for scanning the downsized 110 film.
Unlike the Orca B&W film that was scanned professionally by The Darkroom, I chose to go it alone with the colour film Tiger. The C-41, 200 ISO film results were mixed showing high grain typical of 110 film stock reducing sharpness as well as generally low contrast that made the images seem even softer.
Technical details of the film is limited because Lomography does not publish them. Tiger film is available only in the 110 format from the Lomography website. Whether Tiger is simply a repurposed film from another manufacturer is difficult to say at this point, but we can consider it as a standalone film for this review.
The grain is high as a baseline in this film and only amplified by the tiny format that 110 delivers upon magnification. All of the issues that this magnification creates such as grain, image softness and tonality are also amplified. As a result, the images do not show a lot of gradation in colours and tones.
The dynamic range of this film is decent by 110 standards with shadows and highlights can both be retained in even lighting conditions but not so much in high contrast situation say in full sunlight with deep shadows. Chances are you’ll either blow out the highlights or lose the shadows.
The size of these negatives amplifies the already limited tonality and tonal range in this film. The acutance of the film is low, but the contrast is high helping to give the film a more sharpened look.
Later in this article when the Pentax 110 lenses are used on the digital Pentax Q, it becomes obvious that the high quality Pentax lenses can easily outperform this film. It’s important to emphasize, however, that the very flaws of this film is what makes it interesting to those who are striving for the vintage look in their images.
It’s probably best to use this film in subdued light in open shade or during the blue and golden hours of the day. The images below provide examples of images shot in this more favourable lighting conditions.
Nevertheless, the scans still provide us with a good idea of how the film performs under different circumstances. The following are a number of images taken with the Pentax Auto 110, the 18mm, 24mm and 50mm lenses.
Lomography rates this color negative 110 film at ISO 200 and describes it as gorgeously grainy, especially when enlarged and add that it is “great for vibrant snapshots in the urban jungle.”

This image was taken on the Pentax Auto 110 with Lomography’s Tiger colour print film.

An overview of the city photographed with the Pentax Auto 110 using Lomography’s Tiger color film.

A local historical building photographed with the Auto 110 on Lomography Tiger. Detail is good but not as good as the digital image below.

The vintage look of this image works well with the historic building.

Color and detail is good in this garden image shot on Lomography Tiger film and the Pentax 110.

This garden image of milkweed illustrates the detail Lomography’s Tiger film stock is capable of producing.
Pentax Q test images for comparison
As you can see the images turned out satisfactory after modest editing in Lightroom. Most of the images are a little soft and grainy but, again, if a vintage look is what you are after, then Lomography’s Tiger film and the Pentax 110 system delivers with flying colours.
The lack of grain in the Pentax Q digital images makes for sharper images with increased contrast and colour.
Below, are a few of the same images using the Pentax Q and 110 lenses as well as a few using the Pentax Q with Q autofocus lenses. You can be the judge of what works best depending on your taste and the effect you are going after.

Image shot with Pentax Q and a 110 manual focus lens.

Image photographed with Pentax Q and the Pentax Q’s 06 autofocus telephoto lens. The lens is equivalent to a 70-200mm F2.8 lens in 35mm terms.

Pentax Q with 24mm manuL focus 110 lens.

This image was shot with the Pentax Q and 01 prime autofocus lens.

Image shot with Pentax Q and 110 manual focus lens.

Overview of the city taken with a manual focus 110 lens.

This garden pond image was taken with the 24mm manual focus 110 lens on the Pentax Q. The below image was taken with the digital autofocus 02 lens from the Pentax Q lineup.

This image was taken with the Pentax 02 lens from the Q lineup of lenses.
Lomography Tiger vs digital: pros and cons
If sharp images are your goal, the Pentax Q and the autofocus lenses are the clear winners. The Pentax Q digital comes out on top if you are looking for cleaner, less grainy images with more pop in colour. Although, with careful post-process editing, I’m sure it’s possible to get high quality results with the 110 film.
If a grainy, more vintage look is what you are trying to achieve, that vintage look is still certainly attainable on the digital Q system with some creative post processing. Of course, the vintage look is literally built into the results of the Auto 110 film camera loaded with Tiger’s colour Lomography film.
One final point that I think is important is the cost of shooting 110 film vs digital. Let’s not fool ourselves, this vintage look comes at a high cost. Not only is the film difficult to get (available only from Lomography) developing and scanning the film also gets expensive. It’s probably fair to say that any 110 film is the least cost effective method of shooting giving the lowest yield option for colour film shooters. In addition, the amount of plastic used in the cartridges is not very environmentally friendly.
Lomochrome Turquoise is out of this world
Lomography’s Lomochrome Turquoise might be out of this world, but I’m not sure if that’s a good thing.
Test results show the film is grainy and benefits from post processing in Lightroom to bring out its unique qualities.
That being said, the finished results are worth exploring further. I can’t help but think the film would perform better on a more forgiving film stock like 35mm and 120 film where the extensive grain is less noticeable.
To achieve these other worldly results, Lomochrome Turquoise is another color channel swapping film similar to Lomochrom Purple. With Turquoise, Lomography simply swaps the red and blue dies. The red layer releases a yellow die instead of its normal cyan, and the blue layer releases a cyan instead of its normal yellow die. The green layer is unaffected and creates the magenta die. This effect can more or less be achieved digitally in Photoshop by swapping the red and blue channels in post processing.
Lomography states this about its specialized C41 film introduced in 2021 and rated at a flexible 100-400 ISO. I shot mine at ISO 200.
Lomography says to “pick up this color negative film to explore a wonderland of tantalizing turquoise tones.”
The following are a few examples of Lomography Turquoise on the Pentax Auto 110 vs similar images on digital with the Pentax Q.

This image shows the colour shift in the sky that is a trait of Lomochrome Tourquoise.

This image shot with Lomography Turquoise illustrates the extreme colour shift of the film turning reds into blues. In other images, clear blue skies come out with a heavy orange tint.

The colour shift is evident in this picture of the barber shop. All the blue elements in the picture are actually red in real life.

The orange sky is typical with this film when there are bright blue skies.
Pentax Q digital examples for comparison
The following images are comparison shots taken with the Pentax Q series of cameras and lenses.

Pentax Q with 08 wide angle zoom lens.

Pentax Q with 01 prime lens. This image shows the original colours of the store in comparison to the colours displayed in the above image shot on Lomography Turquoise.
In conclusion: Lomochrome Turquoise on 110 film vs Pentax Q
There is no question the digital Pentax Q gives more pleasing realistic images with much better grain or digital noise. It’s also possible to attain the same effect as Turquoise in digital by swapping out the red and blue channels in photoshop. I suspect, however, that this would defeat the purpose of shooting these experimental films for those who still enjoy shooting with film stock and analog cameras.
It was a fun experiment shooting with both Tiger and Turquoise. Would I shoot them again? Probably not. The cost of developing and printing these films is just a little too high for the results I have been able to attain even using the high quality Pentax Auto 110 system.
I am very happy that I purchased the Auto 110 system to experiment with occasionally with analog film, but I am particularly pleased that the full line of 110 lenses can be used effectively on the Pentax Q digital cameras to give them renewed life well into the future.
If you are a Pentax 110 owner, you owe it to yourself to purchase a Pentax Q and an inexpensive adapter to use these exquisite lenses in a digital format. And, if you are a Pentax Q owner, you must get your hands on some of these 110 lenses to make magic with these 40-plus-year-old tiny lenses.

Five ways to make gardening easier
Gardening does not have to be difficult. Here are five tips to make gardening easier and more rewarding.

A garden vignette can be as simple as using a watering can as a focal point to draw your eye to a lovely planting.
Gardening should be a joy not a chore
Depending on how busy you are, how much time you want to spend in the garden or how large your garden is, finding time to keep it looking its best can be a real challenge.
Here’s an idea, and it just happens to be my number one tip on how you can make gardening easier – Stop trying to create the perfect garden aesthetic.
Instead, create garden vignettes that make you happy and are easier to maintain. It might be a destination sitting area in the back of the garden, a lovely piece of art, or a small, colourful garden around a lovely bird house.
In our garden, vignettes include natural tree branches and stumps that give wildlife perfect places to perch, a sitting area where we can enjoy an open fire, a Japanese-inspired mini-garden leading into the backyard from the front of the home.

A piece of art such as this ceramic piece of art from Fish in the Garden can create a focal point and vignette in your garden.
In the great scheme of things, the perfect garden is not important. Visitors will remember the exquisite garden vignette you have created more than the overall look of the garden.
It’s not important to friends and family and it’s certainly not important to the wildlife that either drop in for a visit or choose to live their lives in your garden.
In fact, for the wildlife, a little messy is okay. A lot messy is even better.
Wildlife will reward you
Case in point: we have a couple of wild turkeys who seem to have chosen our backyard for their winter roosting area. Besides the bird seed that is either sprinkled on the ground for them or drops from the regular bird feeders, I continually catch them working the seed heads from our native Northern Sea Oat grasses left standing throughout the winter.
This, of course leads me to my second tip on making gardening easier. Stop tidying up the garden in fall. In fact, you can even refrain from most garden tidying if you are willing to let nature take its course. There are no gardeners cleaning up in the forests, grasslands or other wild places around us. Nature knows what to do if we give it a chance and accept a little mess in spring and fall.

By leaving the garden to go a little wild, you will get more visits from local wildlife.
It goes without saying that leaving the leaves should be a primary goal. Leave them where they fall, or rake them onto your garden beds. Cleaning up fall leaves is not only a never-ending job, it’s a waste of time and one of the contributing factors behind the decline of so many of our native butterflies, moths, fireflies and other important insects. It’s also depriving our soil of important ingredients like organic matter and trace minerals.
Even without the seed from the feeders, these turkeys – as well as many of the traditional songbirds – would be flocking to the backyard to eat the natural seed remaining on this native grass. Recently I watched them working the seeds on the brown fern stalks that remain all winter. These natural food sources are vital for the survival of these magnificent birds throughout the winter.
But the seed heads feed a host of animals in the garden from songbirds, to larger animals from our friendly red squirrels to mice that are food for our neighbourhood fox families and screech owls that also need a source of food during our long winters.
The Goldfinches are regular visitors to our dried Black Eyed Susan flower heads.

Adding the native cardinal flower will reward you with hummingbirds and other backyard wildlife from butterflies to hummingbird moths.
Explore the world of native perennials
This leads into my fourth tip: Begin transitioning from primarily using annuals in the garden to depending on the beauty and ease of perennials as the main backdrop for your garden. Whenever possible, use native varieties that are more hardy and adapted to the conditions in the garden.
Keep most of the annuals for containers and hanging baskets and focus on hardy native perennials that not only come back each year with the least fuss, but also spread willingly throughout the garden creating free plants that will eventually act like a living mulch.
Speaking of mulch, it is one of the key ingredients to creating an easy-to-maintain garden.

Here various stone was used to create a non-organic mulch that allows black mondo grass to shine as it grows up through it.
Mulch can be your best garden helper
My final tip is to ensure your garden beds are covered with a thick layer of mulch – either organic or non-organic like pea gravel or river rock.
If you are just starting out on your garden adventure, plan on ordering truck loads of natural mulch to cover your garden beds. Your soil will thank you over time and you will significantly reduce the number of weeds in your garden.
Shredded cedar mulch is my chosen method, but I have also readily dumped natural (free) mulch from tree-cutting companies in parts of my garden as well.
And, while you can purchase mulch on a regular basis to keep a thick blanket covering your soil, a better goal is to use a living, natural mulch of ground covers to get the job done. Purchasing mulch can get expensive, and it requires a lot of time to spread every couple of years.

Creeping phlox forms the perfect ground cover in the front of the garden where it is quite sunny. In shadier areas, use wild geranium, wild ginger or a variety of ferns to form a ground cover.
By planting native ground covers, you can achieve the same results naturally. There are many to choose, from aggressive ground covers like Virginia Creeper a native vine that can quickly cover the ground in a woodland garden, to a less aggressive native plant such as wild geranium.
Another favourite of mine is to use a tapestry of ground covers that form a beautiful tapestry of colour and texture as the various ground covers weave in and out and around one another.
Covering the floor of your garden with native ground covers will take time. Meanwhile, keep the commercial mulch topped up and before you know it you’ll need less and less shredded cedar mulch and you’ll have more time to enjoy your garden and the wildlife that it attracts.
Finally, if all of these tips still means your garden is too much work, consider doing what I did and find someone who sees and shares your garden vision and hire them to help you enjoy your garden to its fullest rather than see it as a constant chore.

Watching the garden grow
By combining a garden journal and photography, you can create the ultimate record of your garden over the seasons and over the years.

This 20-year-old image shows our garden as it was about 20-years ago. The below picture is updated to show how the garden has changed over the years.
Garden journal / photos combine to document your garden journey
Anyone who follows this gardening blog knows how important photography is to me and the content of this website.
Documenting the garden and its inhabitants – both the fauna and flora – is not only a favourite pastime, it’s an important resource for me from year to year to plan for next season and well into the future.
Remembering where the coneflowers or wild ginger were planted and when they bloomed previous years, or how the native wildflowers found a footing in the crevice on the large boulder, are just a few of the many benefits of documenting the garden through images and in written form.

The garden today with its black-eyed susans and native grasses and ferns dominating the back garden.

This is another view of the front garden as it is today showing a corner of the Japanese-inspired garden. The bench in the top image is replaced by yellow Adirondack chairs in front of a fern dominated garden.
Consider a garden journal
A garden journal like this elegant 5-year garden Journal (see image below) from YouTuber extraordinaire Linda Vater is an excellent way to document the garden from year to year. It also can make the perfect gift for the gardener in your life.
There is nothing like flipping through a well-worn garden journal filled with insights, drawings, tattered photographs and meticulous notes about the garden to inspire you either to get out in the garden come spring or dream and plan throughout the winter season.
Adding your own photographic images to the journal is an excellent way to enhance the journaling experience and work as a visual reminder not only from year to year, but decade to decade.

This elegant 5-year garden journal not only helps you record your garden journey, it’s a fine way to stay organized.
Even if you are not overly interested in extensive garden journaling, simplifying the process using only a photographic record to document your garden is both fun and rewarding.
Simply documenting the garden annually through photography and using inexpensive self-published books to create your own visual garden journal is a worthwhile endeavour. Or, you can create one larger book that includes a more long-term record of your changing gardens.
To read more about how easy creating your own photographic book is, check out my earlier post here.
The importance of documenting the garden over the years came into sharp focus over the past few weeks as I began scanning the thousands of slides and negatives I’ve accumulated over the past 45 years since first discovering the joy of photography.
Of course, documenting the garden’s growth took on a greater importance since I started this website, but even before the website I was using traditional analogue photography (prints and slides) to capture moments in the garden – from planting our first serviceberry tree to the changing face of our front and back gardens.
The images even show the history of the almost complete elimination of the massive lawns that carpeted almost every square inch of the property when we first moved in more than 25 years ago. Replaced, obviously, with a woodland-style garden.
Front garden transformation
The image at the top of the page illustrates how the front garden has changed in the past 20 years, going from a sunny garden with lots of flowers to a more shade garden using textures a subtle colour.
It shows a very different garden than our current front garden. For example, when I came across this image in my files, I barely remembered the drift of purple coneflowers and large grasses.

This image from about 20 years ago includes several areas of grass –long since gone – and an immature serviceberry tree on the left that is now quite large and shades out a large part of the existing garden.
The coneflowers died out many years ago, probably from the excessive shade that took over after the serviceberry pictured here staked off, grew into a mature understory tree. The grasses were removed after getting out of control and ferns have taken over the back area that once boasted a number of hosta and trilliums. There are still remnants of trilliums that emerge before the ferns take over that area of the garden.
Today our front garden is a combination of mature trees, ferns, grasses, a ground cover of pachysandra, creeping phlox and black-eyed susans. We’ve also added large boulders down the side of the driveway to hold back the garden.
This decision to use natural boulders as a retaining wall not only helped clean up a problem area in the garden, it gave us another micro-climate where we can use the heat generated from the boulders to grow rock-garden loving plants like thyme and allow the creeping phlox to drift over the rocks and cascade down between the crevices.
It also gave reptiles, such as our friendly garden snakes, toads and salamanders the perfect place to warm up in the early morning as the sun heats the rocks long before the surrounding area.

This image, taken at a local botanical garden, was the inspiration to plant Golden Alexandra or Basket of Gold in our own garden to cascade over the large boulders along the driveway much like the image below of the creeping phlox.
Last year, I added “Basket of Gold” (Aurinia saxatilis) to the area (see image above) and am looking forward to documenting its spreading growth over the seasons. (Beware: this plant is considered invasive in warmer climates). The idea came after visiting our local botanical gardens (see post here) where it lit up the rock garden in spring and early summmer. Once again, photographing the plant in the botanical garden gave me a visual reminder of how it was used, its growth pattern and its stunning beauty.
The garden in spring when the creeping phlox carpets the front in a sea of purple.
The top image and the more current photographs reminds me of how much the garden has changed in the past twenty years. Without the visual representation, these early memories of the garden would fade much like the flowers, grasses and trees that formed the early foundation of what is today.
This website’s focus is, of course, on woodland gardening with an emphasis on native plants and attracting wildlife. Documenting the garden and its inhabitants through photography is also an important part of the website. I try to provide helpful tips on everything from getting close to backyard birds, what cameras are best for garden photography and how to capture beautiful images of flowers and garden visitors.
Part of my focus on garden photography is using inexpensive, smaller digital cameras that are more than capable of creating stunning garden images, rather than spending huge amounts of money on the latest and greatest equipment. Many of these simple cameras are probably sitting in one of your drawers. If not, purchasing them on line for pennies on the dollar is not difficult. If you enjoy the experience, you can upgrade over time.
If you are interested in exploring garden photography further, please take a moment to check out my photography related posts on the website. Just go to my homepage, scroll to the bottom and you’ll be able to access those posts in the “photography related” links.
Going back into my photographic archives and scanning them into digital images has opened up a new appreciation for the importance of not only archiving our journeys in the garden, but our life’s journey with family and friends.
These are journeys that beg to be captured and archived, maybe on our smart phones, but even better on a dedicated camera designed to capture only our memories.
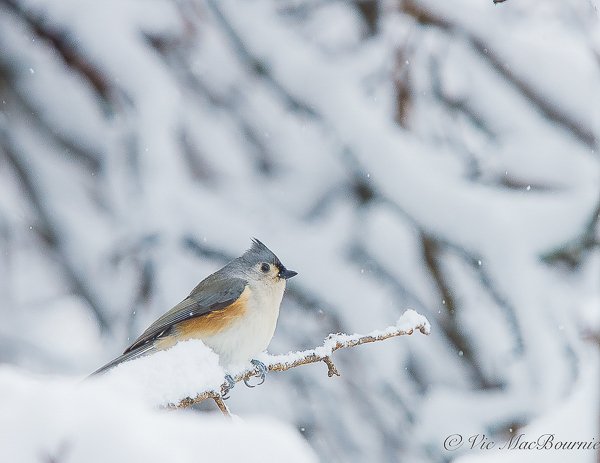
Focus on tree bark for winter interest
Trees can help turn a dull winter landscape into a woodland wonderland not only be adding texture and interest in their bark, but catching the snow on their branches as it falls.

Trees add winter interest to our gardens in so many ways. Even their ability to catch snow and hold it on their branches adds immense beauty to our winter gardens. Here a tufted titmouse uses a small branch as a landing spot during a snow squall.
Five trees, shrubs for winter interest
As fall turns to winter, we look for more subtle ways to create interest in the garden. One of the best ways, besides adding evergreens and native grasses, is to focus on planting trees and shrubs with interesting bark.
The white paperbark birches are standouts in our garden. And, to ensure the trees take centre stage, I purposely planted three clumps of white birch just outside our large dining room windows to capture their stunning beauty during all four seasons, but especially in winter.
By planting them close to the house, viewers from inside the home are able to pull out the finer detail of the bark – everything from the exfoliating (peeling) papery white bark, to the black striations that give birch trees much of their winter beauty.

It’s difficult to match the beauty of birch bark in winter, or for that matter, any time in the year.
While the stark white bark of the paper birch is an outstanding addition to any garden, our native river birches add their own winter interest with their extreme exfoliating cinnamon-coloured bark creating incredible texture in the trees’ trunks.
(The entire birch family is worth exploring if you are searching for trees with superior winter interest.)

Our native River Birch trees offer outstanding exfoliating cinnamon-coloured bark to our gardens.
The exfoliating bark not only catches our attention throughout the seasons, it is also a magnet for insects to hide throughout the winter. Don’t be surprised to see birds regularly checking out the exfoliating bark for a quick snack. The bark can also be a perfect spot for seed-eating birds to tuck away food for later in winter.
Don’t overlook the Paperbark Maple

The Paperbark Maple is often overlook as a tree providing winter interest.
Another outstanding addition in our garden that takes advantage of the inherent beauty of exfoliating bark against a backdrop of snow is the Paperbark Maple. Although not a native tree, the paperbark maple is an elegant understory tree that does well in a woodland garden.
Like the birches, paperbark maples earn most of their praise for their exfoliating, cinnamon-coloured bark that can be a showstopper throughout the seasons, but especially in winter when it’s copper-coloured trunk stands out against the white snow.
Of course, these are the more obvious trees with outstanding winter bark foliage. There are more, less obvious, woodland trees and shrubs that offer their own interest in more subtle ways, from mottled colours and extreme texture in the bark, to more gnarly looking trunks that come into their own against a snowy background.
Let’s take a look at a few more trees and shrubs with outstanding winter interest.

All Japanese Maples provide outstanding year-round interest, but the coral bark Japanese Maple is truly a standout during the winter months.
Red- yellow twigged dogwood: When it comes to shrubs for winter interest, red- and yellow- twig dogwoods (Cornus spp. and cvs.) are easily on the top of the list. They are strong performers in zones 3-9 and have long been planted en-masse for spectacular winter statements in the garden. Newer hybrids such as Arctic Fire from Proven Winners offer even more vibrant colour than native varieties, but try to stick to our native varieties or combine them with newer introductions from Proven Winners such as Arctic Sun Cornus sanguine in zones 4-8. (Grows 3-4 feet tall and wide) Yellow twig also boasts hybrids that perform well such as ‘Bud’s Yellow’ (6-8 feet tall). Consider planting these shrubs in front of darker evergreens such as cedars to bring out the best colour in their bark. Annual pruning of about one third of growth will help the shrub maintain their colourful branches.
Japanese Maple particularly the Coral Bark Maples: Combine outstanding summer and fall interest with stunning coral-red bark that takes centre stage in winter. It’s pretty tough to beat a Coral Bark Maple for outstanding winter interest in the understory of the garden. There are several hybrids available including the “Sango-Kaku” with its delicate leaves that open pinkish-yellow before changing to a light green in summer followed by a bright yellow in fall. These trees can be grown as a shrub or small tree. Like most Japanese Maples, it is a slow grower with an upright form.
Black Cherry Prunus serotina . (also known as wild cherry trees is another favourite: Our native Cherry trees boast a lovely mahogany-coloured bark when they are young, becoming dark and flaky as they mature. In spring, bunches of small white flowers appear after the first leaves have fully developed. These flowers become dark red cherries from August to early September (8 to 10 millimetres across). These trees are valuable forest trees for wildlife. They provide a good food source for up to 33 species of birds and many mammal species also eat its fruit. It is also of special value to many of our native bees as well as bumble bees and honey bees. These trees are a larval host plant for Eastern Tiger Swallowtail, Cherry Gall Azure, Viceroy, Columbia Silkmoth, Promethea Moth, Small-eyed Sphinx Moth, Wild Cherry Sphinx Moth, Banded Tussock Moth, Band-edged Prominent and the Spotted Apatelodes.

Adding trees to your garden, as well as grasses, goes a long way to transforming a dull landscape into a winter wonderland. Here a combination of mature and understory trees combine with grasses to bring the winter landscape to life.
These are just a few of the trees we can add to our gardens, not only to create winter interest, but to attract a wealth of wildlife from native bees and birds, to mammals such as chipmunks, squirrels and foxes.
Winter is the perfect time to begin planning additions to our gardens. Take the time to do some research to find the perfect trees for your backyard. Remember to always look for native trees if possible and ensure that they will grow in your zone.

Living with Wild Turkeys in the garden
Wild Turkeys, for better or worse, have become a part of some our more rural gardens. Find out more about these massive wild birds and how they play a role in our woodland gardens.
Attracting cardinals, blue jays, nuthatches and other garden birds to your yard is one thing, but wild turkeys (Meleagris gallopavo silvestris) – that’s on a whole other level.
They are large. Massive, in fact, and their oversized feet capped with claws can make short work of a properly manicured garden bed. If you’ve got a layer of black landscape fabric under the mulch, plan to have most of the that ripped up and left in a dishevelled mess under the feeders.

An Eastern wild turkey routs through leaves in the backyard looking for insects.
But that’s a mild inconvenience. I’m more than happy to endure some inconvenience to see these magnificent birds strutting their stuff through the garden and bedding down in our fern garden.
I don’t want them sticking around forever, but for a few days in spring or fall, it’s just fine with me.
If you have never seen wild turkeys, you may not be looking in the right places. These massive birds are often seen walking in fields or on the edges of deciduous and mixed woodlands. They are well adapted to this environment, foraging for food during the day and roosting in trees during the night.
For more on wild turkeys, you may want to check out “The Wild Turkey, Biology and Management.”

A male wild turkey under our bird feeder filling up on white millet bird seed.
What do wild turkeys eat?
Turkeys are omnivores, meaning they will eat seeds, nuts, berries, snails and a host of insects. Acorns are by far their favourite food. Oak trees, once again, come to the forefront of must-have trees to have in your yard.
For more on why oaks are so important in our landscapes go here.
Eastern wild turkeys will also readily eat small mammals such as mice and voles helping them to become a gardener’s friend.
They typically forage in the morning and evening, but can also, at times, be seen during the day. They especially like to go into corn and wheat fields after the harvest and feast on the remaining grains.
Identifying male and female wild turkeys
The distinctive gobble, beards and beautiful tail feathers of the male makes them easy to identify.
In North America primarily in the United States there are five native subspecies – the Rio Grande, the Merriam’s, the Osceola, the Eastern, and the Gould’s. But we are here to talk about the native eastern wild turkey.
Turkeys are wide spread across the United States up into Canada as far north as Quebec and down south into Mexico.

An immature wild turkey strolls through the garden. The trailing beard gives away the sex of the bird, although a small percentage of females also grow beards.
Why did wild turkeys become almost extinct?
Over hunting the clearing of its woodland habitat and the loss of its staple food to chestnut blight made this, the largest of North American game birds, one of the rarest. But the Wild Turkey has made and impressive comeback and is now found in every state except Alaska.
According to the Ontario government website: The eastern wild turkey (Meleagris gallopavo silvestris) was reintroduced into the province in 1984 and is now a thriving population playing an important part of the biodiversity of Southern Ontario.
Today, it is estimated that more than 100,000 turkeys call Ontario home. All of these wild turkeys are descendants of the original 274 turkeys that were released around 1984.
“Unregulated hunting and clearing of native forests for agriculture caused the extirpation (regional extinction) of wild turkeys from Ontario in 1909,” the Ontario government website states. “Efforts to restore wild turkeys began in 1984 and were successful. Ontario experienced a rapid expansion of the number and range of the birds in the province. Because of forestry, agriculture and milder climatic conditions, the occupied range of wild turkeys in Ontario is now larger than the historical range.”
Reintroduction programs throughout the United States introduced wild turkeys in the early 1990s have also proved very successful and helped wild turkeys become a “species of least concern.”

Why have wild turkeys come to my yard?
And, it is this group of reintroduced wild turkeys that have decided to spend several days in our yard primarily gorging on our bird feed, but also systematically routing through our fallen leaves looking for insects. The fact that our fallen leaves are left on the ground – unlike most of our neighbours – is one of the reasons the wild turkeys have chosen our yard to feel at home.
For more on why it’s important to leave fallen leaves in the garden go here.
Raking up leaves and disposing of them not only kills so many insects and other wildlife that depend on them to overwinter, it discourages birds and other animals from coming to our yards in search of food.

One of the three wild turkeys spending a few days in our yard cleaning up the spilled bird feed and routing through leaves looking for insects.
Wild Turkeys in the garden
There is no mistaking a wild turkey in the yard. If a crow or even a raptor is the largest bird you’ve had in your yard, you better be prepared for what appears to be a prehistoric invasion of the avian kind.
This year I’ve counted as many as nine roaming through the yard scratching for insects and seeds buried just below the duff of the woodland floor. That was in the early summer when the babies were old enough to more or less have their adult feathers but still quite small to be mistaken for a very large group of crows.
There is no mistaking the trio of male wild turkeys we’ve been entertaining this week in the yard. These are three wild turkeys looking for food for the long winter ahead.
And what better place to find it than beneath our bird feeding station.
When I say large, I mean about three feet tall.
These wild turkeys are actually 1 of 5 sub-species and is the most common one found in Canada and the Eastern half of the United States. They also have the widest range of each of the five sub-species.
The eastern wild turkeys actually live in diverse habitats but can usually be found in a near hardwood forest and in agricultural fields.
They are the largest of the five sub-species. Adult males, also known as a gobbler, average just over three feet in height (91 centimeters) and can weigh up to 25 pounds (11.34 kg). Juvenile males, also known as jakes, will typically be 2.5 feet to 3-feet in height and average 16 pounds (7.25 kg). While female turkeys known as hens, are slightly smaller than jakes and weigh around 9 pounds (4.082 kg).

To keep warm during our cold winters, Adult wild turkeys typically grow 5-6,000 dark yet extremely colourful feathers. The feathers are actually beautiful and appear to change colour when light hits them at different angles.
Wild turkeys also have some of the best eyesight of any animal or bird. Their eyes are positioned on each side of their heads giving them an almost 360 degree field of vision. They also have excellent colour and depth perception, and don’t have to shift their focus to see other objects at different distances, meaning everything in their view is always in focus.
Wild turkeys generally roost or sleep high up in trees where they are safer from marauding coyotes and other predators. But when it comes to laying their eggs, hens prefer the ground. Eastern wild turkeys lay their eggs from late March to May, typically laying and average of eight to twelve eggs.
This process can take one to two weeks to complete as hen turkeys tend to only lay one egg a day.
The hens do not collect sticks or other material to build a nest, instead choosing to lay their eggs directly on the ground, often in a grassy areas protected by overgrown bushes. The incubation period lasts 26 to 28 days.
The baby wild turkeys are called poults and are able to fly and run shortly after hatching. Both Wild Turkey parents care of the poults teaching them how to find food and avoid predators. In addition the male will help to incubate the eggs.

The poults usually stay with their parents for several months learning how to find food and escape predators.
Wild turkeys live in groups called flocks. These flocks can have just a few birds up to several hundred birds.
The courting period of wild turkeys is certainly the most entertaining time of the year. This phase happens just before and during the nesting period when the gobblers strut their stuff much like a peacock showing their 18 tail feathers in an impressive show meant to catch the attention of a nearby hen. Although strutting is used to attract hens, it is also used to show dominance over other male turkeys. As a result, strutting can often be seen outside the typical courting season.
During the mating season, the top of the gobblers’ heads turn a pure white during this strut further showing off the spectacular colours in their face and neck ranging from bright blue, reds and whites caused by blood vessels in their heads and necks. The male turkeys can control these colours which helps to communicate to other turkeys what kind of mood they are in.
The more colourful the tail, the more attractive it is to female turkeys.
In addition, the fleshy, wormlike piece of skin on their foreheads just in front of their eyes just above the beak is referred to as the snoot. It also has the ability to change colours along with its shape ranging from short and stubby to long and colourful.
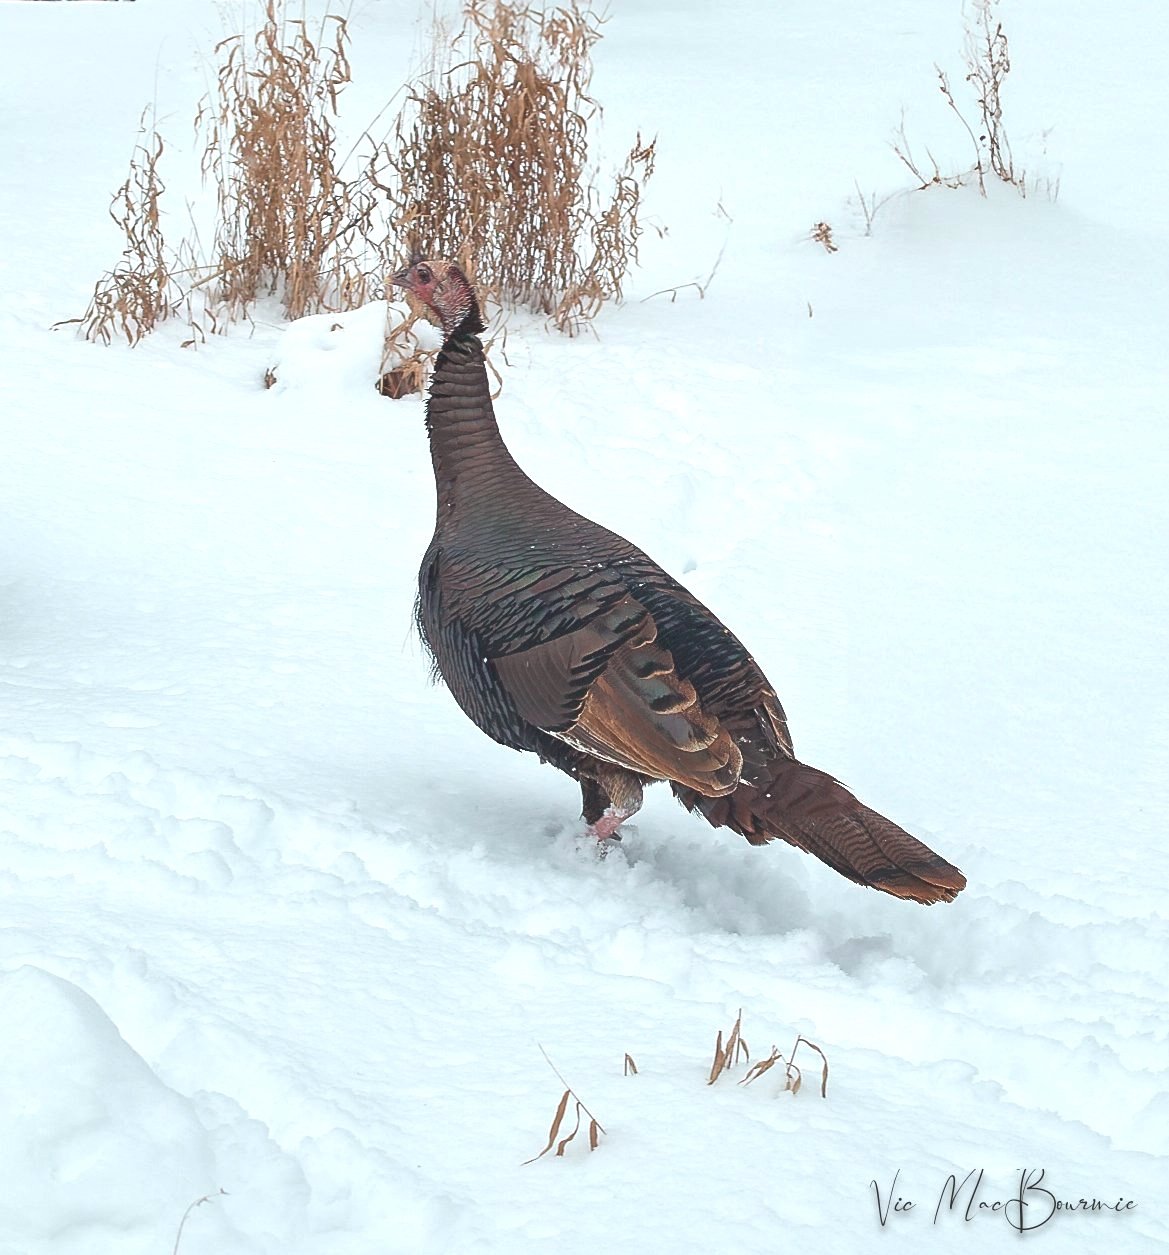
Wild winter of turkeys
Our wild turkeys decided to stay with us all winter allowing for some interesting winter images.
Male turkeys produce a loud and rather unique vocalization called gobbling. A gobble can be heard up to a mile away and is used for a variety of situations. Most of the time, however, turkeys are quite elusive birds that spend most of their time clucking and purring to one another. These much lower calls can be harder to hear unless you are very close to the bird. The variety of clucks can mean many things, from friendly and courting purrs, aggressive fighting purrs and even warning clucks to alert other turkeys that danger is near.
Turkeys are capable fliers and can run up to 25 miles per hour but usually only do this when they are trying to escape a predator.
Wild turkeys are an important part of our ecosystem. In the garden and in the wild, wild turkeys help control populations of insects and rodents,
It is the state bird of six states including Arkansas, Delaware, Georgia, Kentucky, Missouri and Pennsylvania.
Climate change has played a role in Eastern wild turkeys’ success in Canada including Southern Ontario and into colder regions into Quebec. They are also found as far west as the Dakotas in the United States.
Differences between wild and domesticated turkeys
Domestic turkeys tend to gobble all year long rather than just in spring. It’s head and neck are covered with more parenthelated skin and its snoot, which hangs over its bill, is much longer. It is said to have a smaller brain and are unable to survive outside of captivity.
Domestic gobblers can also weigh up to 50 pounds.
A wild turkey in the snow looking for seeds and hidden insects. Turkeys will also eat mice if they can find and catch them.
Selective breeding has also created the domesticated white turkey.
The wild turkey is far more alert, its neck and legs are longer and its body is more streamlined. Adult males have a beard which grows four to five inches a year and can get up to a foot long on three-year-old gobblers. But because they only grow so long, they are not an accurate measure of age. Although the beards look like long hair, they are actually a tuft of modified feathers.
About one in twenty hens also have beards.
The gobblers and hens spend most of the year apart, using a variety of vocalizations to locate one another for mating season.
Every flock has a dominant gobbler. The spurs on his lower legs indicate his age more accurately than his beard, The spurs grow about half and inch per year and go from round the first year to blunt after two years to sharp three years to very hip at older than three years.
Nearly all turkeys live within a five mile radius but a foraging flock may wander widely.

Why plant a Chinkapin Oak tree
The Chinkapin Oak is a fast-growing oak that might be perfect for your back or front yard.
Fast-growing, mid-size oak that produces an abundance of small acorns
Oak trees are an outstanding addition to any garden looking to attract a variety of wildlife from deer and wild turkeys to chipmunks, squirrels, birds and a host of moths and caterpillars to feed the birds in spring and summer.

The Chinkapin Oak is a Carolinian species found in Southern Ontario and throughout native to eastern and central North America. It ranges from Vermont to Minnesota, south to the Florida panhandle, and west to New Mexico in the United States. In Mexico it ranges from Coahuila south to Hidalgo.[2]
The dilemma is not, should I plant an oak, but what oak out of the more than 400 varieties should I plant.
The final decision is as much about the conditions in our yards, as it is about the look we’re after.
In our yard, the combination of sandy-based soil, a nice sunny spot and the need for a fast-growing oak that puts out plenty of acorns early in life to feed wildlife, led me to the Chinkapin Oak (Quercus muehlenbergii) also spelled Chinquapin oak.
Doug Tallamy’s The Nature of Oaks: The Rich Ecology of Our Most Essential Native Trees is an excellent resource if you’re looking for more information on these important trees.
You can also check out my posts here: The Mighty Oak, Columnar Oaks.

The Nature of Oaks is considered the bible for anyone looking for information on Oak trees.
Chinquapin Oak is a Carolinian species, common throughout the Eastern United States but found only in southern parts of Ontario that feature species from the Carolinian zone. The most common small tree and shrub species found in association with chinquapin oak include flowering dogwood Cornus florida, sassafras, sourwood, hawthorns, and sumacs.
They like an alkaline soil especially on a limestone bedrock. It’s a member of the white oak family and can live for up to 400 years.
The fact that it is rare in my geographical area and adds to the many Carolinian zone species in our yard is a pure bonus.
It didn’t hurt that the city where I live made the informed decision to give away native trees as a way to encourage homeowners to plant more native trees. Granted, my Chinkapin oak is very small and needs several years of nurturing to get to a stage where it becomes a part of the canopy and an important structural element in our garden. Once established, however, Chinquapin oaks can put on two or more feet of growth per year and grow to between 40 and 70 feet tall (30 metres) tall with a straight trunk up to 60 centimetres wide, with a similar-sized canopy.
The leaves of the Chinkapin oak are large and can grow up to 8 inches (10-18 centimetres) in length. The leaves have a scalloped look and are shiny green on the top with a dull underside. The leaves are more narrow than many traditional oaks. They are coarsely toothed with pointed tips. In the fall they turn a pleasant dark, purply-grey colour.
But the real reason I decided to plant a Chinkapin oak is the abundance of acorns borne singly or in pairs that these trees produce and the fact that production starts early in life. The acorns are smaller than typical acorns and turn almost black as they mature. They mature in one year, and ripen in September or October. Their shell is also softer than most acorns and are therefore more accessible to a greater number of birds and wildlife. The cap covers a third to half of the acorn.
In a few short years, our local wildlife is going to love it. Blue Jays, woodpeckers, our packs of wandering wild turkeys, deer, red squirrels, chipmunks, raccoons and of course birds that thrive on the caterpillars and other Lepidoptera that use the tree as a host.
These trees prefer soils in the 6.5 -7.0 up to 7.5 range. Chinkapin Oak is often confused with the swamp white oak and chestnut oak.
Those who know their oak trees, understand that Oak species, as a group, serve as host plants for caterpillars of more than 500 different butterflies and moths – more than any other genus of tree. The caterpillars (larvae) feed on the oak foliage, but do not harm the trees.
Wildlife that use the Chinkapin oak
Chinquapin oak acorns provide food for many species, including:
The high-quality acorns are a reliable food source for the red-headed and red-bellied
woodpeckers, northern bobwhite, ruffed grouse and wild turkey
white-tailed deer
chipmunks
squirrels
hummingbirds visit the flowers in spring
The trees are a larval host for the Grey hairstreak butterfly and the Red-Spotted Purple butterfly
The leaves of young chinkapin oak are commonly browsed by deer and rabbits while
beaver feed will happily feed on the tree’s bark and twigs.

If you live in an area with deer, rabbits and other rodents, you may need to protect the sapling until it is large enough to fend off the critters.
Protect your Chinkapin Oak while they are young
In our yard, I have had to protect the sapling from rabbits, deer and other rodents by placing fencing around it for a few years until it grows large enough to fend off the critters on its own.
The bark of the Chinkapin Oak is a pale brownish grey colour with thin, narrow and often flaky scales.
Flowers emerge in late spring. Trees have both male and female flowers – male flowers form as catkins, while female flowers are small and grow as individuals or in clusters.
Where do they grow naturally?
Chinquapin oak are found in well-drained soil over limestone, calcareous soils and forested sand dunes. You can expect to see them growing best on rocky sites such as shallow soul over limestone.
Fun facts about the Chinquapin Oak
Chinquapin oak acorns can be eaten raw and taste sweet.
Chinquapin oak can be mistaken for dwarf chinquapin oak as they can both grow under harsh conditions.
Chinquapin oak trees can produce almost 10 million acorns over their lifetime.

Alliums are perfect choice to add architectural interest
Alliums are the perfect addition to any garden whether it's a formal or more natural garden setting.
Fall is the time to plant your allium bulbs
It all started with an experiment that didn’t quite work out. So, in the spirit of gardening, I added even more alliums this year to ensure next year is a success.
That’s the thing about alliums. Once you get a taste of them, there’s no going back.
My plan was to grow giant alliums in the fern garden where they could rise up above the massive Ostrich ferns and create outstanding architectural interest and a pop of coour among the ferns in late spring.

Alliums add architectural interest to every garden, whether formal or a more natural garden.
A very wet spring meant our ferns grew especially tall and, unlike most years, the ferns stood their ground and refused to fall. The result, our Purple Sensation alliums merely peeked out from between the ferns rather than rising above them.
But even the sight of the alliums peeking out among the ferns was enough to make me want to plant more this year. So this year we added taller alliums in both purple and white. I’m hoping for a great show next season.
We also added alliums in two other parts of the garden to ensure we get a great display.
If you are like me and have hesitated to plant alliums in your garden, make this the year you take the leap into this fascinating group of plants that are often referred to as ornamental onions.
These non-native bulbs, that tend to bloom a little later than daffodils and tulips, are part of a group of plants that include onions, garlic, leeks and shallots.
They are available in a range of sizes, colours and blooming times. In fact, if you plan properly, you can have them blooming from late spring through summer adding architectural interest to any garden.
They work both in formal gardens as well as more natural gardens including woodland gardens. Try to find a sunny spot for them for best results.
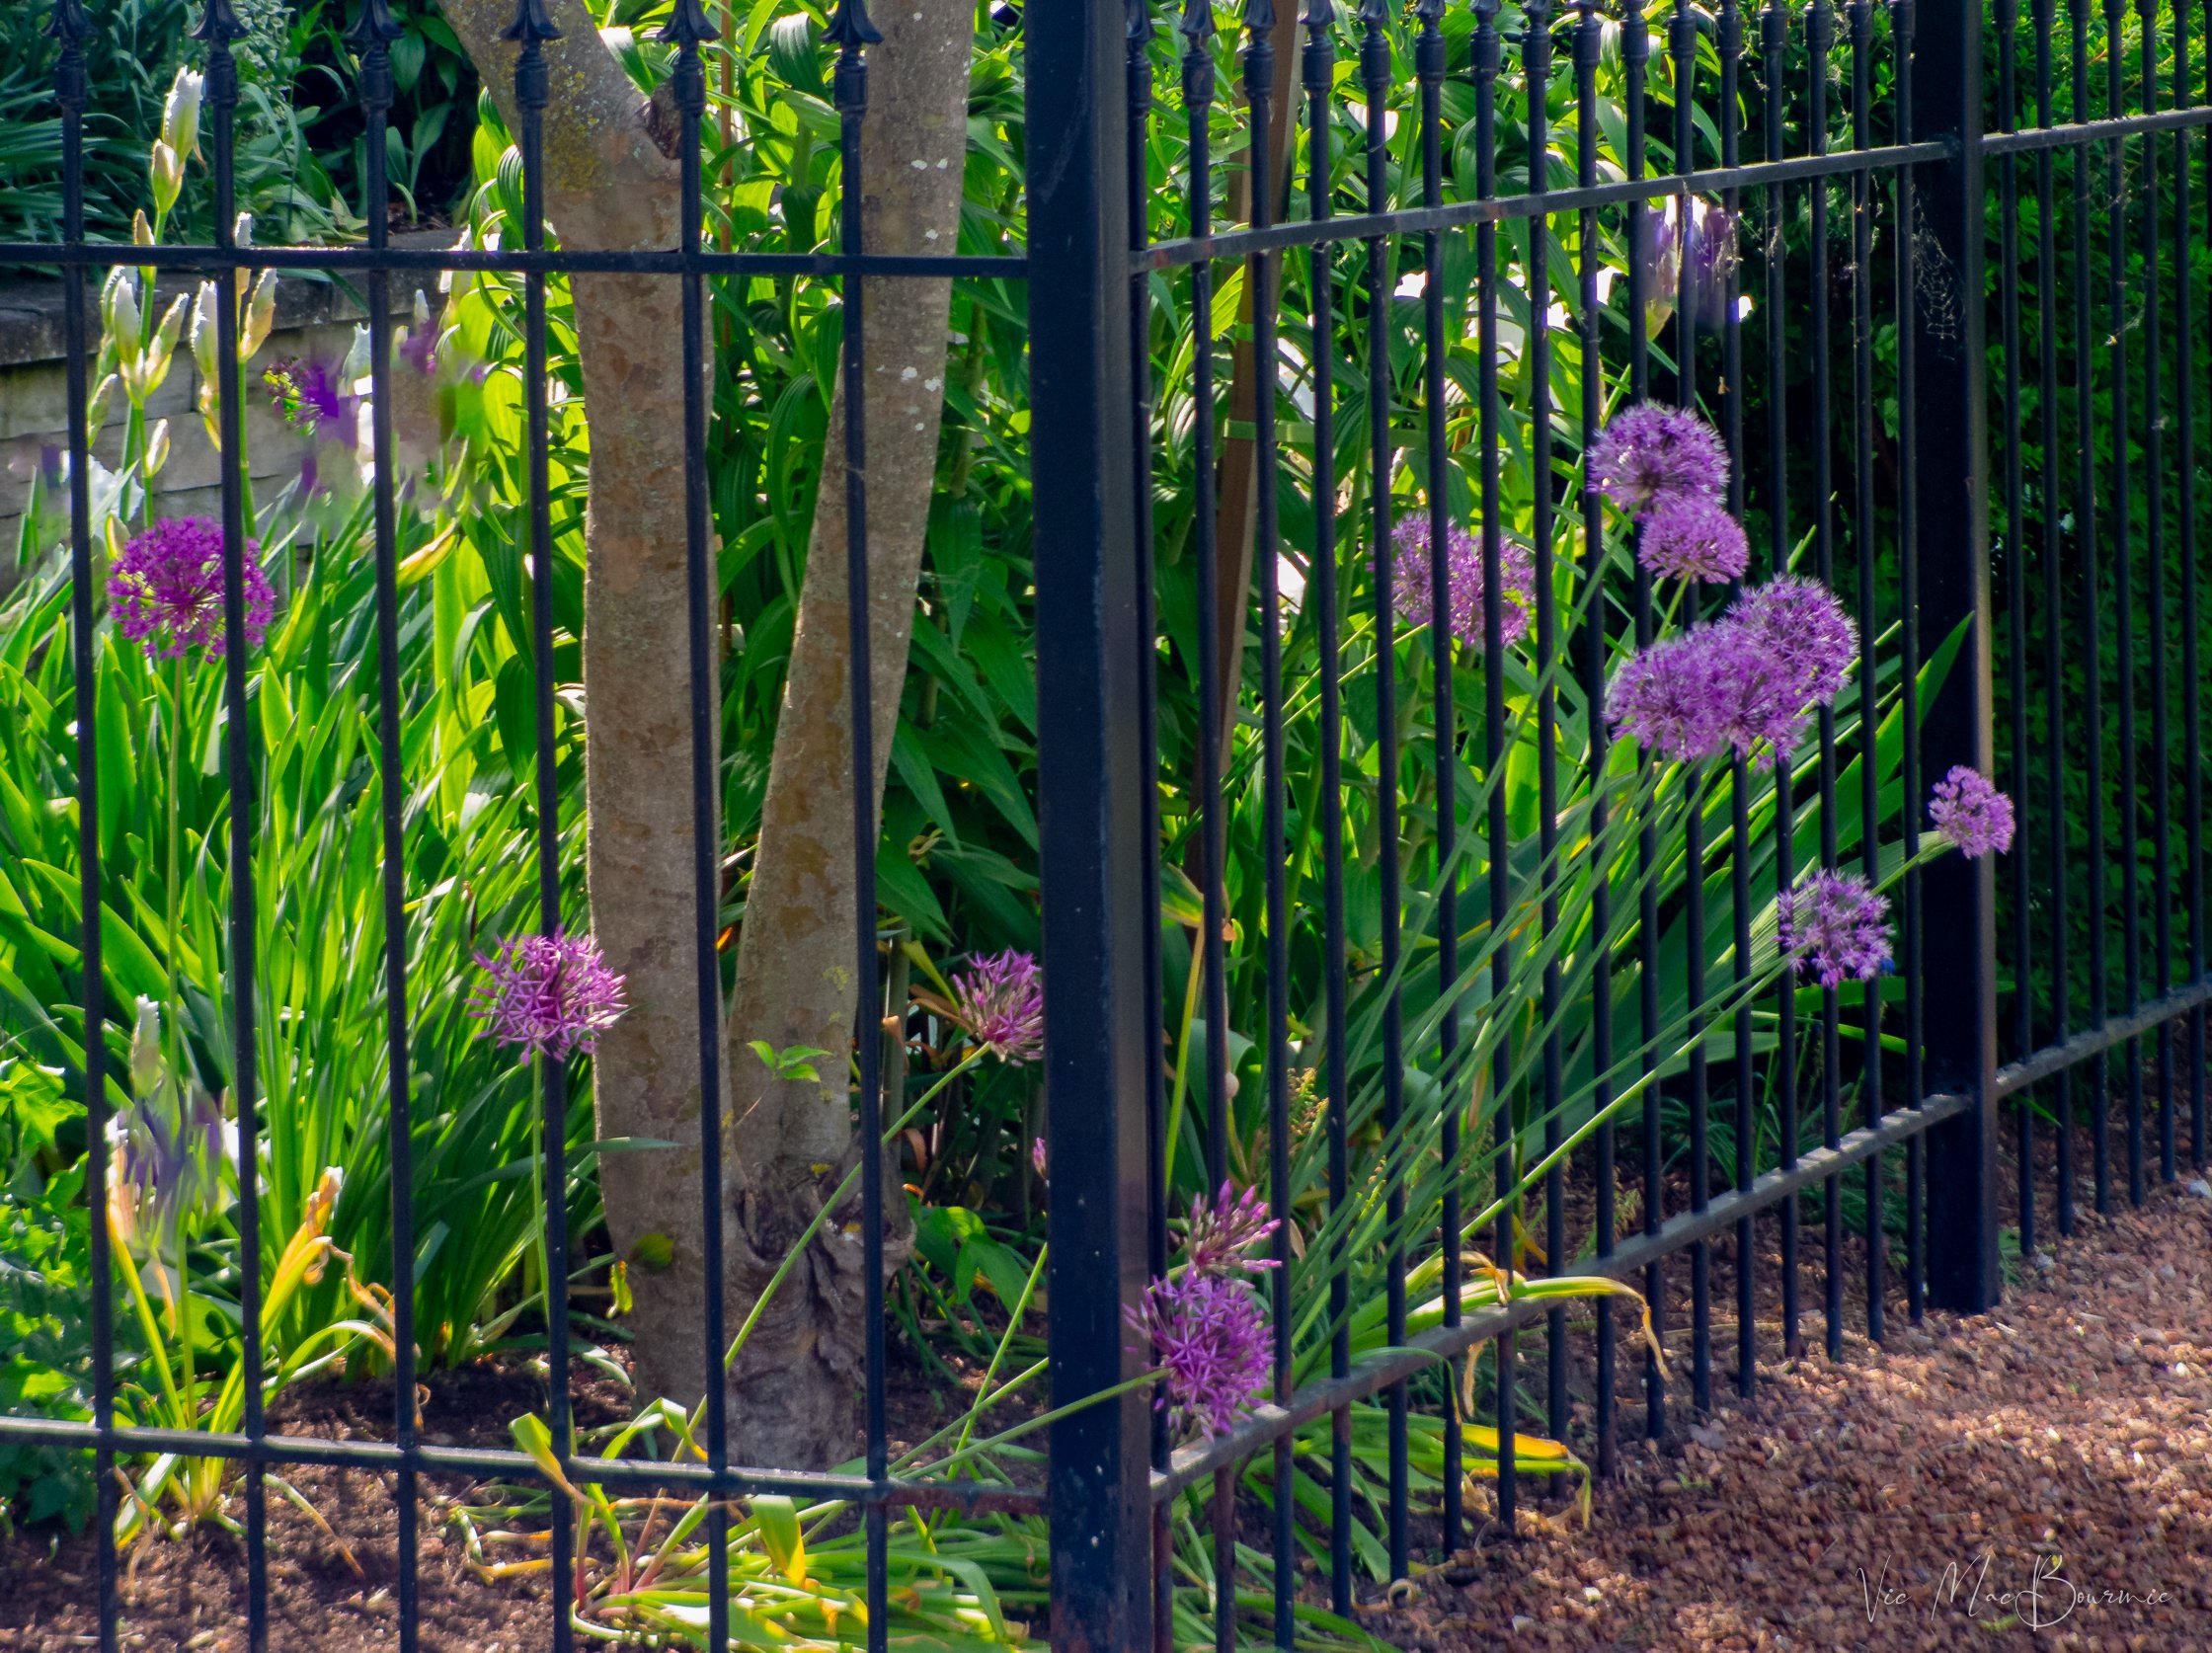
These alliums elegantly grow through a black wrought iron fence.
Like daffodils and tulips, fall is the ideal time to get allium bulbs in the ground for next spring. You can now find them in most stores, including many of the Big Box stores. Just realize that your choice in many of these Big Box stores is limited to the more common variety of allium bulbs. If you are looking for more interesting or unusual allium bulbs, you may have to check out better nurseries or mail-order firms like Brecks that offer a beautiful and comprehensive variety of alliums.
You can even purchase your allium bulbs from Amazon as well.
Get your orders in early to ensure you get the best quality and varieties.
What makes these bulbs especially great is that rodents tend to leave them alone. Deer, squirrels, chipmunks, voles even groundhogs express no interest in alliums. That’s probably because of their roots in the onion family.
The bulbs multiply in the ground creating denser clumps each year and the allium seeds can reseed in the garden adding more of these lovely plants to your landscape.
These easy-to-grow plants prefer full sun but do well in half-sun conditions in well-drained sandy soil. Extremely wet, poor draining soil is likely to create conditions for bulb rot in the garden.

Alliums stand out against a white wall.
Alliums can be a little more expensive than other bulbs, but once planted they last forever and after about three years the bulbs can be split to create even more plants.
Plant the allium bulbs about 7 inches under the ground – deeper than most bulbs – and about 8 inches apart.
If you are planting a lot of the bulbs, consider using a drill bit or auger especially made to create ideal holes for planting larger bulbs. This set of four augers from Amazon will meet the needs of even the most ardent bulb enthusiast.
Also, remember, pointy end of the bulb goes up.
One important point to consider is that the foliage of alliums often yellows before they bloom, so you might want to place another type of plant in front of the allium bulbs to cover up the yellowing foliage.

Allium growing in our fern garden adding a pop of colour in late spring.
Alliums also make great cut flowers and their dry seed heads are perfect for arrangements. Consider painting them gold or silver for an especially nice touch in your arrangement.
There are so many alliums to consider for your garden, depending on size, colour and how adventurous you may want to be.
Brecks offers an incredible choice as well as mixed assortments that work well together. If you are serious about getting started with alliums check them out to give you a good grounding on what is available.
I picked up most of my bulbs from Costco this year, but you had to grab them early because they sold out quite quickly. My latest purchase from Costco were bags of Allium Nigrum Pink Jewel (10 to a bag), and the much larger Allium Gladiators (4 to a bag). I also picked up some white varieties of Alliums that we planted in the front garden.
Here are a sampling of alliums to consider for your gardens.
Best alliums for your zone-5 garden
Globe Master – has a huge bloom with purple flower heads as much as 5 inches across. Their blooms last a long time. Plant them in the middle or back off the border to hide the leaves. These alliums do not produce seed so it does not get weedy.
Mount Everest – White flower is 3-4 inches across but they are on a very long stem and grows to about 3.5-4 feet tall.
Purple Sensation – blooms at about 3 feet tall. Flowers are a little smaller than Globe Master but the colour is more intense. It is happy to re-seed itself around your garden.
Ivory Queen – Wide leaves and flowers at about six inches high with a lovely white creamy flower. Flower heads are two inches across and white. These smaller alliums are a great addition to the rock garden
Allium Christophii – Flowers at about 2.5 feet high with large flowers that can reach about 8 inches across. Will disperse seeds around the garden.
Allium fistulosum – flowers at about 2 ft high with white green flowers. Its stems are large thick and hollow. Will produce seeds but they always grow close to the mother plants.
Graceful Beauty – small allium that grows only 8 inches tall with nice white flowers. Leaves are grass like.
Allium atropurpureum – A very dark coloured allium that grows about 3-feet tall with smaller umbra reddish purple about 3 inches wide that flowers at 2.5 feet high. Acts almost like an ephemeral as its foliage disappears by mid July.
Allium Molly – grows to about 8 inches tall and flower is yellow with wide leaves. Hard to tell that it’s even an allium. It will seed around your garden a little bit but nothing too serious..
Allium Siculum – flowers at 2 feet tall. Flowers are unusual with an unusual colour. Striking plant for the garden with large strapping leaves.
Other alliums to consider
Allium sphaerocephalon – smaller allium 2 feet tall with a much smaller inflorescence.
Allium red mohican – Interesting colour of purple, white, cream with hints of yellow
Allium Firmament – purple flower head that grows to about 2 ft tall. Flowers are 4-5 inches wide
Allium Ping Pong – Grows to about 2-feet tall with a 3-inch flower
June-July bloomers
Allium nigrum silver spring – lovely allium growing to between 2-3 ft tall with 4-inch wide umbrels that have a blueberry/raspberry colour to them. Infloresence is one of the most beautiful yet still subtle of the alliums.
Allium chloranthum (Yellow Fantasy) – Grows 14-16 inches high with a flower that is only about 2 inches wide but has a lovely yellow colour
Check out Brecks for mixes
Allium summer drummer – very tall 4-5 feet tall reddish purple with 6-8-inch wide umbels. Late bloomer in July and August.
Planting for flower photography
The vision in my mind was brilliant, despite not working out quite so perfectly in the end. However, I still consider the experiment successful and expect to continue photographing the combination of purple alliums growing up through a sea of green Ostrich ferns.
As mentioned earlier in this post, our wet spring caused our ferns to grow taller than ever and fail to fall like they usually do. The result was alliums peeking out through tall upright ferns rather than the lovely purple flowers rising above and floating over the ferns.
When the alliums finally began to appear in late spring, I took the opportunity to document the scene.
Most of the images below were shot with the original Lensbaby composer lens to impart a more creative touch to the images. The lens allows the photographer to create out-of-focus areas in the image while maintaining sharp focus areas where the photographer chooses.
Below are just a few of the images from the Lensbaby composer.


Tips to create more living space by reducing lawn
Removing lawn to add more useable living space to your garden is always a good idea and one that can add interest to your yard if done correctly.

A new area in the garden created around a fire pit, takes advantage of removing unused turf grass to create a more useful garden area.
Adding a fire pit, water bowls and a great place to relax
Reducing or even eliminating your lawn is one of the most freeing endeavours you can do for yourself. Not only does it free you from having to spend hours cutting, weeding and fertilizing turf, it opens up a wealth of opportunities to create more useable areas in a garden.
It doesn’t matter if your yard is an acre or a postage stamp, reducing or eliminating the lawn creates opportunity to add quiet sitting areas and secret gardens spots that become places you want to go to rather than another patch of grass that demands attention on a weekly basis.

The fire pit is the perfect place to relax during the cooler months. Built away from the house and trees, it creates a more useable space than the turf grass it replaced. More changes are to come including the inexpensive plastic adirondak chairs that are being replaced with green higher quality chairs.
Interested in creating more living spaces in your garden? Check out my other post here about creating a backyard that fulfills all your needs.
For the past 25 years I have been reducing our lawn to the point that it now covers only a tiny fraction of our property and requires only about 5-10 minutes of cutting on a weekly basis. That beats the up to two hours of cutting that was needed when we first moved into the home. In those days I often turned grass cutting into a two-day project.
Even back then, I new that spending that much time cutting grass was neither sustainable, nor something I wanted to do in my retirement years. Slowly, over the first few years the lawn in the front yard was removed and replaced with a large meadow/woodland garden with a separate Japanese-inspired garden.
In time, the backyard grass began to disappear as new gardens took shape. A massive fern garden planted with dogwoods, redbuds and serviceberries took care of a huge swath of useless turf grass and created a cool oasis for animals and birds to escape from the summer’s heat.

A larger view of the garden shows the fire pit area in the centre looking back at the house and gardens.
More recently, I decided I needed a separate area in the garden to finally make use of a long unused Weber fire pit to enjoy an open fire where I could relax and cook over an open flame during the approaching cooler months.
Time to get rid of more grass.
Whether it’s one of the newer and very impressive Solo smokeless units, or an older one you already own, a fire pit can be an outstanding addition to the garden.
First step: Decide on a design plan.
Since the remaining grass was contained in a circle with gardens all around, we decided to create a secondary circle that intersected the previous circle resulting in a circle that protruded into the original one and kept the circular theme.
The biggest mistake people make is to create a garden space that is too small resulting in an area that doesn’t sit comfortably in the landscape and restricts them from either giving plants the room they need or making the area appear too cramped. In this garden area, four people could easily sit around the fire pit with as many as six if necessary.
• Once we had the design concept, it was as simple as digging in a plastic edging in the circular form.
• Rather than removing the grass, we simply set the battery-powered mower to its lowest setting and scalped the grass to within an inch of its life. That made laying black landscaping cloth over the grassy area much simpler.
• With the black landscaping fabric down, ensuring the grass would be killed off over a period of time, all that was left was to put down a Thick layer of shredded cedar mulch. A word of warning, spreading a thin layer of cedar mulch will only lead to problems down the road when the black landscaping is exposed allowing grass and weeds to grow up.
• A solid two- to three-inch layer of mulch is a good start. The thick layer will not only hold the landscape fabric in place, it will also further reduce any chance of light getting through to prevent grass and weeds from growing up. It should be topped up over the years. (At some point, the black landscape fabric can be removed leaving a thick layer of mulch to keep weeds at bay.)
• It took about 36 bags of mulch to cover the large area. Thankfully, the mulch was on at firesale prices and although I thought 26 bags was more than enough we had to add more. Unfortunately, the store ran out of natural cedar mulch so an edge of black cedar mulch was added. Although I would not have originally used the black mulch to edge the project, I have grown to like it over time.
• A fire pit, a few water bowls, some comfortable seating and fresh firewood and we have turned a useless patch of weedy grass into a useful and interesting part of the garden that uses the garden as a backdrop for enjoying the garden with friends as the cooling days of autumn approach.
Another idea that would work in this space
If a real fire pit is not allowed in your area (you could use a propane fire pit), or its something that does not interest you, the area would be perfect for a quiet sitting area that provides a new view of your garden. Add a nice birdbath, a small tree a side table for a glass of wine and a couple of comfortable chairs. A bird feeder – maybe a hummingbird feeder – with a couple of large containers filled with some of their favourite plants would be a great place to relax with your children, grandchildren or friends.
The area could also be the focus of a bubbling rock feature with a sitting area. Don’t have electricity? Today’s higher quality solar pumps are capable of moving enough water to create a lovely sound and enough water to attract birds and wildlife.

Author Profile: Vic MacBournie is a former journalist and author/owner of the award-winning website and newsletter Ferns & Feathers. He writes about his woodland wildlife garden that he has created over the past 25 years and enjoys sharing his garden photography with readers.
Wild Ginger is a native ground cover that just might make a great replacement for your hosta plants.