
Luminar Neo to the rescue
Trying to save terrible negatives from long-expired film
It was a dumb mistake. In my hurry to test out a new film camera I had received, I failed to check the film I had loaded in it and went off to run a test roll through it to ensure the camera was working properly.
Turns out the roll of “Black’s Camera film” was likely at least 10 years old and stored inside the camera (not a good idea unless the camera was in a fridge for 10 years. I had not set the camera for any compensation for outdated film (Not that I could easily over ride the ASA setting with this point and shoot camera anyway.)
It wasn’t until I pulled the finished roll of film out of the camera that I realized this was likely long expired film that was given to me along with the camera.

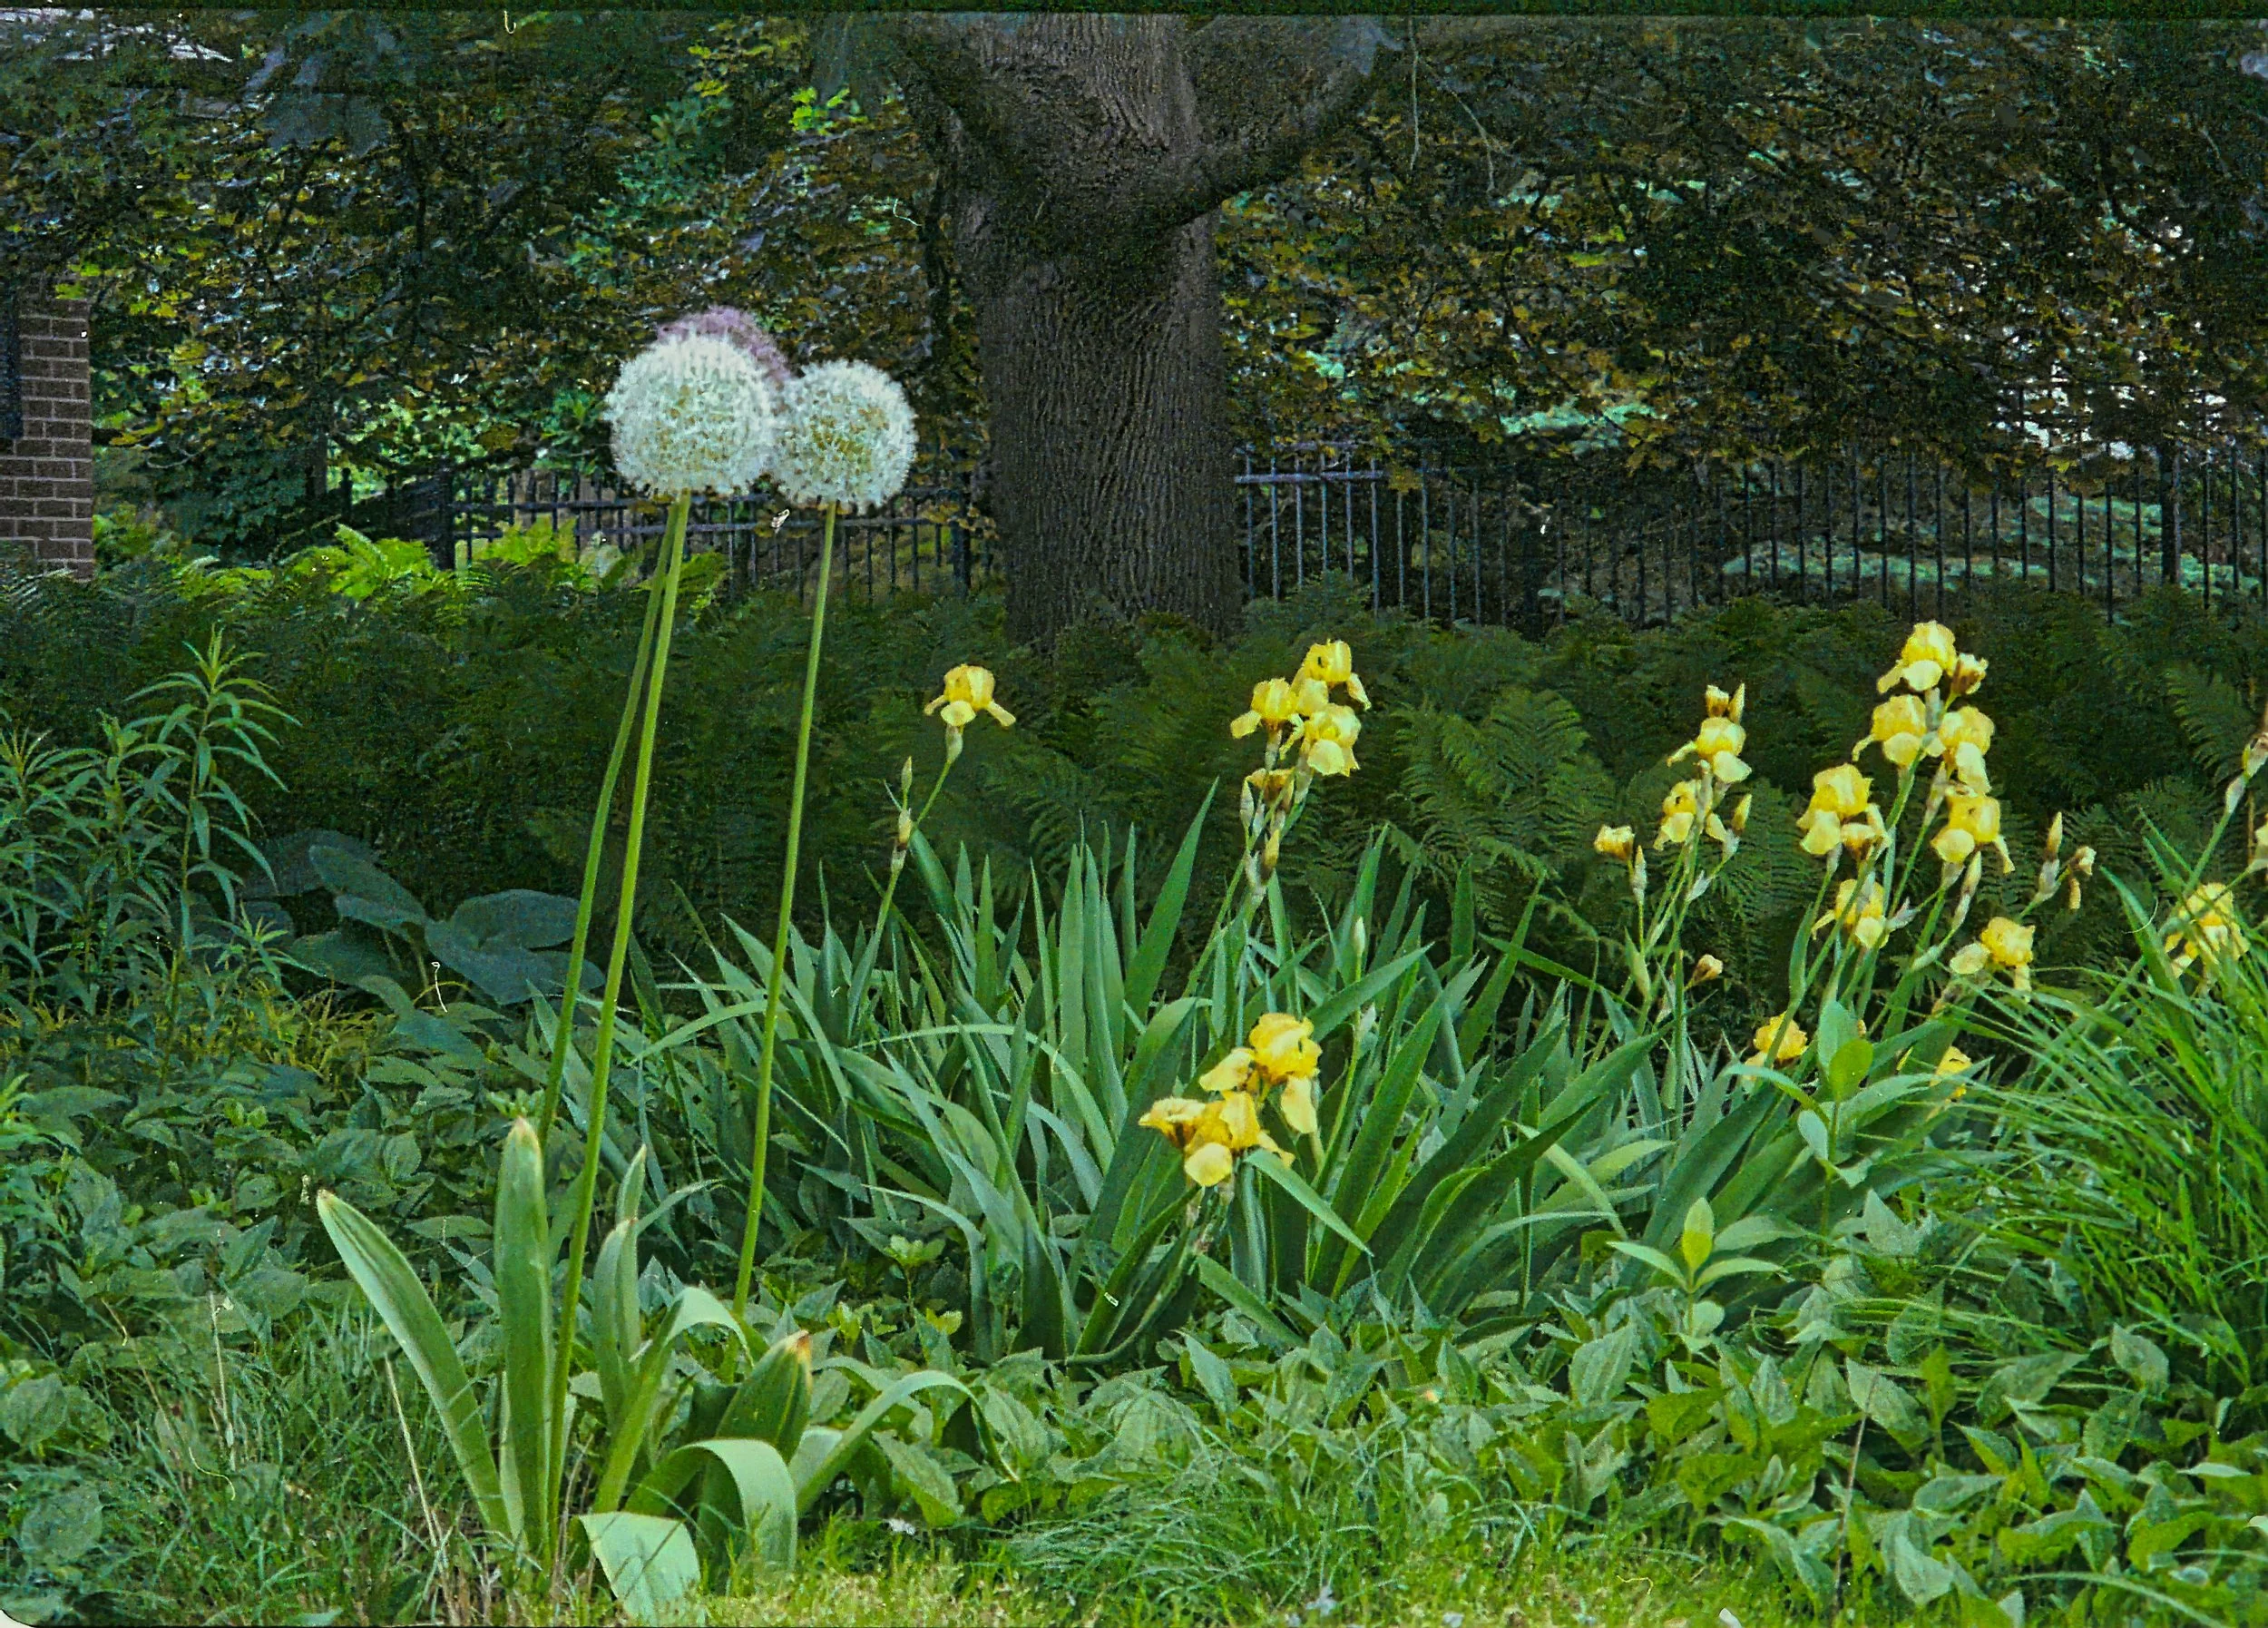
This is an example of one of the better rescued images from the decades-old film post processed with Luminar Neo’s extensive editing modules. The original straight out of camera (SOOC) is pictured below.
I could have asked the lab to push the film a stop or two, but decided to ‘let it ride,’ as they say.
The results were far from perfect. In fact, they were downright awful. Still, I hoped, salvageable with a little (well maybe more than a little) work in post processing.
So, I decided to put my newest post processing software, Luminar Neo, to the test.

This is the same image as the one pictured above before and post processing was applied.
Let’s just say it would have its work cut out for it trying to rescue this old outdated film.
The negatives had a dark, almost eerie appearance to them that looked like they had been run through a bath of black ink. They were dark and murky and just plain ugly. A few were completely unreadable, but most had enough of an image to make scanning them on the Epson flatbed a worthwhile endeavour.
These were originally taken as test images, so there was nothing I couldn’t live without. They were mostly early spring garden images.
If they were priceless family pictures, I would have taken more time with them in post processing and probably would have been able to squeeze out a little better results. Given that they were simply test images, I wasn’t prepared to spend a lot of time trying to rescue these image. With that said, it’s probably wise not to expect miracles.
The lesson I’m hoping to provide readers is that, even if you have very old, faded or extremely underexposed images, there is still hope, especially if you are willing to put in the time to rescue them from the trash bin. These are not images you want to put up on social media, but if they are historical family documents, they would probably be worth rescuing and might even become cherished family keepsakes.
Below are a few of the before-and-after results after running the negatives through Luminar Neo’s comprehensive post processing modules.
It’s difficult to explain everything I did to try and rescue these images. Each image was treated separately and needed varying degrees of editing.
One editing module that I did find extremely helpful was a feature in the Creative Module called “Color Transfer".” This module is rather unique and lets the editor choose an existing photo (either one of the provided ones or one of his/her own) and “transfer” the colours from that image into the image being edited.
This technique – using one of my own garden images – helped me retrieve many of the original greens in the expired images.
The results vary considerably and it’s safe to say that these are not social-media-worthy images. But, as I said, if you have severely degraded negatives that are important to you, there are ways of rescuing them to a respectable level.
Or, maybe it’s best that you be the judge. Before-and-after images below.
All of these images were post processed using the Ukraine-based Luminar Neo. I have partnered with the company and can offer readers a 10 per cent discount at checkout with my code “FernsFeathers.” Using the code will not cost you anything, but I get a small amount of money to keep me writing articles like this one.
If you are interested in exploring Luminar Neo further, check out my posts here (Luminar Neo in the woodland garden and nature) and here (Is Luminar Neo the only software I will need) and here (exploring a film camera and Luninar Leo)
Happy shooting.

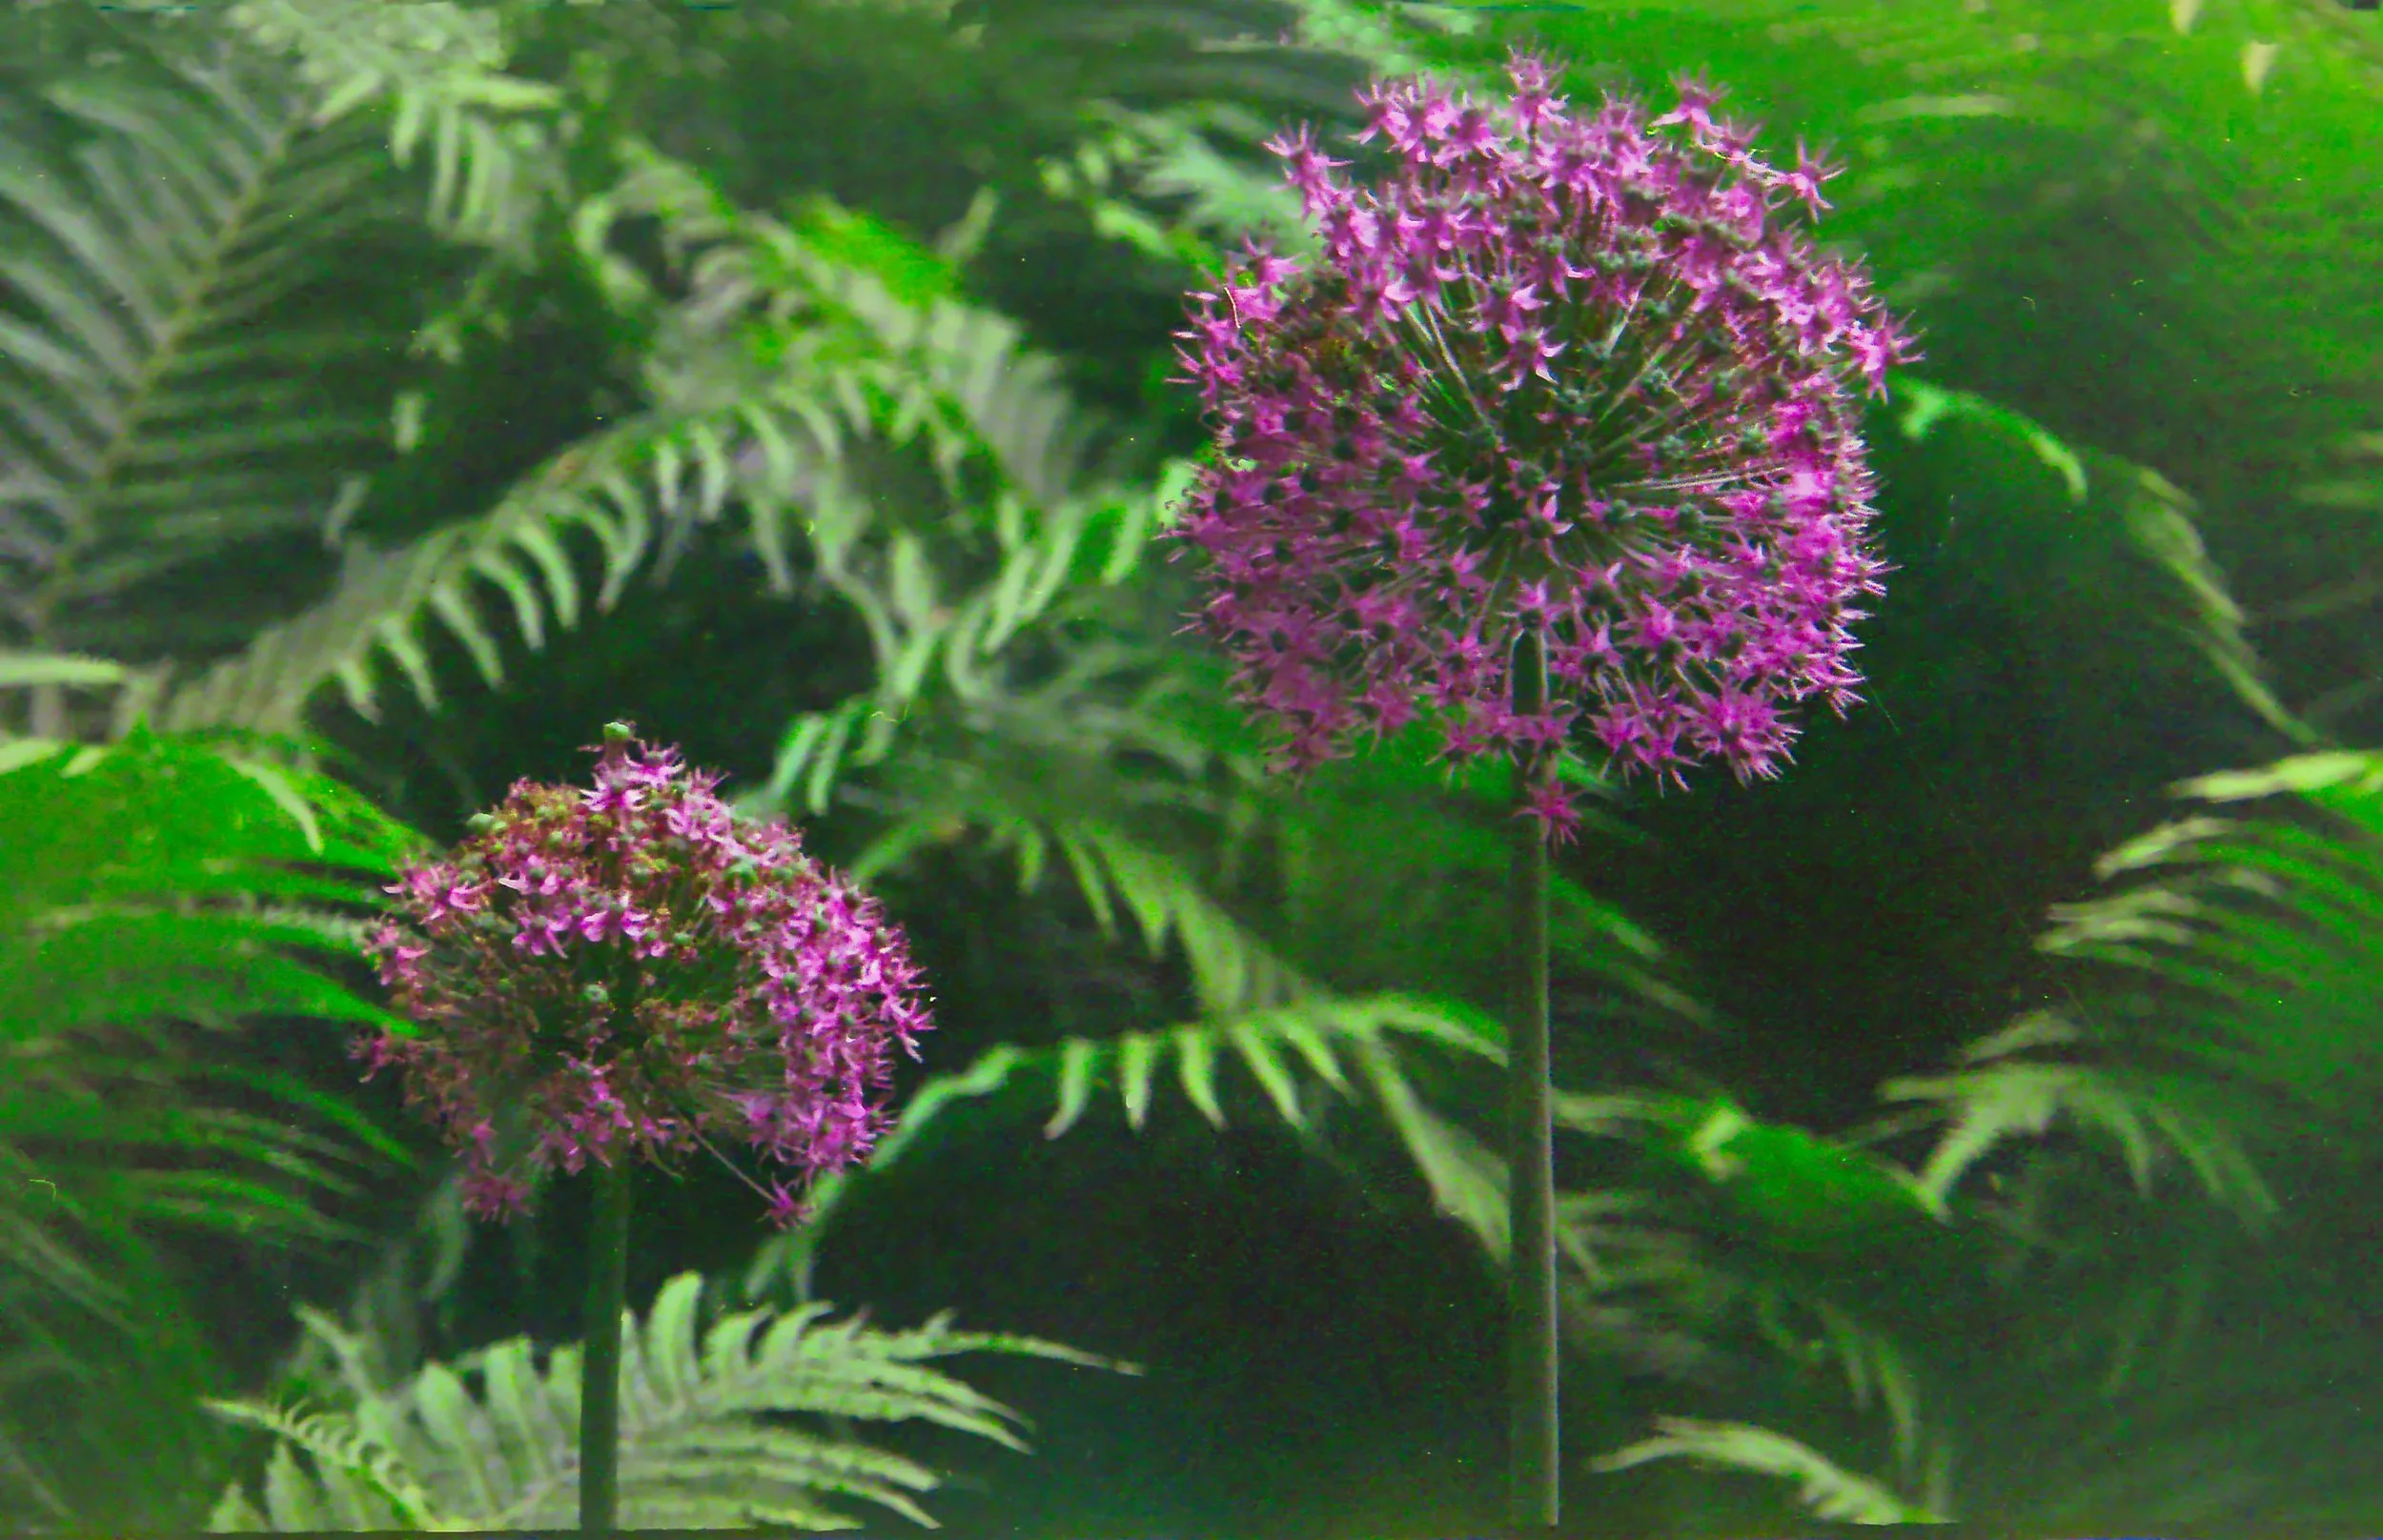
In this image I tried to bring back some of the original greens in the image and bring up some of the clarity in the image by removing the veil over the original image below.

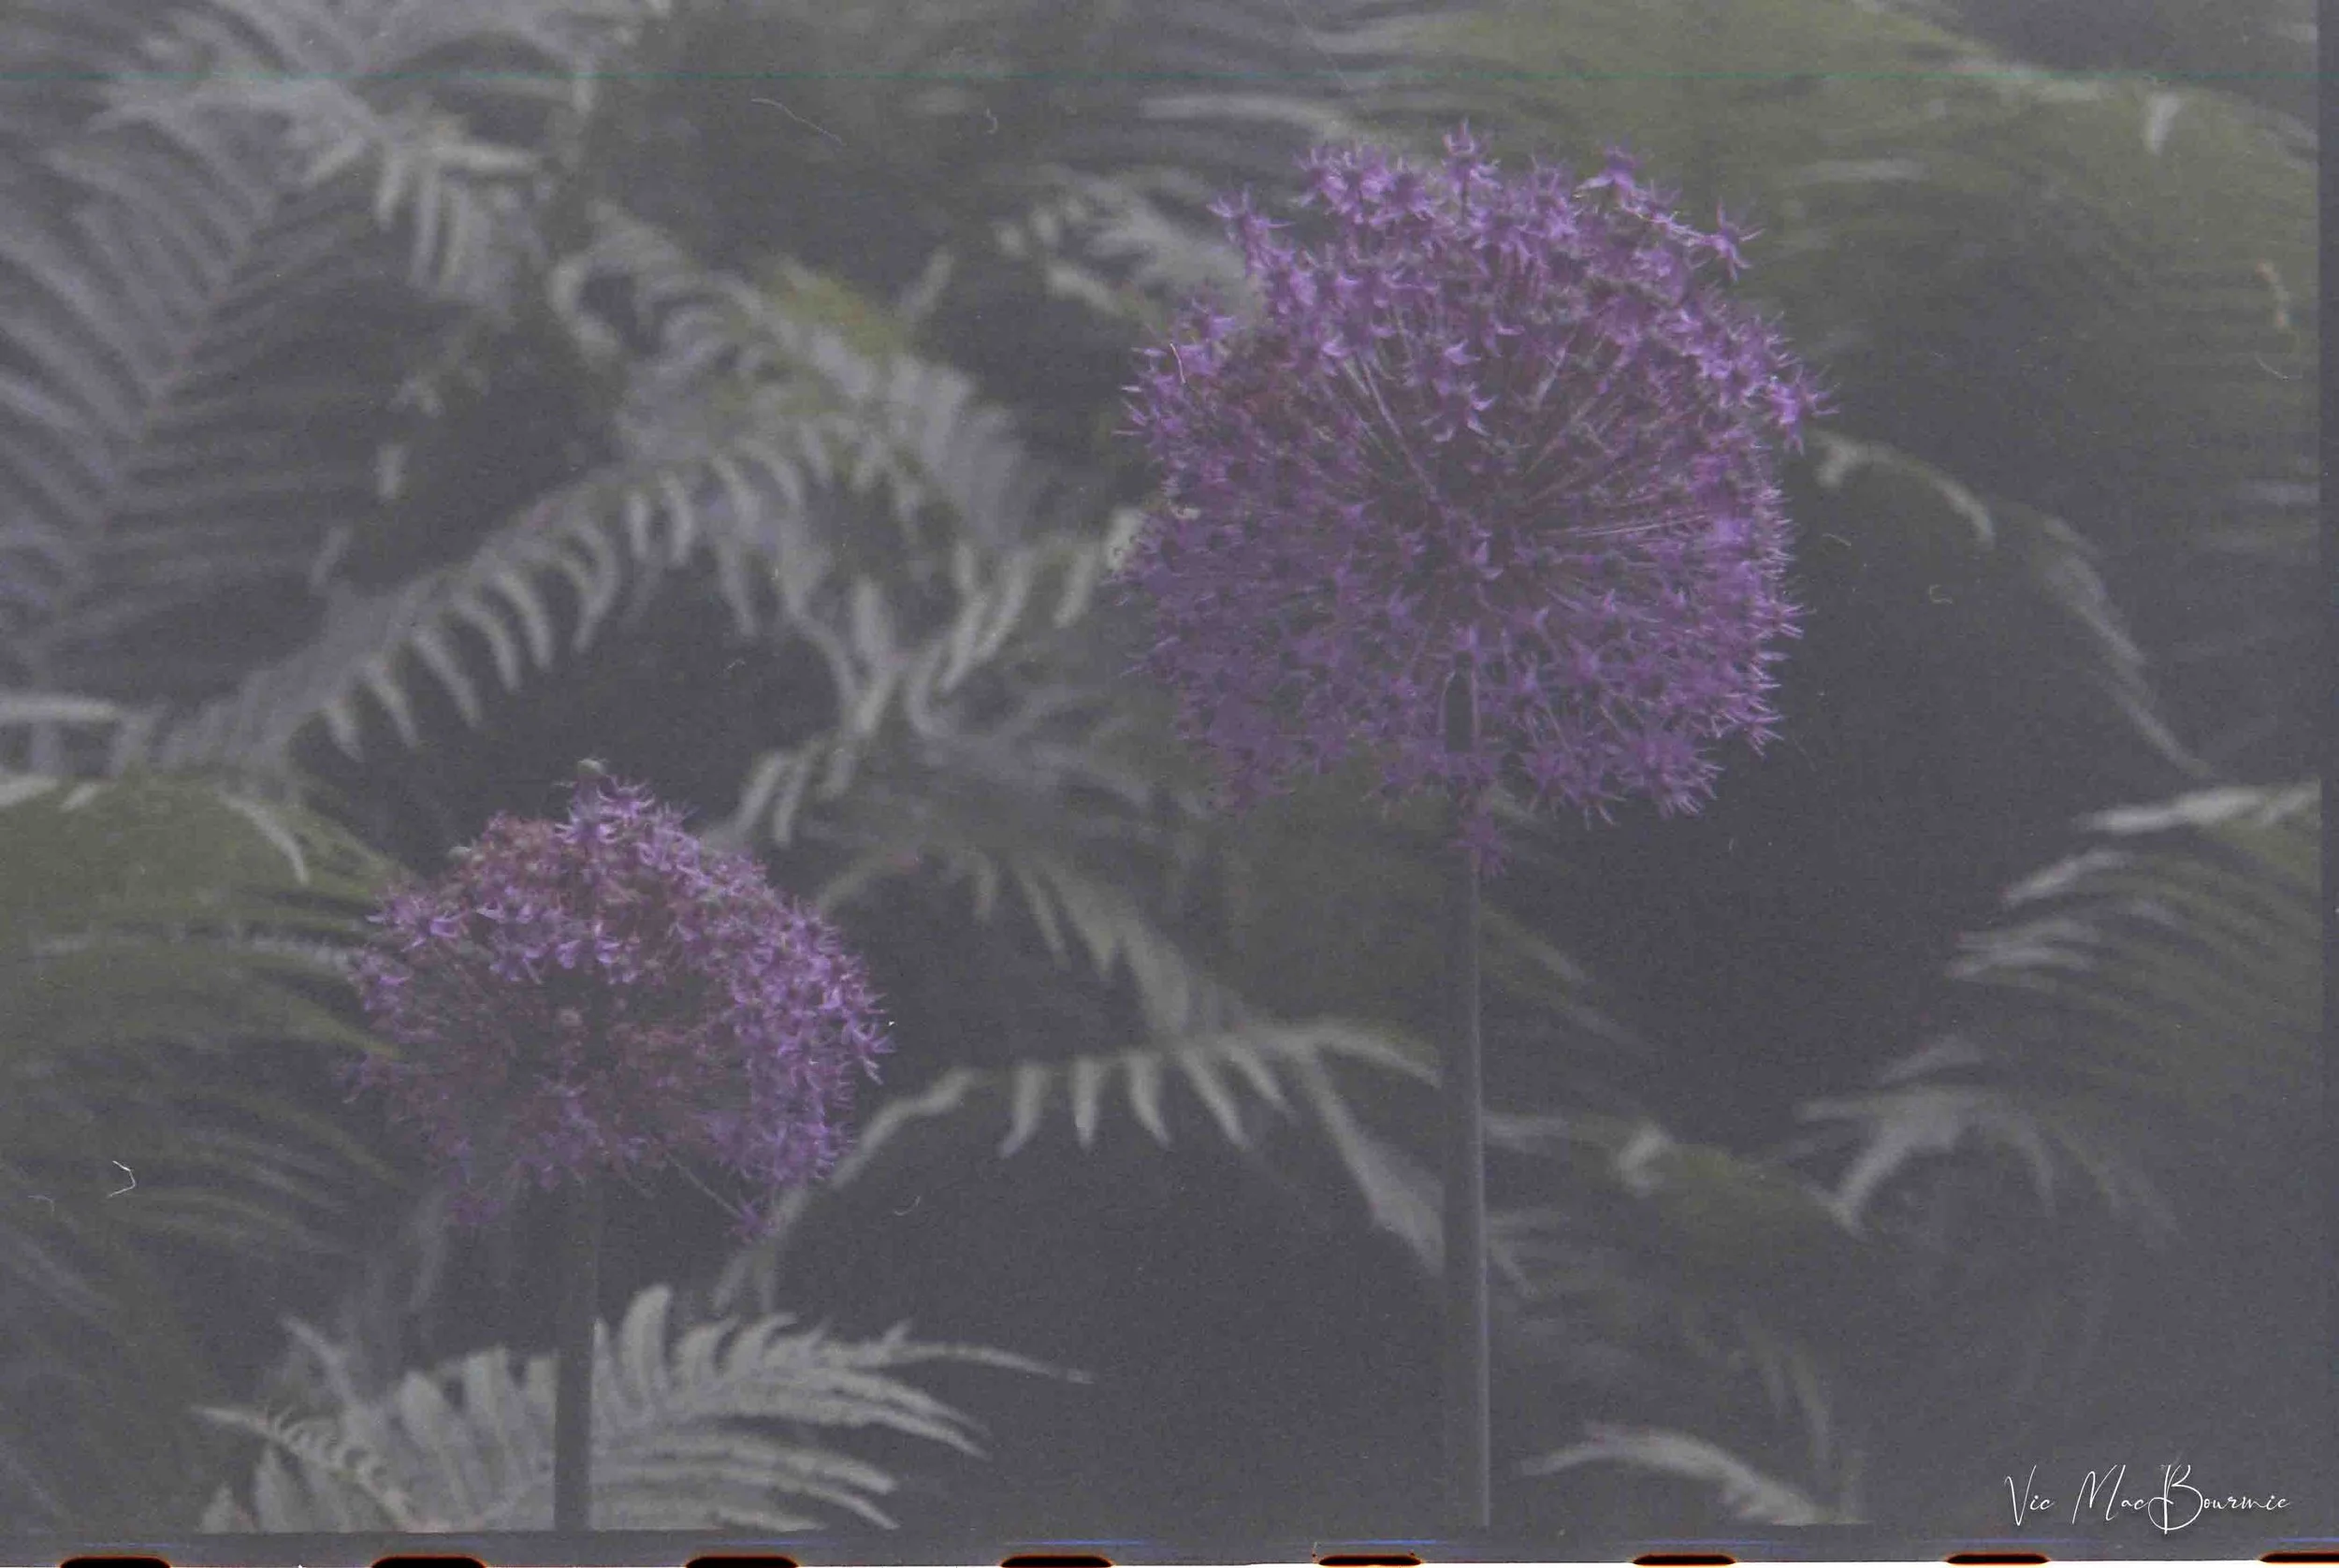
Original image SOOC prior to post processing
Another successfully rescued image thanks to the post processing power of Luminar Neo

Garden image of yellow irises prior to post processing by Luminar Neo.
I probably should have given up with this image shot on expired film, but I was determined to get the most out of it. Here is the result. While it looks pretty bad, it’s a massive improvement from the original image SOOC pictured below.
This image SOOC shows the extreme degradation of the long-expired film. Although the above corrected image is far from stellar, if it were a cherished family picture, it would at least be a major improvement.
